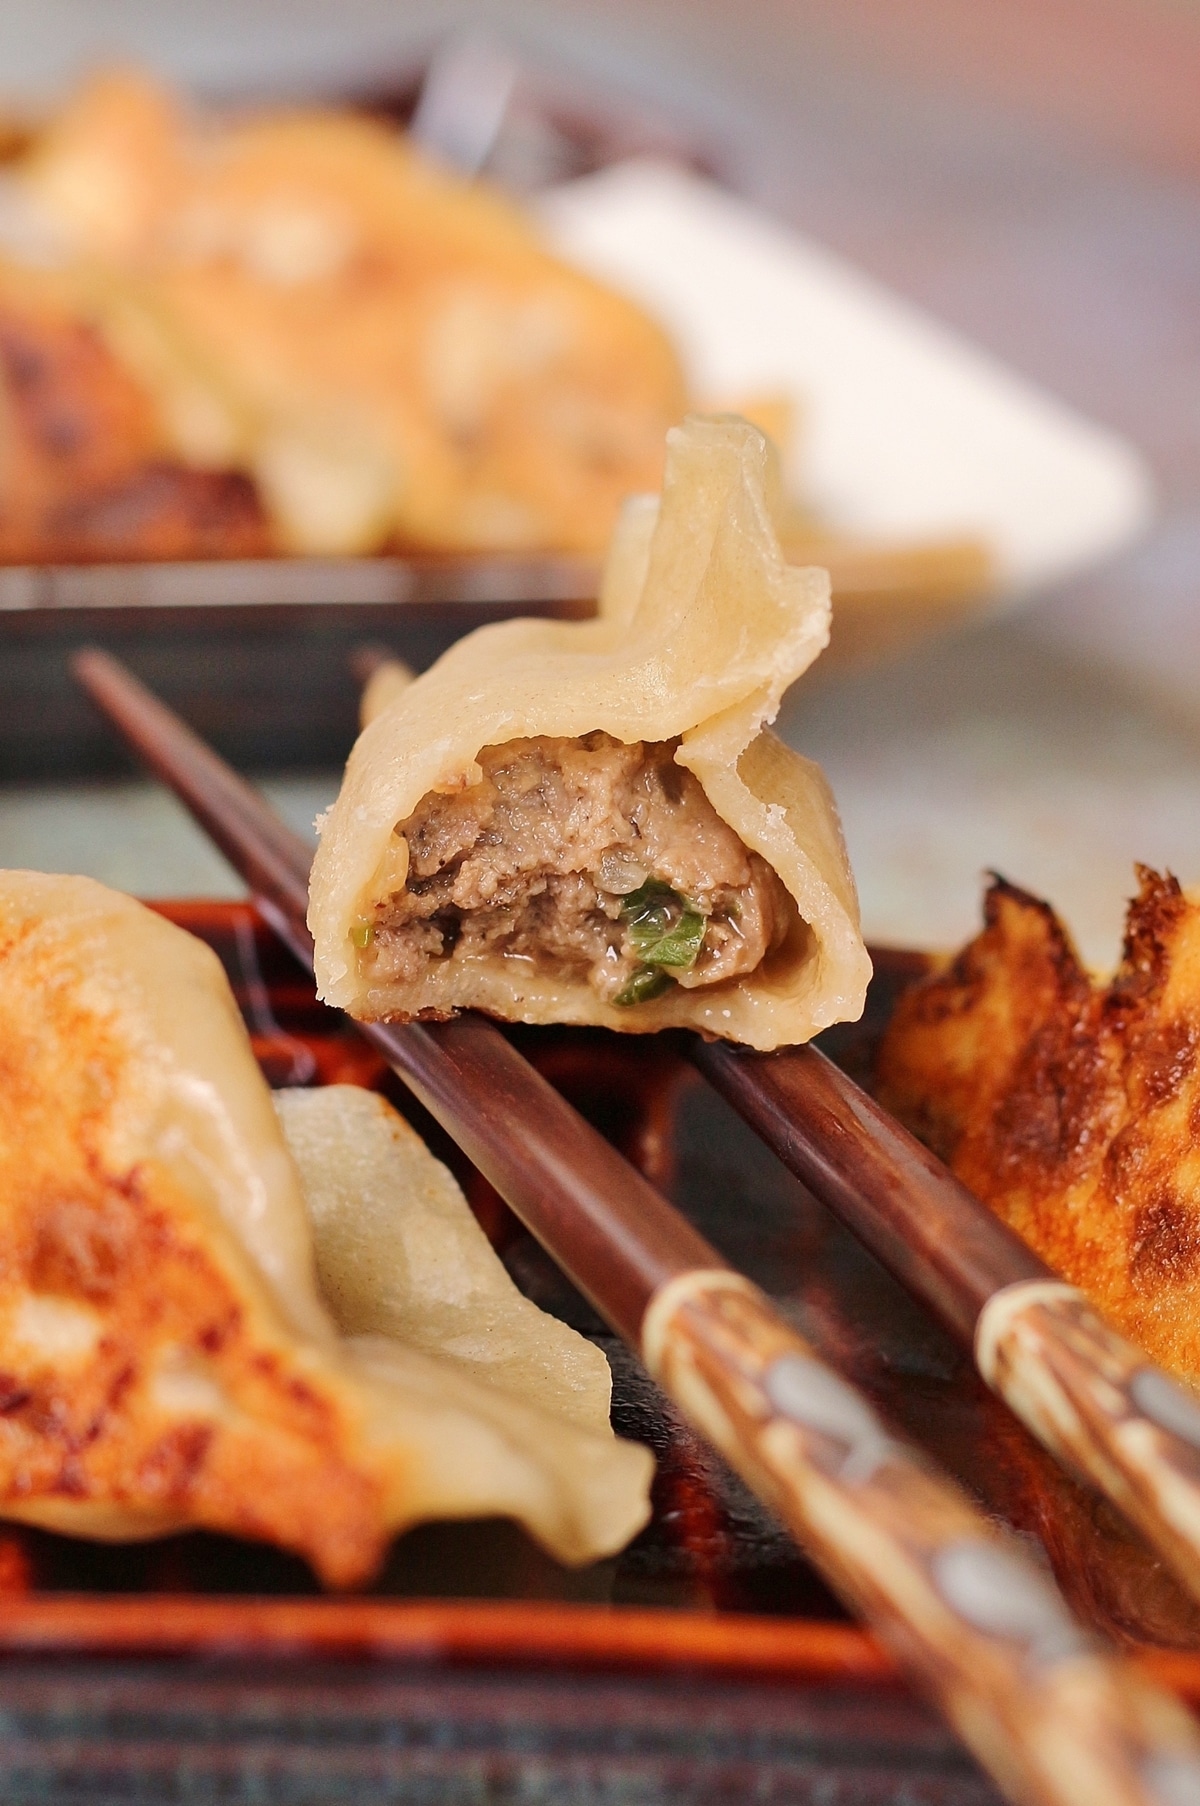
The Spicy Beef Dumplings are ever popular at The Dumpling Galaxy in Flushing, NY, but you can make them yourself with this recipe! Chewy homemade dumpling wrappers encase a spicy and juicy beef filling. Then take these crispy morsels up a notch with an easy and potent raw garlic sauce.
(This recipe was originally published in January 2017, but was updated with new photos and content in 2020).
Dumpling. That's probably my favorite word in the whole entire world. It encompasses so many possibilities of flavors, textures, cultures, and more. It speaks of comfort and temptation. I can close my eyes and picture my happy place. I'm surrounded by them, piles and piles of delicious dumplings in all shapes and sizes.
I'm a little obsessed. This is no surprise. I've shared countless recipes and photos of dumplings over the years on this blog. I've celebrated National Dumpling Day and Chinese New Year even though I'm not Asian, nor did I grow up eating traditional dumplings. My home-grown dumpling comfort came in the form of manti, and it has only expanded from there.
Enter these pan-fried spicy beef dumplings. They're infused with a combination of chili oil and fresh ginger and balanced with a bit of sautéed onion, and scallion among other aromatics. The spicy beef filling is incredible. The smell alone will make you drool, even before cooking it or tasting it.
Although making homemade dumpling dough is a bit more time consuming than using store-bought wrappers, I highly recommend trying it at least once. You’ll notice a big difference in texture and taste that you just can’t replicate with the store-bought variety. I love using store-bought wrappers as a shortcut but often default to homemade because it’s just so much better.
How to make the dipping sauce and filling
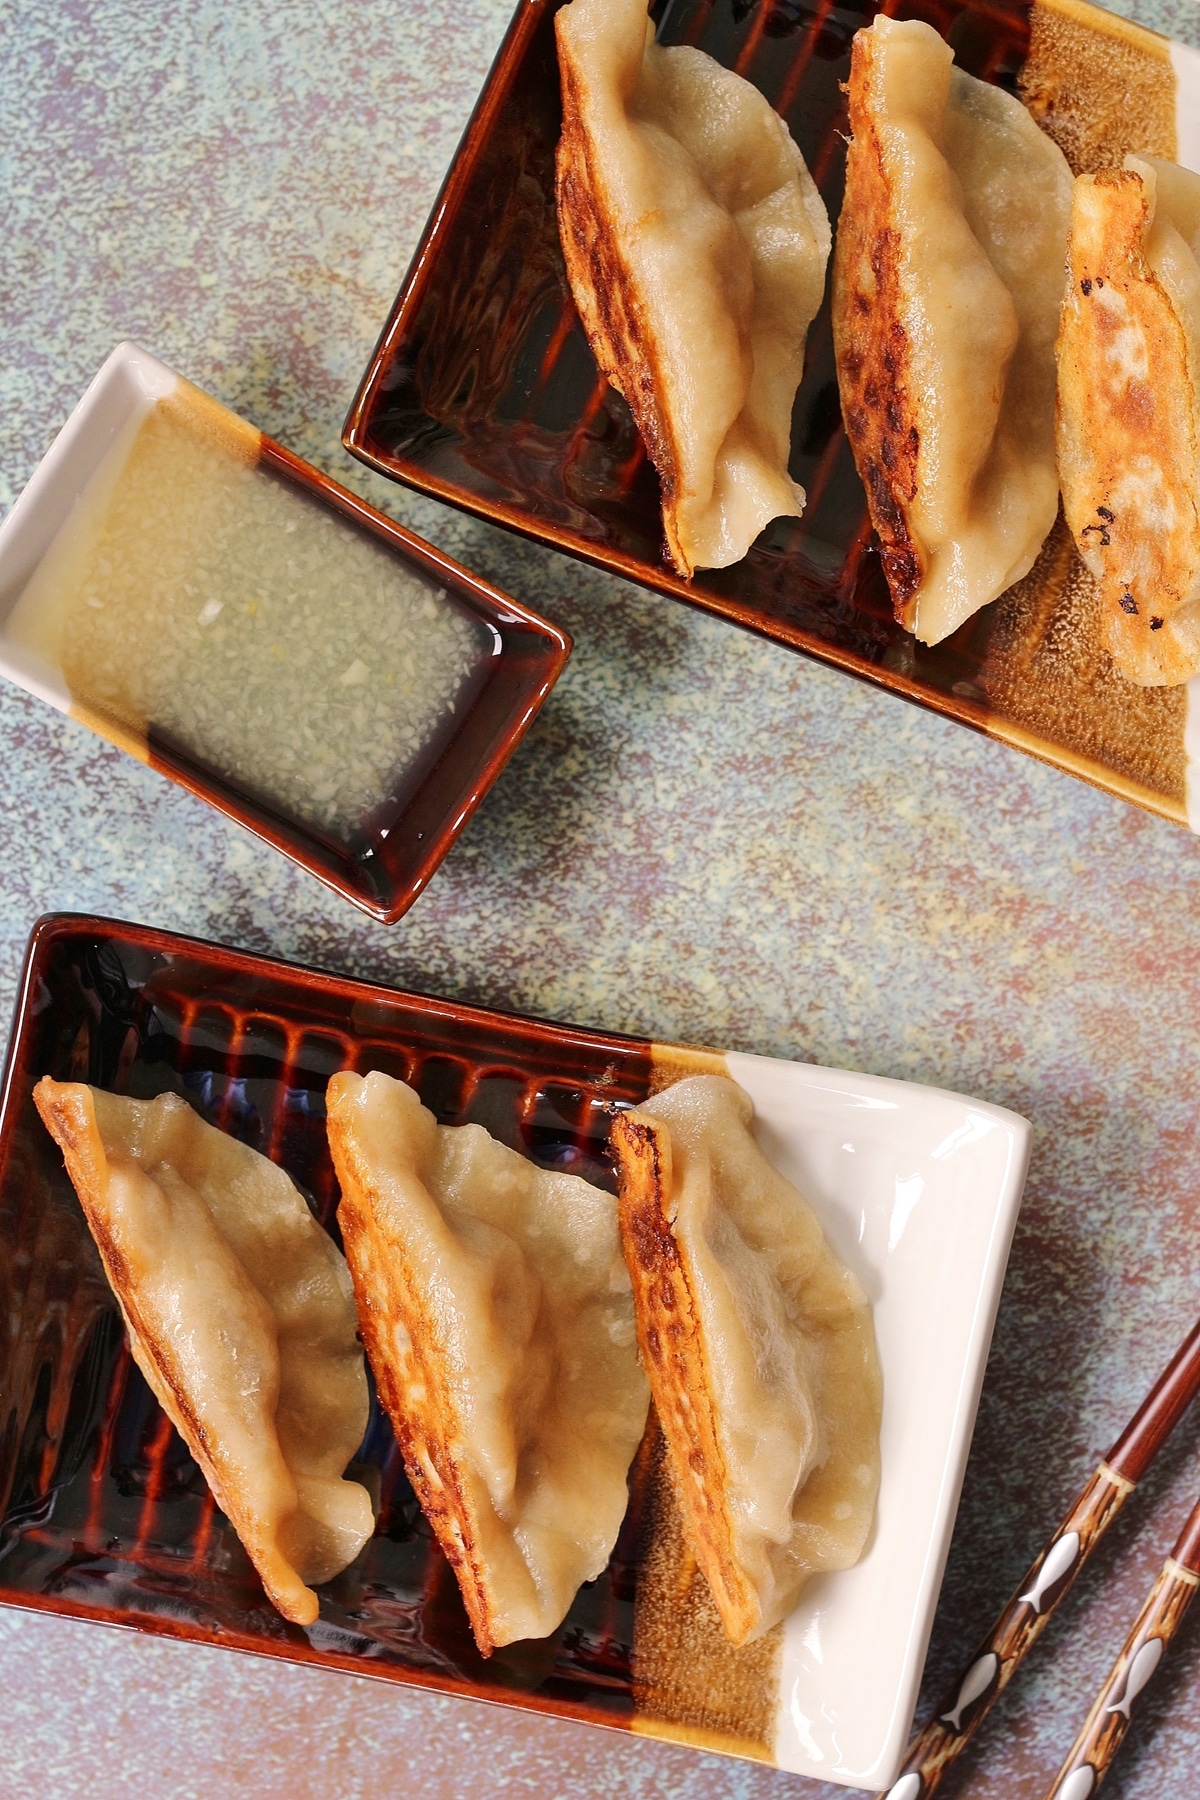
The very first thing you want to do to prepare these spicy beef dumplings is make the raw garlic sauce. It’s a great complement to the dumplings, and adds another element of spiciness and sharpness. If you’re not into garlic, don’t fret. You can swap out this dipping sauce for a standard soy dipping sauce.
Prep the raw garlic sauce 1 to 2 days in advance of when you plan to use it. The flavor needs a little time to mellow. Combine a TON of finely chopped garlic with cold water and a tiny splash of lemon juice. Then stick it in the fridge for a couple days. That’s it.
The epic spicy beef filling is also quite easy to make. Heat up some oil in a skillet, and then add chopped onion. Cook the onion until softened and translucent. Then remove from the heat and stir in some chili oil (homemade chili oil is easy to make yourself!). Set the mixture aside to cool.
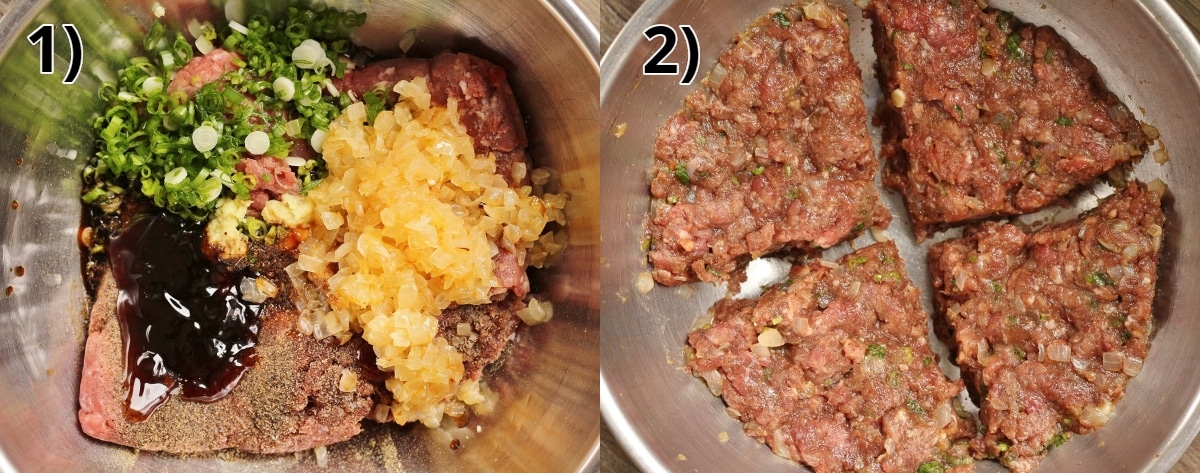
In a mixing bowl add ground beef, the cooked onion mixture, sliced scallions, soy sauce, oyster sauce, grated fresh garlic, ground black pepper, and kosher salt (PHOTO 1). Mix together to combine. You can make the filling up to 1 day ahead of time and refrigerate until needed.
Before using my filling, I like to split it into quarters in my bowl for easy portioning. This way I know that each quadrant will be used for exactly 8 dumplings so I can divide it easily as I assemble them (PHOTO 2).
How to make the dough and assemble the beef dumplings
This homemade dumpling dough only requires two ingredients: flour and hot water. In a large mixing bowl add the flour and create a well in the center. Stir in just-boiled water with a wooden spoon and mix until you have a shaggy mixture.
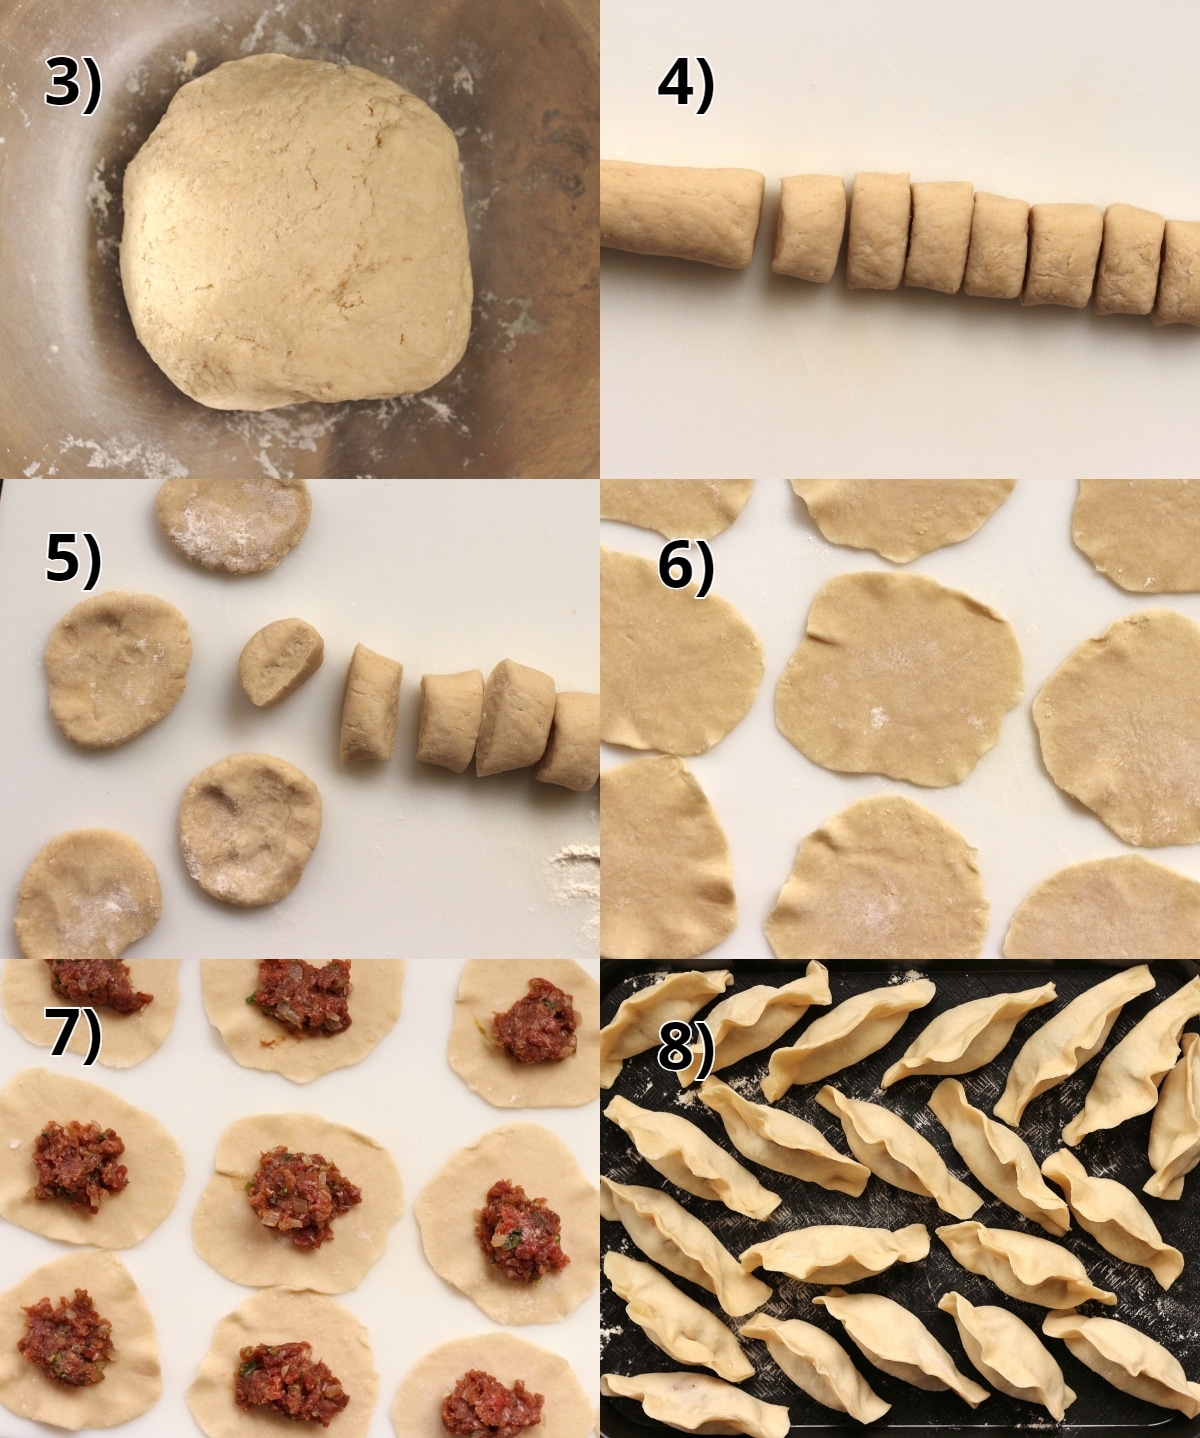
Then go in with your hands (the mixture will be relatively warm) and continue to knead, adding a little more hot water as you go if needed, until you have a smooth ball. The dough should bounce back when pressed with your finger, but leave a light impression of your finger (PHOTO 3).
Transfer the dough to a zip-top bag, squeeze out the air. Let it rest for at least 15 minutes or up to 2 hours at room temperature. The dough will steam up the bag and soften. After resting, use the dough right away, or refrigerate it overnight. Return to room temperature before using.
Remove the dough from the bag, and cut it into quarters. Return three of the quarters back to the bag and set aside. Roll the dough quarter into a 1-inch-thick log and cut into 8 pieces (cut in half, then cut each half in half, and so on to create pieces that are even in size. The tapered end pieces should be cut slightly larger) (PHOTO 4)
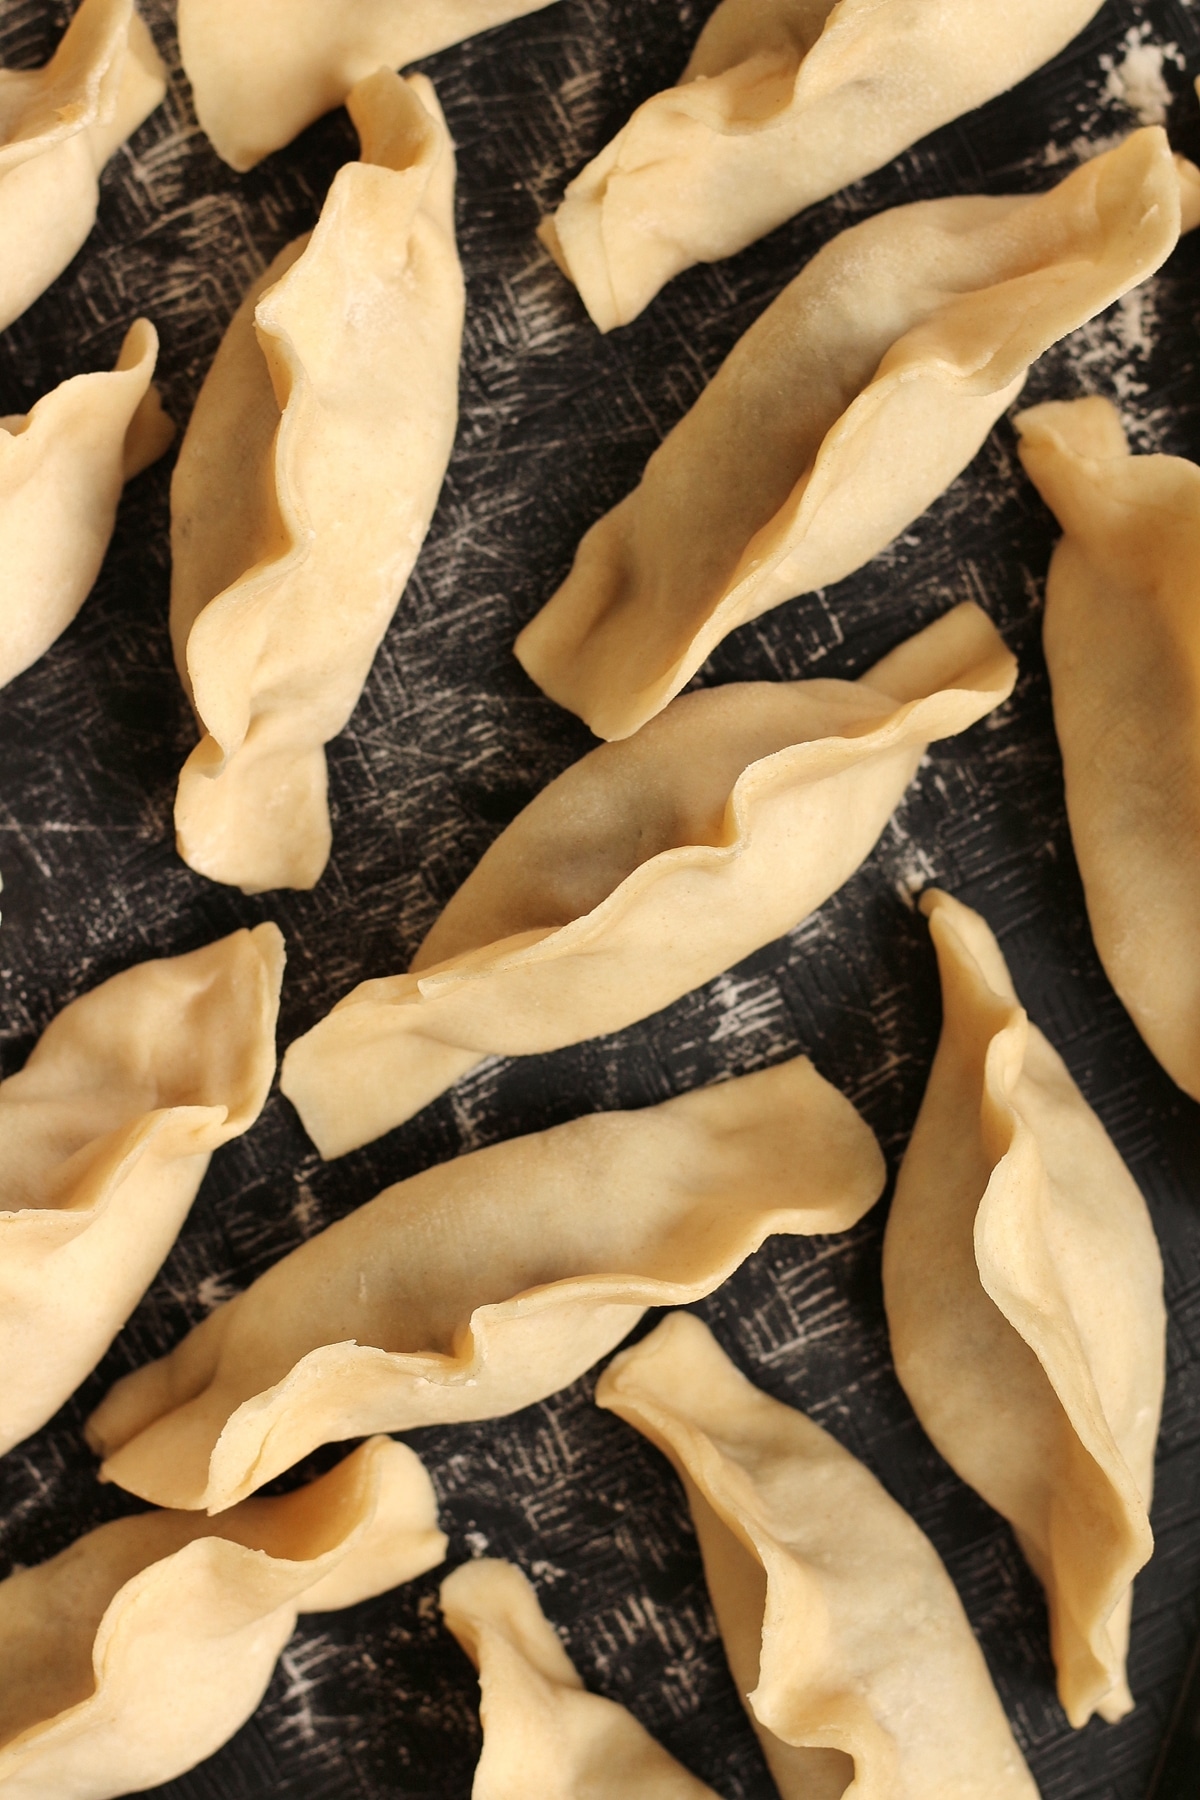
If your pieces are oval, stand them on one of the cut ends and gently squeeze with your fingers to make them round, like a scallop. Take each piece of dough and press each cut end in flour, gently smashing them into flat discs about ¼ inch thick, and set aside (PHOTO 5).
Lightly roll an Asian-style rolling pin across them to flatten them out a bit more. Hold one disk by its edge and firmly but gently roll your pin from the disk's edge to its center. Roll the same edge a few more times, using more pressure at the edge than at the center. Use your other hand to turn the dough disk and reveal a new edge of the disk; roll again. Continue until all edges are rolled out and the wrapper is about 3 to 4 inches in diameter(PHOTO 6).
When a batch of wrappers is formed, fill them before making wrappers out of the other portion of dough, Add about 2 tablespoons of the filling to the center of the wrapper, then lightly pat down the filling to get rid of any air bubbles (PHOTO 7).
Fold the dumpling into a half-moon, pinching it shut with your thumbs and index fingers, then press the center of the dumpling while pulling on the corners to push out any air bubbles and shape it into a curved crescent. Inspect the dumpling for any holes and pinch them shut. Repeat with the rest of the wrappers (PHOTO 8).
How to cook the dumplings
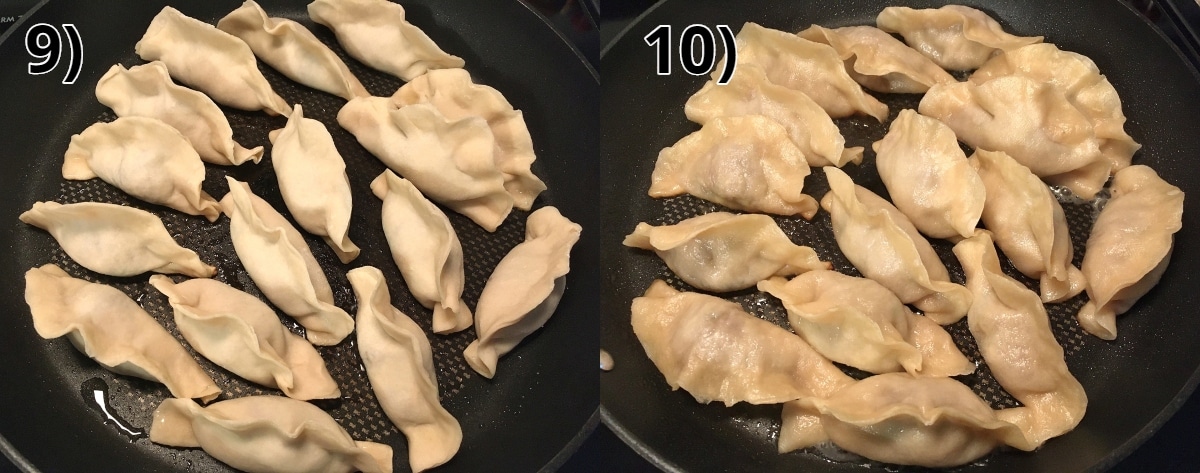
Heat about 1 tablespoon vegetable oil in a large non-stick skillet (you may want to cook these in batches or in two large pans if you are cooking them all at once). Arrange the beef dumplings with the flat sides on the bottom, and cook for 1 to 2 minutes until the bottoms start to brown (PHOTO 9).
Holding the lid close to the skillet to lessen splatter, use a measuring cup to add water to a depth of roughly ¼ inch (about ⅓ cup water but may vary based on the size of your pan). The water will immediately sputter and boil vigorously. Cover with a lid or aluminum foil, lower the heat to medium, and let the water bubble away for 8 to 10 minutes, until it is mostly gone.
When you hear sizzling noises, remove the lid as most of the water is now gone. Let the beef dumplings fry for another 1 or 2 minutes, or until the bottoms are brown and crisp (PHOTO 10).
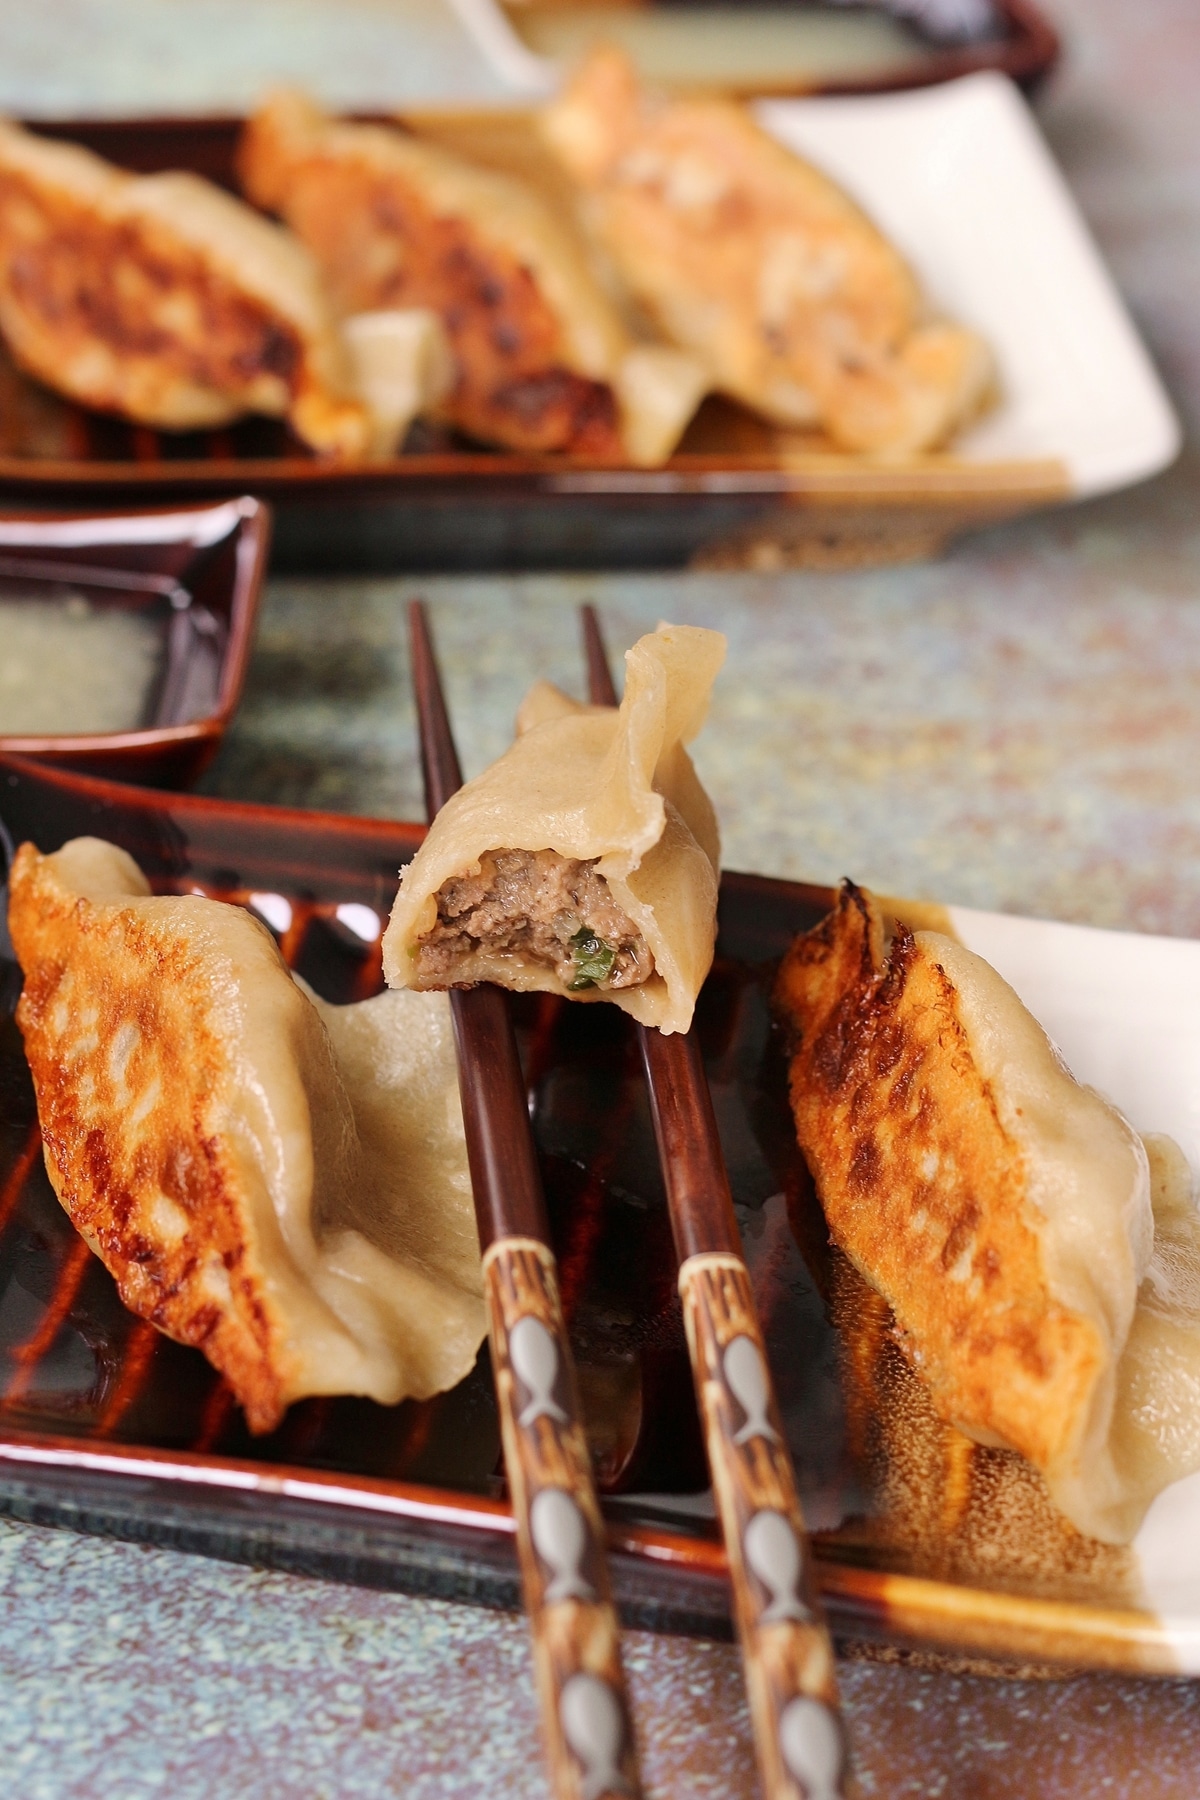
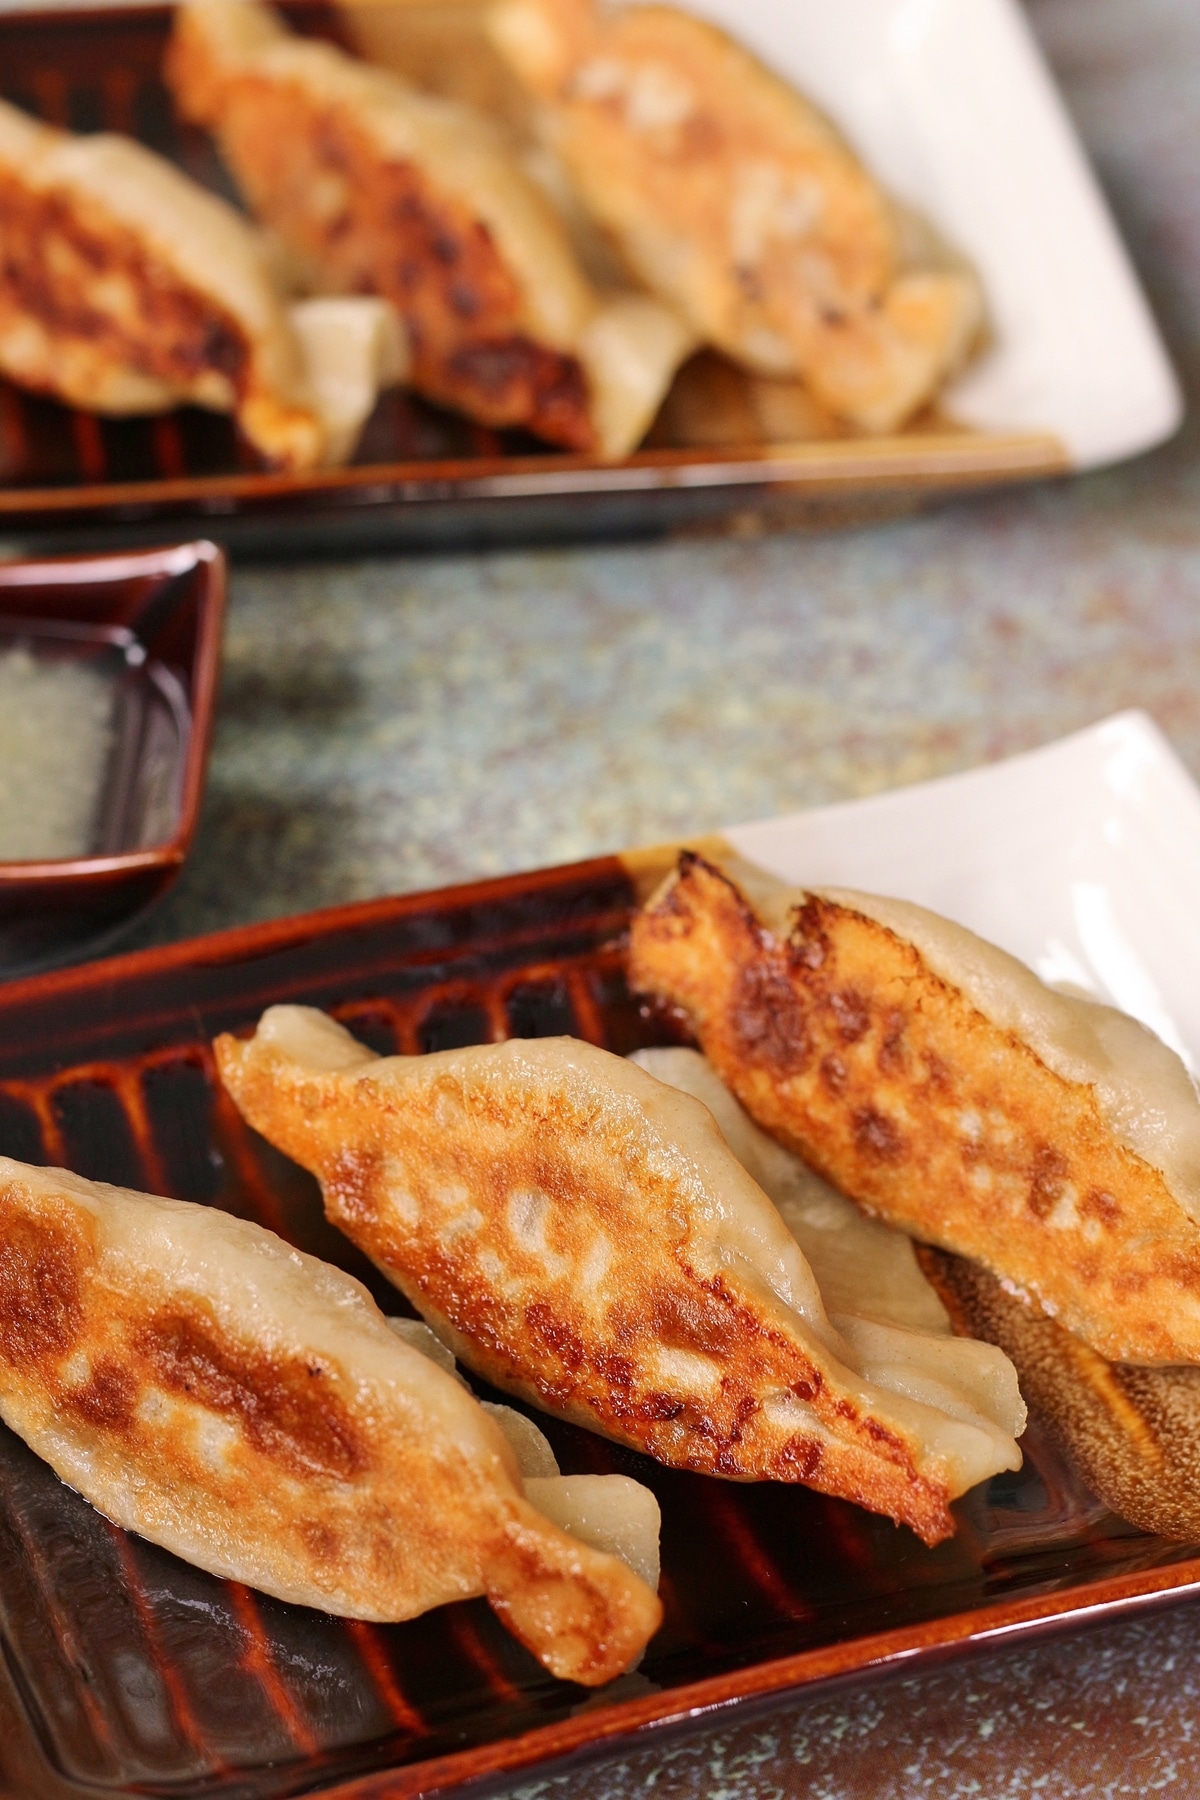
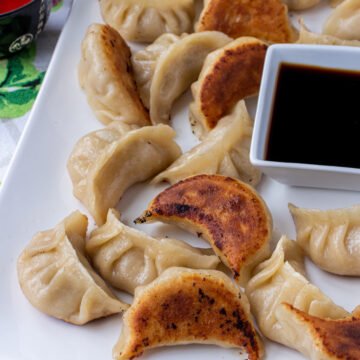
Turn off the heat and use a spatula to transfer dumplings to a serving plate. Display them with their bottoms facing up so they remain crisp. Serve immediately with the Raw Garlic Sauce.
Please scroll to the bottom of the post for the full recipe (in a printable recipe card) including ingredient amounts and detailed instructions.
Expert tips and notes
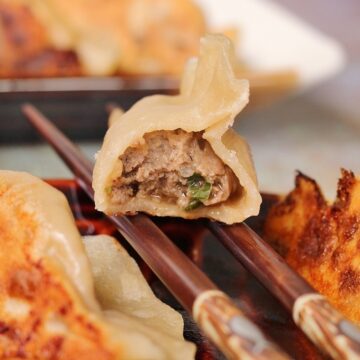
Oh my gosh, are these spicy beef dumplings delicious! The beef filling is juicy and so flavorful. You might be fooled into thinking these are soup dumplings, that’s how juicy they are. I use relatively lean ground beef, and my filling is still extremely juicy, perfectly seasoned, and just excellent.
These are not actually too spicy on their own, but the raw garlic sauce is super pungent and definitely elevates the spice factor. You could also add some of the chili sediment from your chili oil (if it's homemade chili oil) when you make the filling to make it spicier as well.
Making homemade wrappers is not as daunting as you may think, and worth trying at least once. You can use this filling with store-bought wrappers too in a pinch.
When all the spicy beef dumplings are assembled, they can be covered with plastic wrap and refrigerated for several hours and can be cooked straight from the refrigerator.
For longer storage, freeze them on their baking sheet until hard (about 1 hour), transfer to a zip-top freezer bag, pressing out excess air before sealing, and frozen for up to 1 month.
To cook after freezing, partially thaw, using your finger to smooth over any cracks that may have formed during freezing, before cooking.
Other recipes you may like
- Cheeseburger Dumplings
- Khinkali (Georgian Dumplings)
- Manti Dumplings with Yogurt Garlic Sauce
- General Tso’s Chicken Dumplings
- Buffalo Chicken Dumplings
- Ants Climbing a Tree (Sichuanese Spicy Bean Thread Noodles with Ground Pork)
- Sichuanese "Send-the-Rice-Down" Chopped Celery with Ground Beef
- Stir-Fried Cauliflower with Chile-Garlic Sauce
- Browse all Noodle and Dumpling Recipes and Meat Recipes
Tried this recipe? Please leave a star ⭐️⭐️⭐️⭐️⭐️ rating in the recipe card below and/or a review in the comments section further down the page. You can also follow me on social media on Facebook, Instagram, and Pinterest!
Spicy Beef Dumplings
Ingredients
Raw Garlic Sauce:
- 14 to 16 cloves fresh garlic, peeled and finely chopped
- ½ cup cold water
- ¼ teaspoon lemon juice
Filling:
- 1 tablespoon vegetable oil
- 1 medium onion, finely chopped
- 1 teaspoon chili oil, store-bought or homemade
- 1 pound ground beef
- 3 scallions, sliced
- 2 tablespoons soy sauce (I prefer low-sodium)
- 2 tablespoons oyster sauce
- 1 tablespoon freshly grated ginger
- 1 teaspoon freshly ground black pepper
- ½ teaspoon kosher salt
Dough:
- 2 ½ cups (355 grams / 12.5 ounces) all-purpose flour
- About ¾ cup plus 2 tablespoons just-boiled water (boil water, then let it sit for a minute off the heat before measuring)
Cooking:
- Vegetable or peanut oil, as needed
Instructions
Raw Garlic Sauce:
- In a small bowl, whisk together the garlic, cold water, and lemon juice. Transfer to a glass jar or plastic container and refrigerate for 1 to 2 days to let the flavor mellow. Store in the refrigerator for up to a week. Makes about ¾ cup.
Filling:
- In a medium skillet, heat the 1 tablespoon vegetable oil over medium-high heat until it starts to shimmer. Add the onions and cook, stirring occasionally, for 5 to 7 minutes, until they turn soft and translucent. Stir in the chili oil, then remove the pan from the heat and set aside to cool.
- In a medium bowl, use your hands to combine the beef, cooked onions, scallions, soy sauce, oyster sauce, ginger, sesame oil, pepper, and salt, and mix until well blended.
Dough:
- Place a large mixing bowl over a damp paper towel on your work surface, to keep in place while mixing. Add the flour and make a well. Use a wooden spoon to mix the flour while you add the water in a steady stream. Mix together until you have a lot of lumpy bits, then knead the hot dough in the bowl until the dough comes together. Add water by the teaspoon if the dough does not come together.
- Continue kneading the dough on a lightly floured surface (only flour if necessary, and do so sparingly) for a couple more minutes until the dough is smooth and elastic (my mixing bowl was very large so I finished kneading directly in the bowl and it was just fine). The dough should bounce back when pressed with your finger, but leave a light impression of your finger. Place dough in a zip-top bag, seal tightly, pressing out excess air, and set aside at room temperature for 15 minutes up to 2 hours. The dough will steam up the bag and soften. After resting, the dough can be used right away, or refrigerated overnight and returned to room temperature before using.
Assembly:
- Remove the dough from the bag, turning the bag inside out if the dough is sticky. Put the dough on a lightly floured surface and cut it into quarters. Put three-quarters back in the bag, squeezing out the air and sealing it closed to prevent drying.
- Roll the dough into a 1-inch-thick log and cut into 8 pieces (cut in half, then cut each half in half, and so on to create pieces that are even in size. The tapered end pieces should be cut slightly larger). If your pieces are oval, stand them on one of the cut ends and gently squeeze with your fingers to make them round, like a scallop. Take each piece of dough and press each cut end in flour, lightly pressing the dough to about ¼ inch thick and set aside.
- Lightly roll an Asian-style rolling pin across them to flatten them out a bit more. Hold one disk by its edge and firmly but gently roll your pin from the disk's edge to its center. Roll the same edge a few more times, using more pressure at the edge than at the center. Use your other hand to turn the dough disk and reveal a new edge of the disk; roll again. Continue until all edges are rolled out and the wrapper is about 3 to 4 inches in diameter. When a batch of wrappers is formed, fill them before making wrappers out of the other portion of dough.
- Line a baking sheet with parchment paper (if planning to refrigerate dumplings for several hours, also dust with flour to prevent sticking). Add about 2 tablespoons of the filling to the center of the wrapper, then lightly pat down the filling to get rid of any air bubbles.
- Fold the dumpling into a half-moon, pinching it shut with your thumbs and index fingers, then press the center of the dumpling while pulling on the corners to push out any air bubbles and shape it into a curved crescent. Inspect the dumpling for any holes and pinch them shut. Repeat with the rest of the wrappers.
Cooking:
- When you’re ready to cook your dumplings, use a medium or large nonstick skillet with a lid (or cook two batches at the same time using two pans). Heat the skillet over medium-high heat and add about 1 tablespoon neutral oil (like vegetable oil).
- Place the dumplings 1 at a time, sealed edges up, in a winding circle pattern. The dumplings can touch. Medium skillets will generally fit 12 to 14 dumplings, large skillets will fit 16 to 18 dumplings. Fry the dumplings for 1 to 2 minutes until they are golden or light brown on the bottom.
- Holding the lid close to the skillet to lessen splatter, use a measuring cup to add water to a depth of roughly ¼ inch (about ⅓ cup water). The water will immediately sputter and boil vigorously. Cover with a lid or aluminum foil, lower the heat to medium, and let the water bubble away for 8 to 10 minutes, until it is mostly gone. When you hear sizzling noises, remove the lid as most of the water is now gone. Let the dumplings fry for another 1 or 2 minutes, or until the bottoms are brown and crisp.
- Turn off the heat and use a spatula to transfer dumplings to a serving plate. Display them with their bottoms facing up so they remain crisp. Serve immediately with the Raw Garlic Sauce.
Notes
- You can make homemade chili oil for this recipe, or use store-bought chili oil.
- Make ahead instructions: When all the dumplings are assembled, they can be covered with plastic wrap and refrigerated for several hours and can be cooked straight from the refrigerator. For longer storage, freeze them on their baking sheet until hard (about 1 hour), transfer to a zip-top freezer bag, pressing out excess air before sealing, and frozen for up to 1 month. To cook after freezing, partially thaw, using your finger to smooth over any cracks that may have formed during freezing, before cooking.
- This recipe uses kosher salt (aka cooking salt, kitchen salt, coarse salt outside of the US). If you are using table salt, definitely scale down the salt as that is a saltier type of salt! The type of salt will make a big difference in how salty your food tastes, so keep that in mind.
- Adapted from The Dumpling Galaxy Cookbook; dough adapted from Asian Dumplings
Nutrition
*All nutritional information is based on third-party calculations and should be considered estimates. Actual nutritional content will vary with brands used, measuring methods, portion sizes and more.*


Polly says
Yum!
Lori says
I made ours into wontons. They are tasty! I don’t think I’d ever had a beef dumpling filling before.
Mary Kabakian says
This is so flavorful and super juicy! We love these dumplings so much.