These Manti Dumplings are a creative variation on the traditional Armenian dish manti. While manti are actually Armenian dumplings, these are more Asian-style dumplings. They encompass all the flavors we know and love from the original recipe.
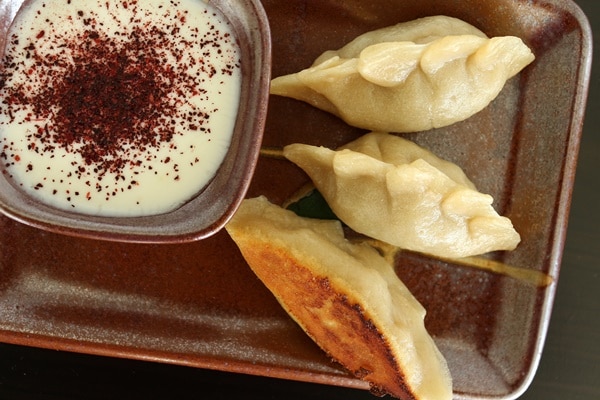
It's no question that my favorite food in the entire world is my beloved grandmother's manti. They are truly a labor of love to make. The whole family usually gets involved assembly line style to make for efficient work.
Our family recipe for manti is perhaps my favorite recipe on the blog. Not only is it my favorite dish, but it's the recipe that has garnered the most positive feedback from fellow Armenians.
Both through blog comments and emails, readers have let me know how this recipe has reconnected them back with their own memories of making and eating manti. Yet others who have tried the recipe and found it tasted exactly of their own youthful memories.
I have also brought our manti into the kitchen at Union Square Cafe in New York City. This was was an absolute privilege.
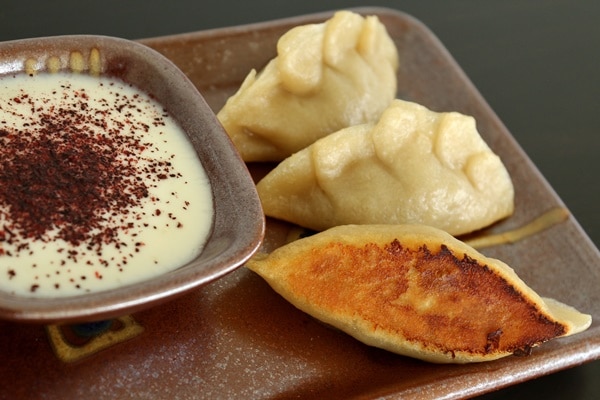
But like I said, it's very time consuming to make. I started brainstorming ideas of ways to bring the flavors of manti onto my plate with a bit less of the effort. No, I'm not going to use wonton skins like some Armenians do instead of rolling out their own dough. I came up with a couple of ideas, one of which I will share today.
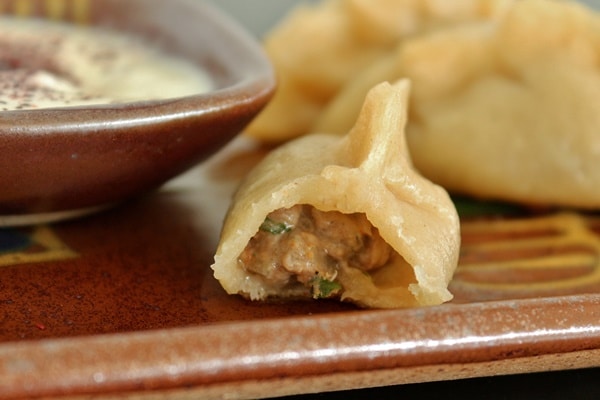
Enter my new and original Manti Dumplings, a redundant title as manti in their original form are decidedly dumplings. Yet I'm taking the flavor profile and meshing it with a traditional Asian-style dumpling as its doughy vehicle for consumption.
The filling is nearly identical to that of my grandmother's manti. It has an addition of chicken broth to loosen up the ground beef and make for a juicier result. Chicken broth plays an important role in our manti.
Typically, manti is baked in the oven and then drowned in chicken broth before it finishes baking. It then absorbs some of the broth, yielding a crunchy/chewy/soft texture, while also yielding a bit of a brothy base for serving.
This is also why I elected to pan-fry these dumplings with chicken broth instead of the water that is normally used when cooking Asian dumplings with this method.
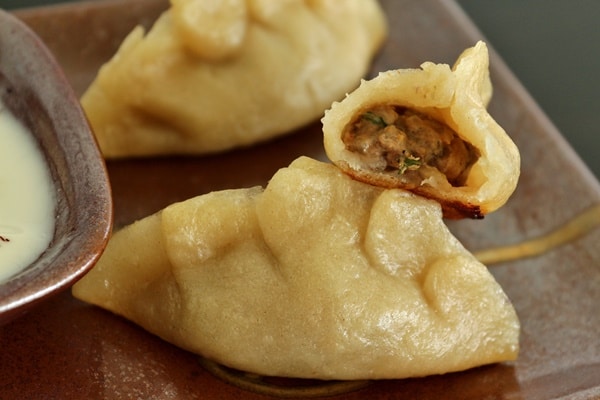
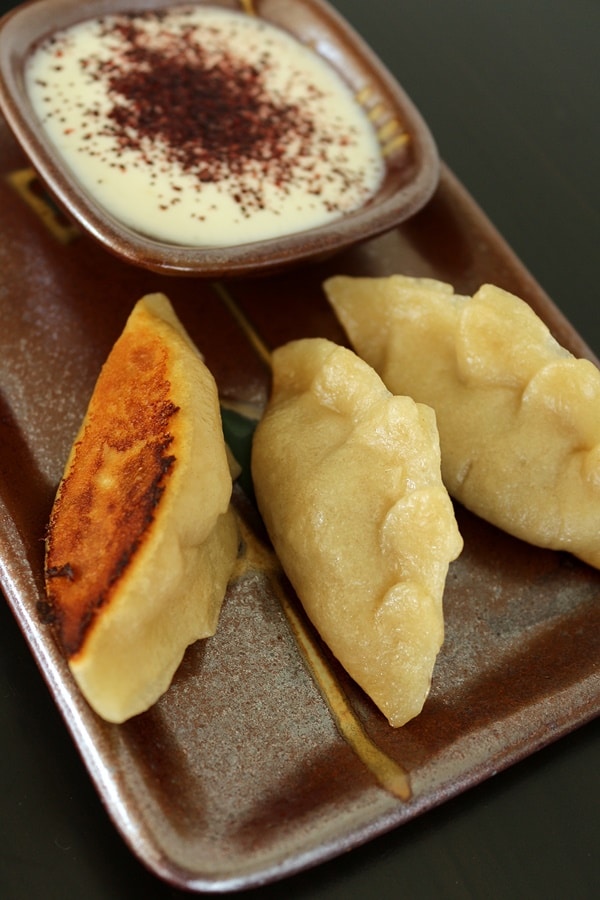
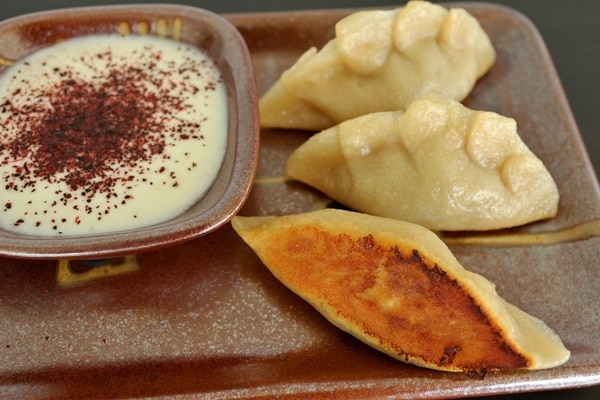
The dipping sauce is obviously the same sauce we use to top our manti, a mixture of yogurt and garlic. A final sprinkling of sumac atop the dipping sauce, and we have a true flavor replica of our original recipe. The only difference is the dumplings are larger, and the texture is a bit different, more chewy than our muse.
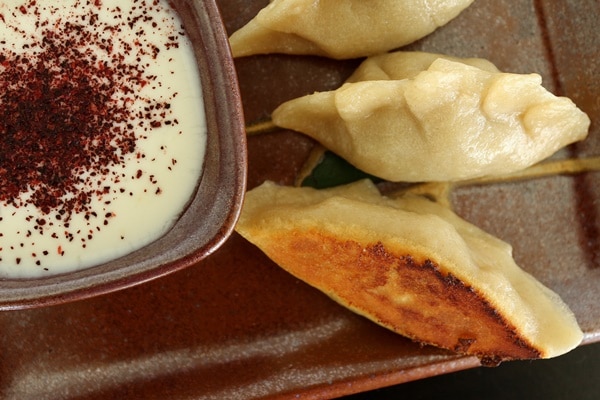
If you love manti, if you love dumplings, or if you simply love delicious food, please try this recipe! I'm so excited to share it with all of you. It's one of my favorite inventions, a real twist on the original while still capturing everything I have always loved about this family favorite.
Even though it's still time consuming to roll out your own dumpling wrappers, it really makes all the difference. It's still faster than making traditional manti by hand. Trust me.
Other recipes you may like
- THE BEST Homemade Manti
- Manti Soup
- Dolma (Stuffed Grape Leaves with Meat and Rice)
- Armenian Meatball Soup
- Ishli Kofte (Stuffed Kofte)
- Easy Cheese Borek
- Armenian Gata
Tried this recipe? Please leave a star ⭐️⭐️⭐️⭐️⭐️ rating in the recipe card below and/or a review in the comments section further down the page. You can also follow me on social media on Facebook, Instagram, and Pinterest!

Manti Dumplings
Ingredients
Filling:
- 8 ounces ground beef
- ¼ cup chicken broth
- 2 ½ tablespoons minced onion or shallot
- 2 tablespoons chopped parsley
- 1 teaspoon kosher salt
- ¾ teaspoon paprika
- ¼ teaspoon ground black pepper
Dough:
- 10 ounces (285 grams / 2 cups) all-purpose flour
- About ¾ cup just-boiled water (boil water, then let it sit for a minute off the heat before measuring)
Yogurt-Garlic Dipping Sauce:
- 1 cup plain yogurt
- 1 large clove garlic minced or crushed
- 1 tablespoon plus 1 teaspoon water or as needed for proper consistency
- Big pinch kosher salt
- Ground sumac
Cooking Dumplings:
- Canola or peanut oil for pan-frying
- About 1 cup chicken broth
Instructions
- To make the filling, mix the beef, chicken broth, onion, parsley, and seasonings in a medium bowl until well-combined. The filling can be prepared 1 day ahead and refrigerated.
- To make the dough, place a large mixing bowl over a damp paper towel on your work surface, to keep in place while mixing. Add the flour and make a well. Use a wooden spoon to mix the flour while you add the water in a steady stream. Mix together until you have a lot of lumpy bits, then knead the hot dough in the bowl until the dough comes together. Add water by the teaspoon if the dough does not come together.
- Continue kneading the dough on a lightly floured surface (only flour if necessary, and do so sparingly) for a couple more minutes until the dough is smooth and elastic (my mixing bowl was very large so I finished kneading directly in the bowl and it was just fine). The dough should bounce back when pressed with your finger, but leave a light impression of your finger. Place dough in a zip-top bag, seal tightly, pressing out excess air, and set aside at room temperature for 15 minutes up to 2 hours. The dough will steam up the bag and soften. After resting, the dough can be used right away, or refrigerated overnight and returned to room temperature before using.
- To make the dipping sauce, combine all the ingredients except for the sumac in a small mixing bowl. Adjust the amount of water as needed to achieve desired texture (some yogurts are thicker or thinner than others). The sauce can be prepared several hours in advance and refrigerated.
- To assemble the dumplings, remove the dough from the bag, turning the bag inside out if the dough is sticky. Put the dough on a lightly floured surface and cut it in quarters. Put three-quarters back in the bag, squeezing out the air and sealing it closed to prevent drying.
- Roll the dough into a 1-inch-thick log and cut into 8 pieces (cut in half, then cut each half in half, and so on to create pieces that are even in size. The tapered end pieces should be cut slightly larger). If your pieces are oval, stand them on one of the cut ends and gently squeeze with your fingers to make them round, like a scallop. Take each piece of dough and press each cut end in flour, lightly pressing the dough to about ¼ inch thick and set aside.
- Next, flatten each dough disk into a thin circle, about ⅛ inch thick, either with a tortilla press (lined with plastic wrap), or with a heavy flat-bottomed object like a frying pan (also lined with plastic). Alternatively, use a dowel (which is a good lightweight rolling pin alternative for fast and flexible dumpling making) to lightly roll out each disc into an ⅛ inch thick circle.
- To finish the wrappers, place wrappers one at a time on your work surface, and flour only if sticky. Imagine a quarter-size circle in the center of the dough. This is what the Chinese call the “belly” of the wrapper. You want to create a wrapper that is larger than its current size, but still retaining a thick “belly” in the center. This ensures an even distribution of dough when the dumpling is sealed. Use the rolling pin to apply pressure to the outer ½-to-¾-inch border of the wrapper. Roll the rolling pin in short downward strokes with one hand while the other hand turns the wrapper in the opposite direction. Aim for wrappers that are about 3 ¼ inches in diameter. When a batch of wrappers is formed, fill them before making wrappers out of the other portions of dough.
- Line a baking sheet with parchment paper (if planning to refrigerate dumplings for several hours, also dust with flour to prevent sticking). Hold a wrapper in a slightly cupped hand and scoop about 1 tablespoon of filling slightly off-center toward the upper half of the wrapper, pressing and shaping it into a flat mound and keeping a ½-to-¾-inch border on all sides.
- To make “pea pod” shapes, fold the edge of the wrapper closest to you to meet the top edge and pinch together to seal well. Place on your work surface and press gently to steady the dumpling and make it sit flat. Fold the sealed edges of the dumpling to make a series of pleats from one end to the other.
- Place finished dumplings on the prepared baking sheet. Repeat with the remaining wrappers and dough, spacing out dumplings about ½ inch apart. Keep the finished dumplings covered with a dry kitchen towel.
- When all the dumplings are assembled, they can be covered with plastic wrap and refrigerated for several hours and can be cooked straight from the refrigerator.
- To pan-fry the dumplings, use a medium or large nonstick skillet (or cook two batches at the same time using two pans). Heat the skillet over medium-high heat and add 1 ½ tablespoons oil for a medium skillet and 2 tablespoons for a large one. Place the dumplings 1 at a time, sealed edges up, in a winding circle pattern. The dumplings can touch. Medium skillets will generally fit 12 to 14 dumplings, large skillets will fit 16 to 18 dumplings. Fry the dumplings for 1 to 2 minutes until they are golden or light brown on the bottom.
- Holding the lid close to the skillet to lessen splatter, use a measuring cup to add chicken broth to a depth of roughly ¼ inch (this will vary depending on the size of the pan, but I used about ½ cup water to cook half the dumplings in a large skillet). The broth will immediately sputter and boil vigorously, Cover with a lid or aluminum foil, lower the heat to medium, and let it bubble away for 8 to 10 minutes, until it is mostly gone. When you hear sizzling noises, remove the lid as most of the broth is now gone. Let the dumplings fry for another 1 or 2 minutes, or until the bottoms are brown and crisp. Turn off the heat and wait until the sizzling stops before using a spatula to transfer dumplings to a serving plate. Display them with their bottoms facing up so they remain crisp.
- Serve dumplings with the yogurt-garlic dipping sauce in individual dipping sauce dishes, and sprinkle the top of each serving of sauce with sumac before dipping.
Notes
- For longer storage, freeze them on their baking sheet until hard (about 1 hour), transfer to a zip-top freezer bag, pressing out excess air before sealing, and frozen for up to 1 month. To cook after freezing, partially thaw, using your finger to smooth over any cracks that may have formed during freezing, before cooking.
- This recipe uses kosher salt (aka cooking salt, kitchen salt, coarse salt outside of the US). If you are using table salt, definitely scale down the salt as that is a saltier type of salt! The type of salt will make a big difference in how salty your food tastes, so keep that in mind.
Nutrition
*All nutritional information is based on third-party calculations and should be considered estimates. Actual nutritional content will vary with brands used, measuring methods, portion sizes and more.*

Comments
No Comments