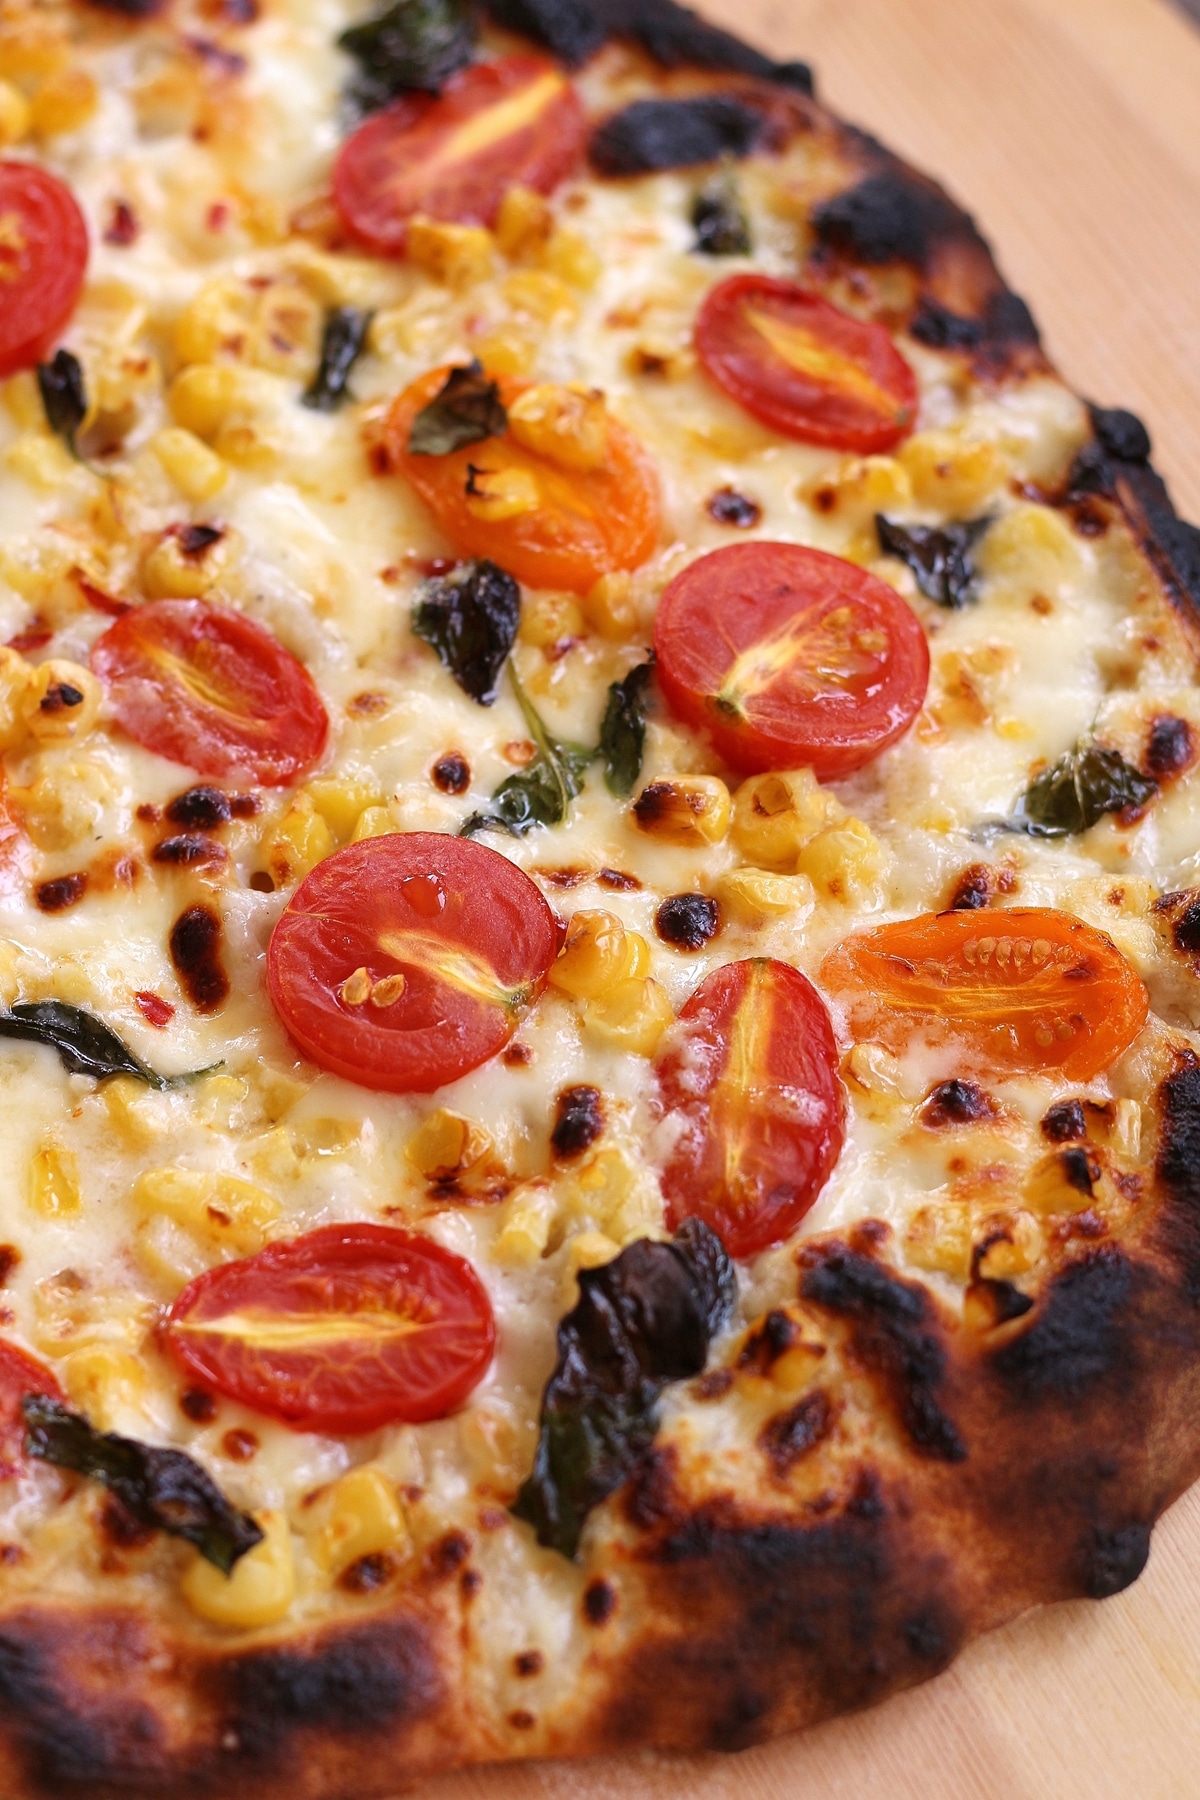
This Corn and Tomato Pizza is the perfect pie for late summer and early fall when corn and tomatoes are plentiful. It features a fool-proof no knead pizza dough, creamy béchamel sauce, and fresh mozzarella. It will quickly become your favorite pizza of the season!
(This recipe was originally published in September 2012, but was updated with new photos and content in 2020).
Have you ever wondered what summer tastes like? I mean, what summer REALLY tastes like? I'm sure you think you've tasted it. But I'm telling you, this pizza (or pie, if you will) is what summer tastes like. It is everything about the season that you look forward to all year. And it's what you'll miss the most as the weather turns brisk.
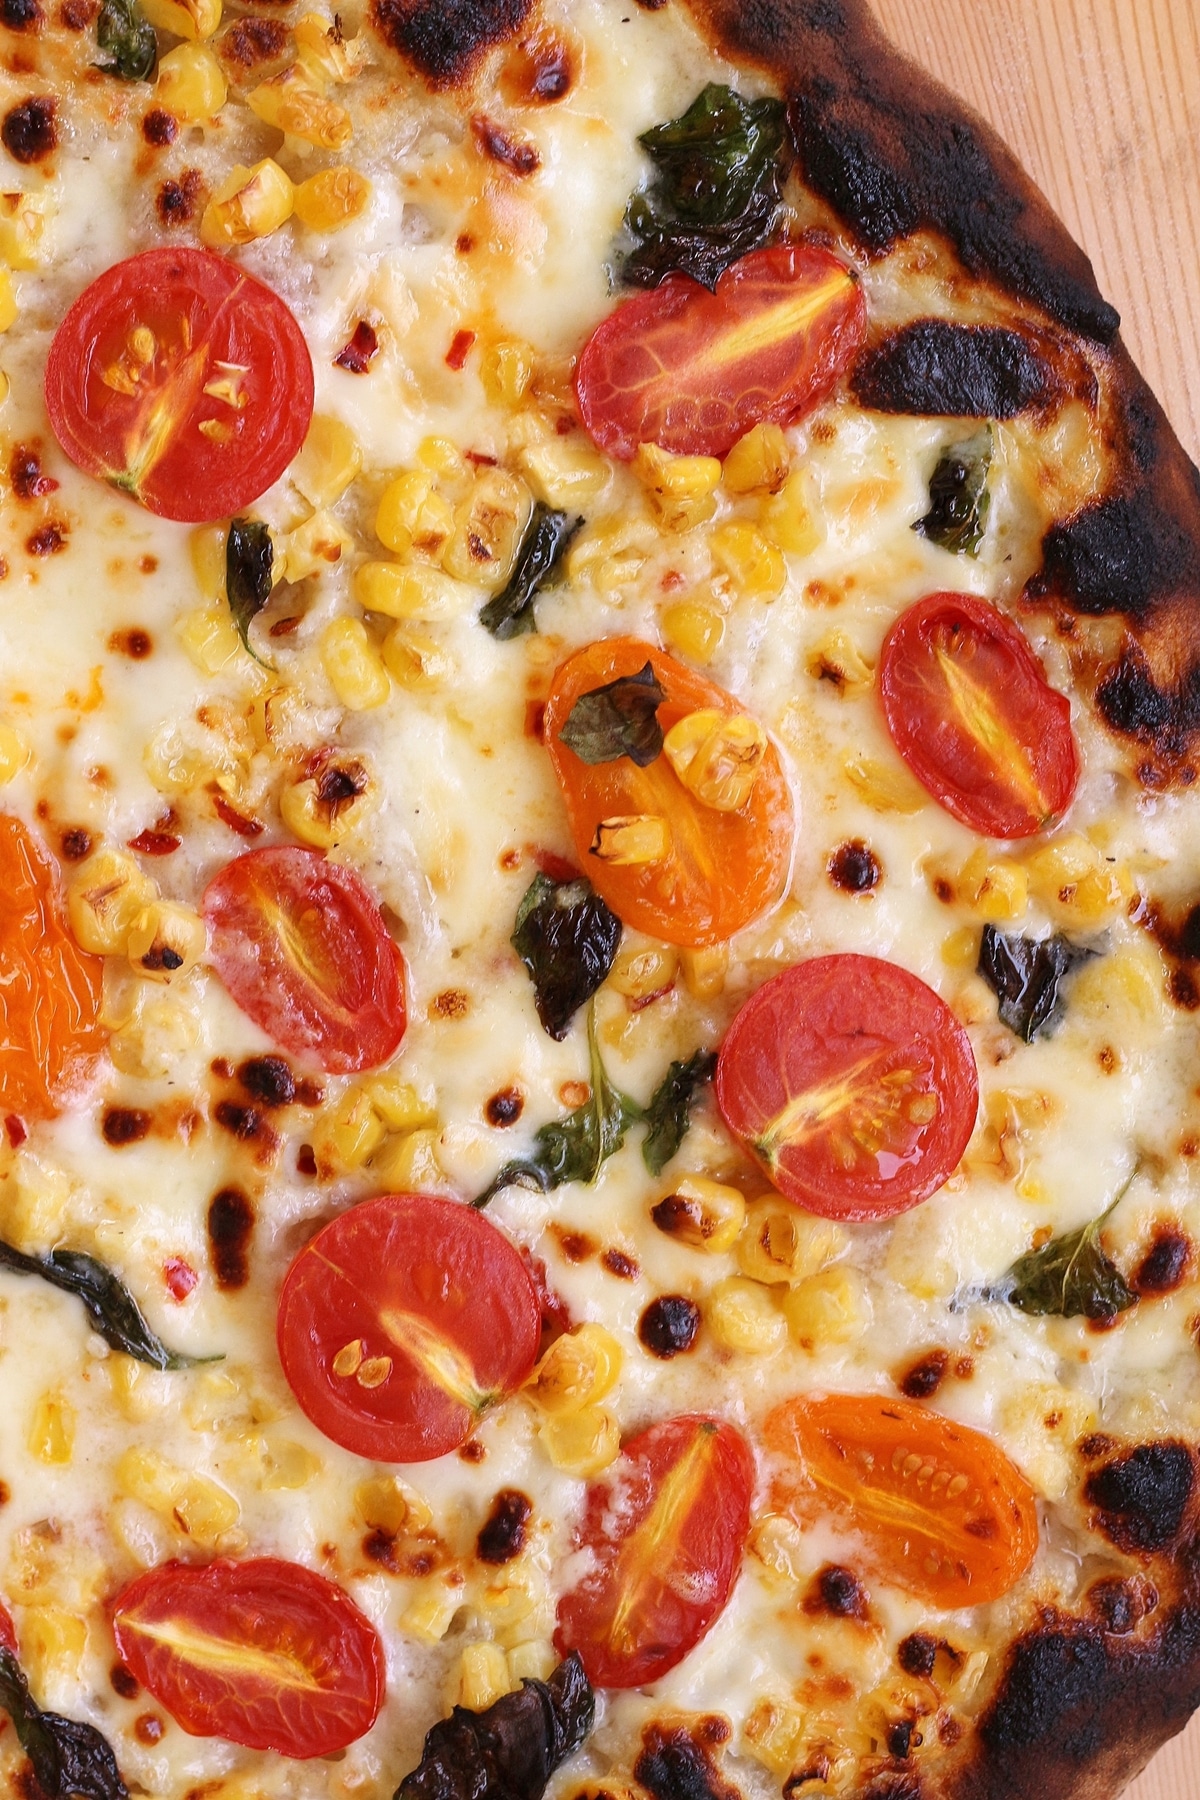
The is a white pizza. It starts with a light and creamy béchamel base and is topped with a hard grating cheese such as Parmigiano-Reggiano, and perfectly melty fresh mozzarella. Instead of slicing the cheese you just rip it into clumps. It will essentially liquefy under the heat of the broiler.

Fresh garlic and chili flakes add subtle sharpness and spiciness to this decadent summery pizza pie. The cherry (and/or grape) tomatoes roast under the broiler, sweetening and deepening their flavor tenfold.
The corn roasts on top of the pizza, adding sweetness and crunch, rounding out this pie to perfection. Finally, fresh basil adds a bit of brightness. This corn and tomato pizza pie is a summer dream.
I’m not usually the biggest fan of white pizzas, but this corn and tomato pizza recipe is an exception. Something about the juiciness of the roasted tomatoes really takes the place of the traditional tomato sauce in my eyes.
With the freshest corn of the year and the sweetest tomatoes you've ever had in your life, this corn and tomato pizza is a must-try! I like to keep it super local. My cherry and grape tomatoes, and outstanding sweet mirai corn come from Confreda Farms in Cranston, RI. Meanwhile, I use fresh basil from my garden.

How to make the no knead pizza dough
Although you can use store-bought pizza dough for this recipe, I highly recommend making it yourself using this easy-as-pie method. I absolutely love Jim Lahey's no knead pizza dough. It is full-flavored and chewy-textured. The perfect pizza crust.
Jim’s recipe follows his revolutionary no-knead technique. He then marries it with his technique of broiling pies on a very hot pizza stone to mimic the results obtained by using a coal-fired oven (we’ll get to that part shortly).
To make this pizza dough simply combine all-purpose flour, a small amount of dry active yeast, salt, and water. Mix just until combined (PHOTO 1). Leave it in a mixing bowl, cover with plastic wrap or a kitchen towel, and set it aside at room temperature for about 18 hours until doubled. The actual time required may vary based on room temperature on that given day. It will take longer in a cooler room, and less time in a warm one. The dough will loosen up and get very bubbly over time (PHOTO 2).

This long, slow rise yields a more artisan style dough. Next, scrape our dough out of the bowl onto a generously floured surface. This is a fairy wet and sticky dough. You may need to flour it and your work surface a few times to make it easy to handle.
Divide the dough into four equal pieces. Each will be approximately 7.5 ounces.
If you were to use store-bought dough for your corn and tomato pizza, plan to get 2 pounds of pizza dough to divide up into 4 pizzas (about 8 ounces per pizza).
For each piece of dough, fold it over onto itself several times until you get a round ball of dough. Turn it so the seam-side is down. If the balls are sticky, flour them generously and set them down on a floured board.
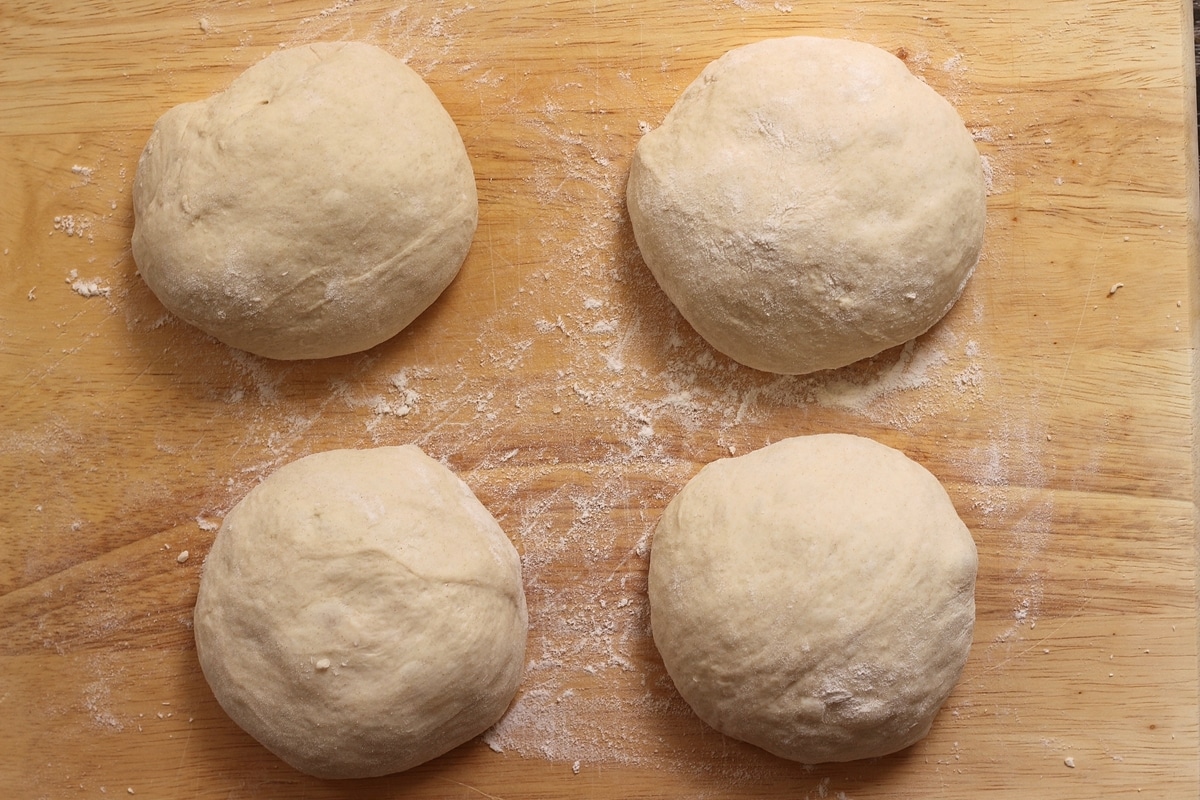
If you don’t intend to use the dough right away, wrap the balls individually in plastic and refrigerate for up to 3 days. Return to room temperature by leaving them out on the counter, covered in a damp cloth, for 2 to 3 hours before needed.
How to make the béchamel sauce
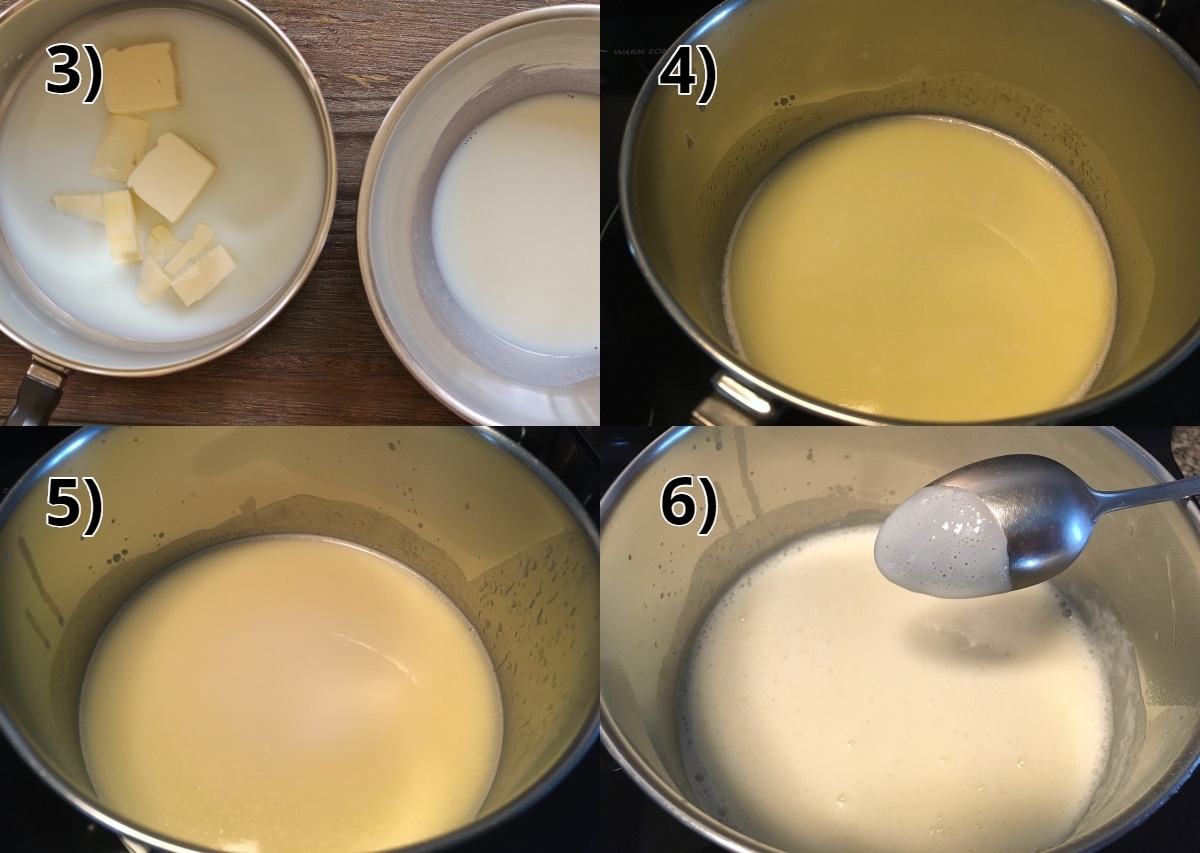
This is an unusual way to make béchamel (white) sauce, but it works! Start by adding ¼ cup of milk to a saucepan along with butter cut into pieces. In a small mixing bowl whisk together a small amount of flour with the remaining ½ cup milk (PHOTO 3).
Heat the milk and butter over medium-low heat just until the butter has completely melted (PHOTO 4). Pour some of the heated milk mixture into the bowl of flour and milk and whisk together. Then pour the mixture from the bowl back into the saucepan and whisk it in (PHOTO 5).
Add the salt and keep whisking until the mixture thickens enough to coat the back of a spoon. Remove from the heat, stir in some grated nutmeg and cool until needed (PHOTO 6).
Notes on baking technique and troubleshooting
Let’s pause for a moment and talk about the baking technique for these pizzas. You need a head start to get your oven ready.
First of all, if you have a favorite way to bake your pizzas, by all means, just do it. You can follow the rest of this recipe for the dough and toppings and bake the pizzas however you prefer. With that said, I’m going to take a few moments to discuss Lahey’s pizza baking technique which imitates a brick pizza oven.
It’s really worth investing in a thick pizza stone to retain heat better. I have tested out this method with both gas and electric ovens, and thin and thick pizza stones. The thick stone is definitely going to yield a better result because it will retain the heat more. Aim for at least ½-inch thick if you can.
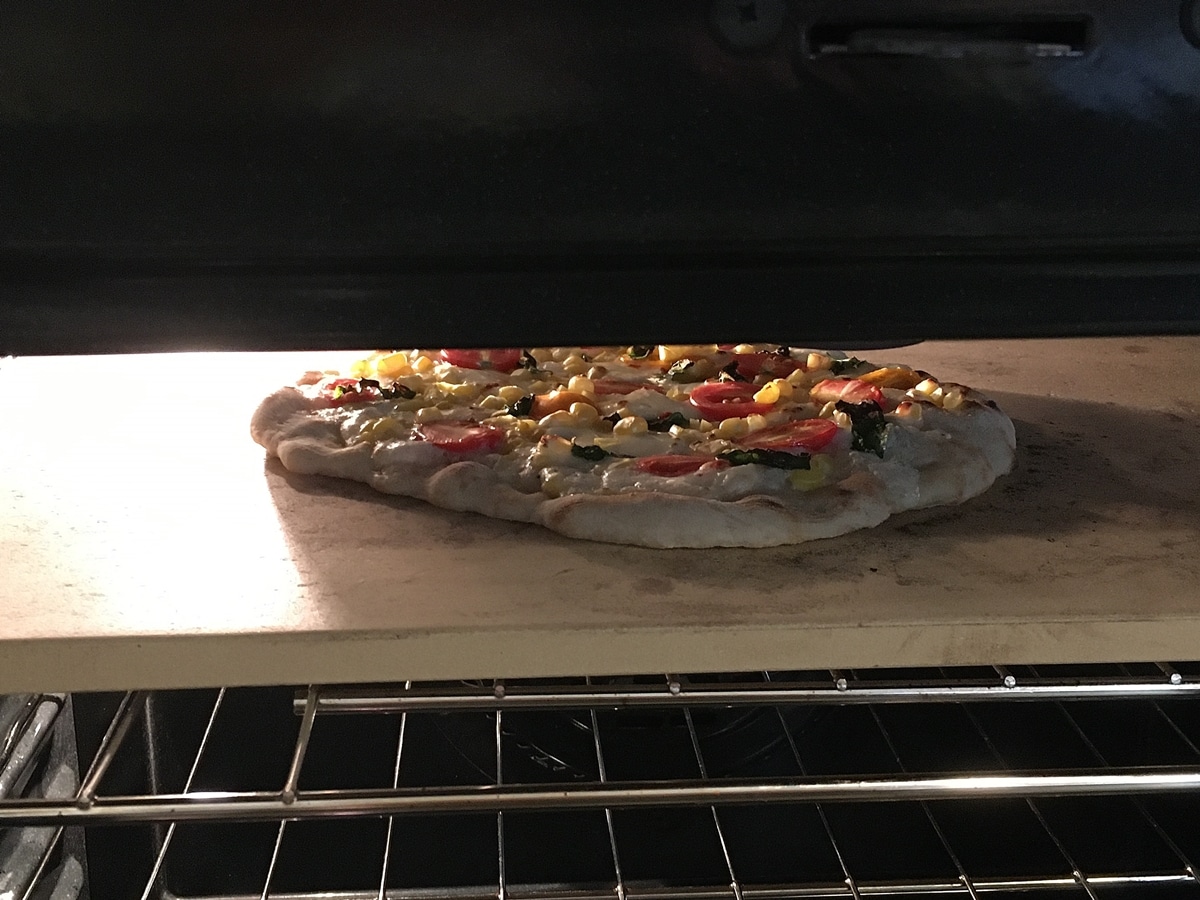
Next, you need to preheat your stone. There are instructions below the recipe on using this technique for different types of ovens, but basically you will need to set your stone either 8-inches (for gas) or 4-inches (for electric) below the broiler element in your oven. Preheat your oven at 500 degrees F for at least 30 minutes. Personally, I push this a tad longer if I have the time to do so.
Then switch your oven from bake to broil for another 10 minutes to really heat up that pizza stone! If you are using an electric oven, the heating element may turn off and on, and you can force it back on by briefly opening the oven door and then closing the door again.
Here are some important notes regarding this baking technique:
- Every oven is different. Every pizza stone is different. You may need to test out this technique and make some adjustments for your own oven and pizza stone to get it just right. Please be aware of this before following the recipe!
- Some ovens have safety features that will cause the oven door to lock or the oven to turn off (perhaps with an error code) if it overheats. I personally have experienced this with two different electric ovens! Don’t panic. You can usually reset this by unplugging the oven or resetting the circuit breaker in your breaker box. I just want to be crystal clear on these potential issues different ovens may cause because I have experienced them myself, and lived to tell you about them (and still had delicious pizza to eat afterward).
- If you find that your pizza is getting super charred on top but not baked or browned enough on the bottom, don’t panic! Here’s a good method that has worked for me. When the pizza is charred to your liking, remove it from the pizza stone with your peel and transfer it to a baking sheet. You can return it to the oven on a lower rack (not on the stone directly) and continue to bake it for another minute or two if needed.
- I actually do this above method with my pizzas after they are all baked and I want to heat them back up right before serving. I will turn off the broiler and switch the oven back to bake, and then return the pizzas to the oven on baking sheets, or even back onto the pizza stone. Without the broiler on they shouldn’t continue to char, but instead will heat back through.
The pizza dough should be cooked through since it’s so thin, even if it’s not too browned underneath compared to the charred top. It’s hard to mimic a professional pizza oven even with these steps, but your corn and tomato pizza will still be crusty and bubbly despite the limitations.
In the past I had asked Jim Lahey directly a couple of troubleshooting questions. I’d like to include his answers here:
WHY IS MY BOTTOM CRUST NOT BROWNING?
Jim: The thickness of the stone, distance of the stone from the broiler and the overall cooking time can affect the quality of the bottom crust. I’d recommend moving the oven rack closer to the broiler and making sure that you use a thick pizza stone.
DOES THE STONE LOSE HEAT BETWEEN PIES? SHOULD I LET THE STONE HEAT UP MORE BETWEEN EACH PIE?
Jim: Once you arrive at the preheated temperature, leave the oven on broil full time. No need to switch to oven mode between pizzas. Ideally, you want the pizza stone to be at 620 degrees. The heat from the burners should be about 700 degrees. When the pizza is cooking, there’s almost like a parabola of steam that rises off the pizza and evaporates. That dome is created in part by the amount of heat on the bottom as well as the surface heat from above that comes from the broiler heating up the surface below causing steam to rise.
How to assemble and finish your pizzas
Take one ball of the dough and generously flour it, your hands, and the work surface. Then press it down and gently stretch it out to 6 to 8 inches. Supporting the disk with your knuckles toward the outer edge and lifting it about the work surface, keep stretching the dough by rotating it with your knuckles, gently pulling it wider and wider until the disk reaches 10 to 12 inches.
Alternatively, stretch the dough on the work surface by massaging it into a roundish disk about 10 to 12 inches, but don’t handle it more than necessary. If the dough has had ample time to rest, it should be easy to stretch. Set the disk on a well-floured pizza peel. It is now ready to be topped.
With the dough on the peel, spoon ¼ of the béchamel sauce over the surface and spread it evenly, leaving about an inch of rim untouched. Sprinkle the surface with grated Parmigiano-Reggiano and fresh mozzarella torn into chunks. Evenly sprinkle the top with chopped garlic, chili flakes, and salt and drizzle just a little olive oil over the top. Arrange halved cherry and/or grape tomato pieces over the pie and scatter corn kernels on top. Distribute freshly torn basil around the pie.
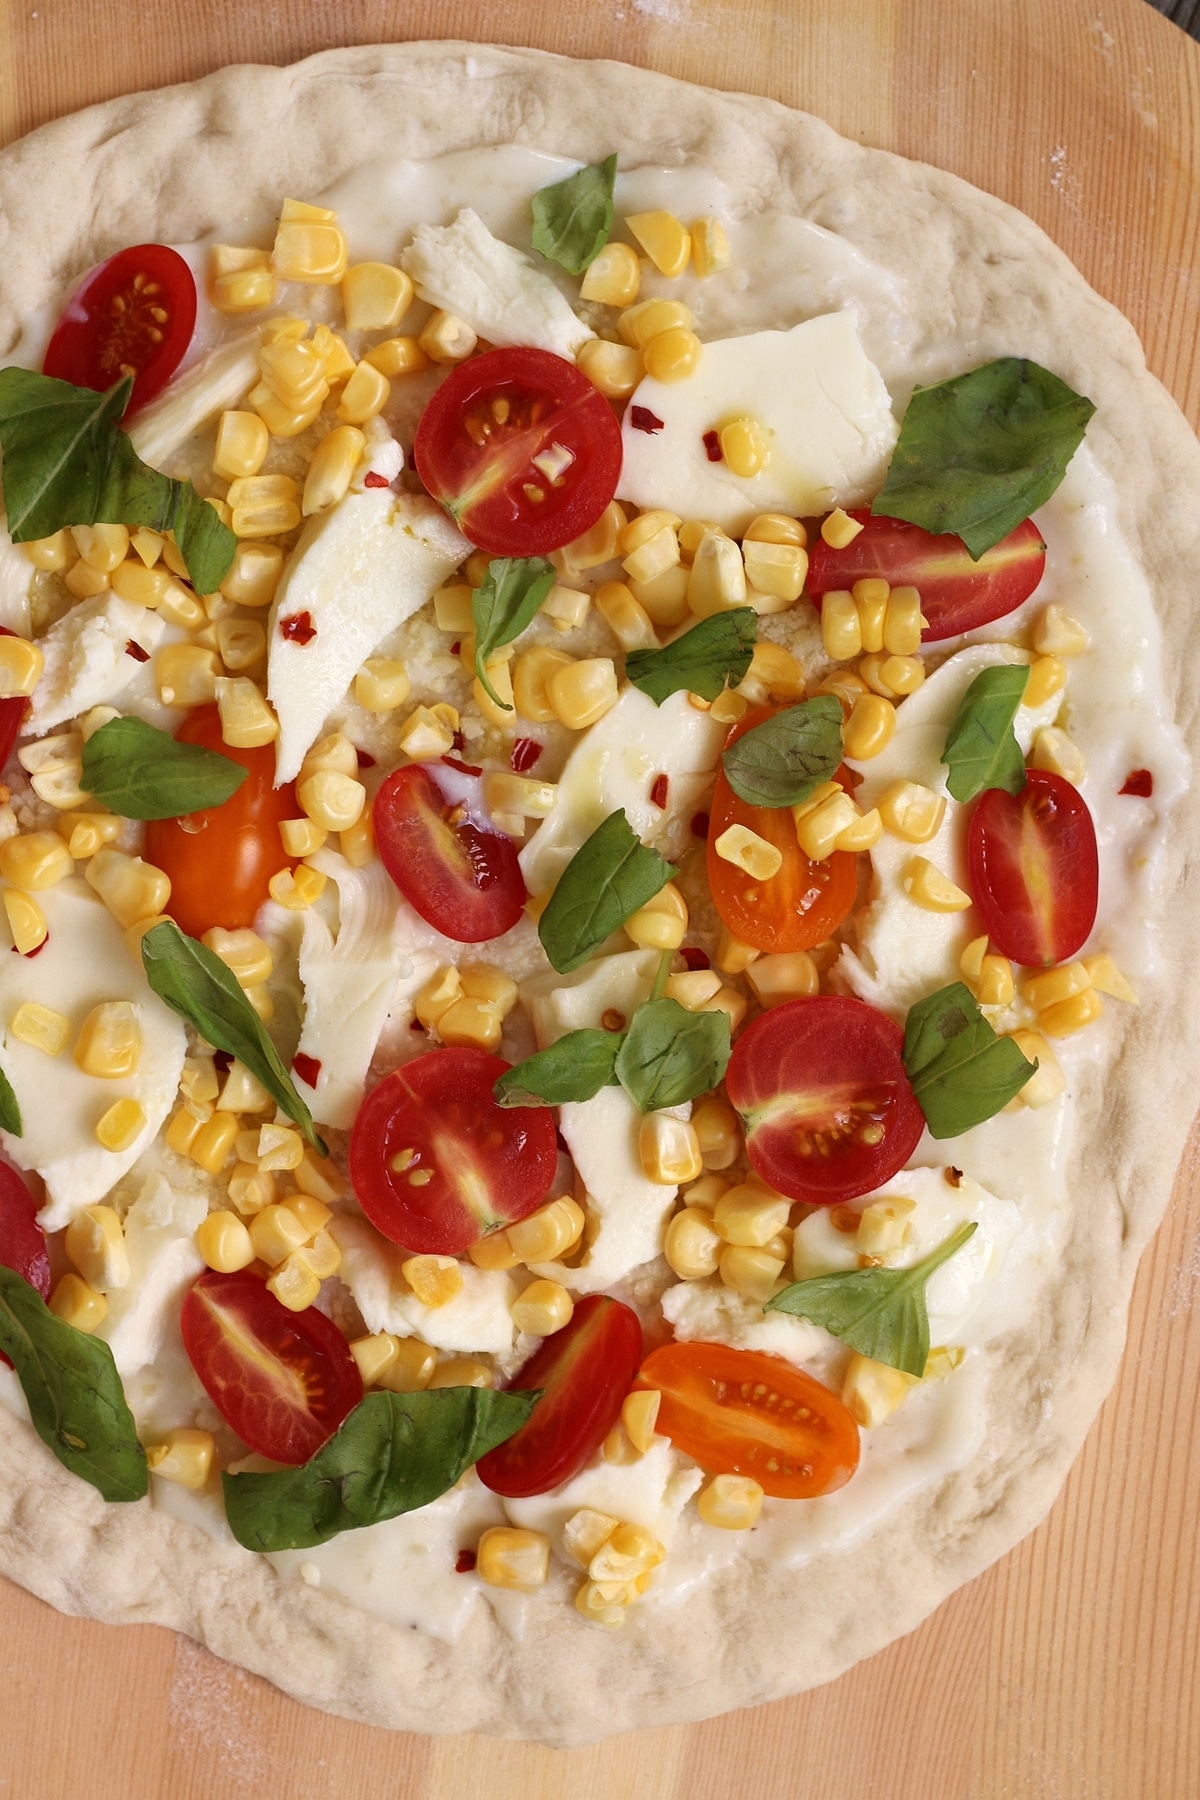
I like to test out the motion before I actually get to the oven just to make sure my pizza slides around on the peel. Make sure you’ve floured it enough!
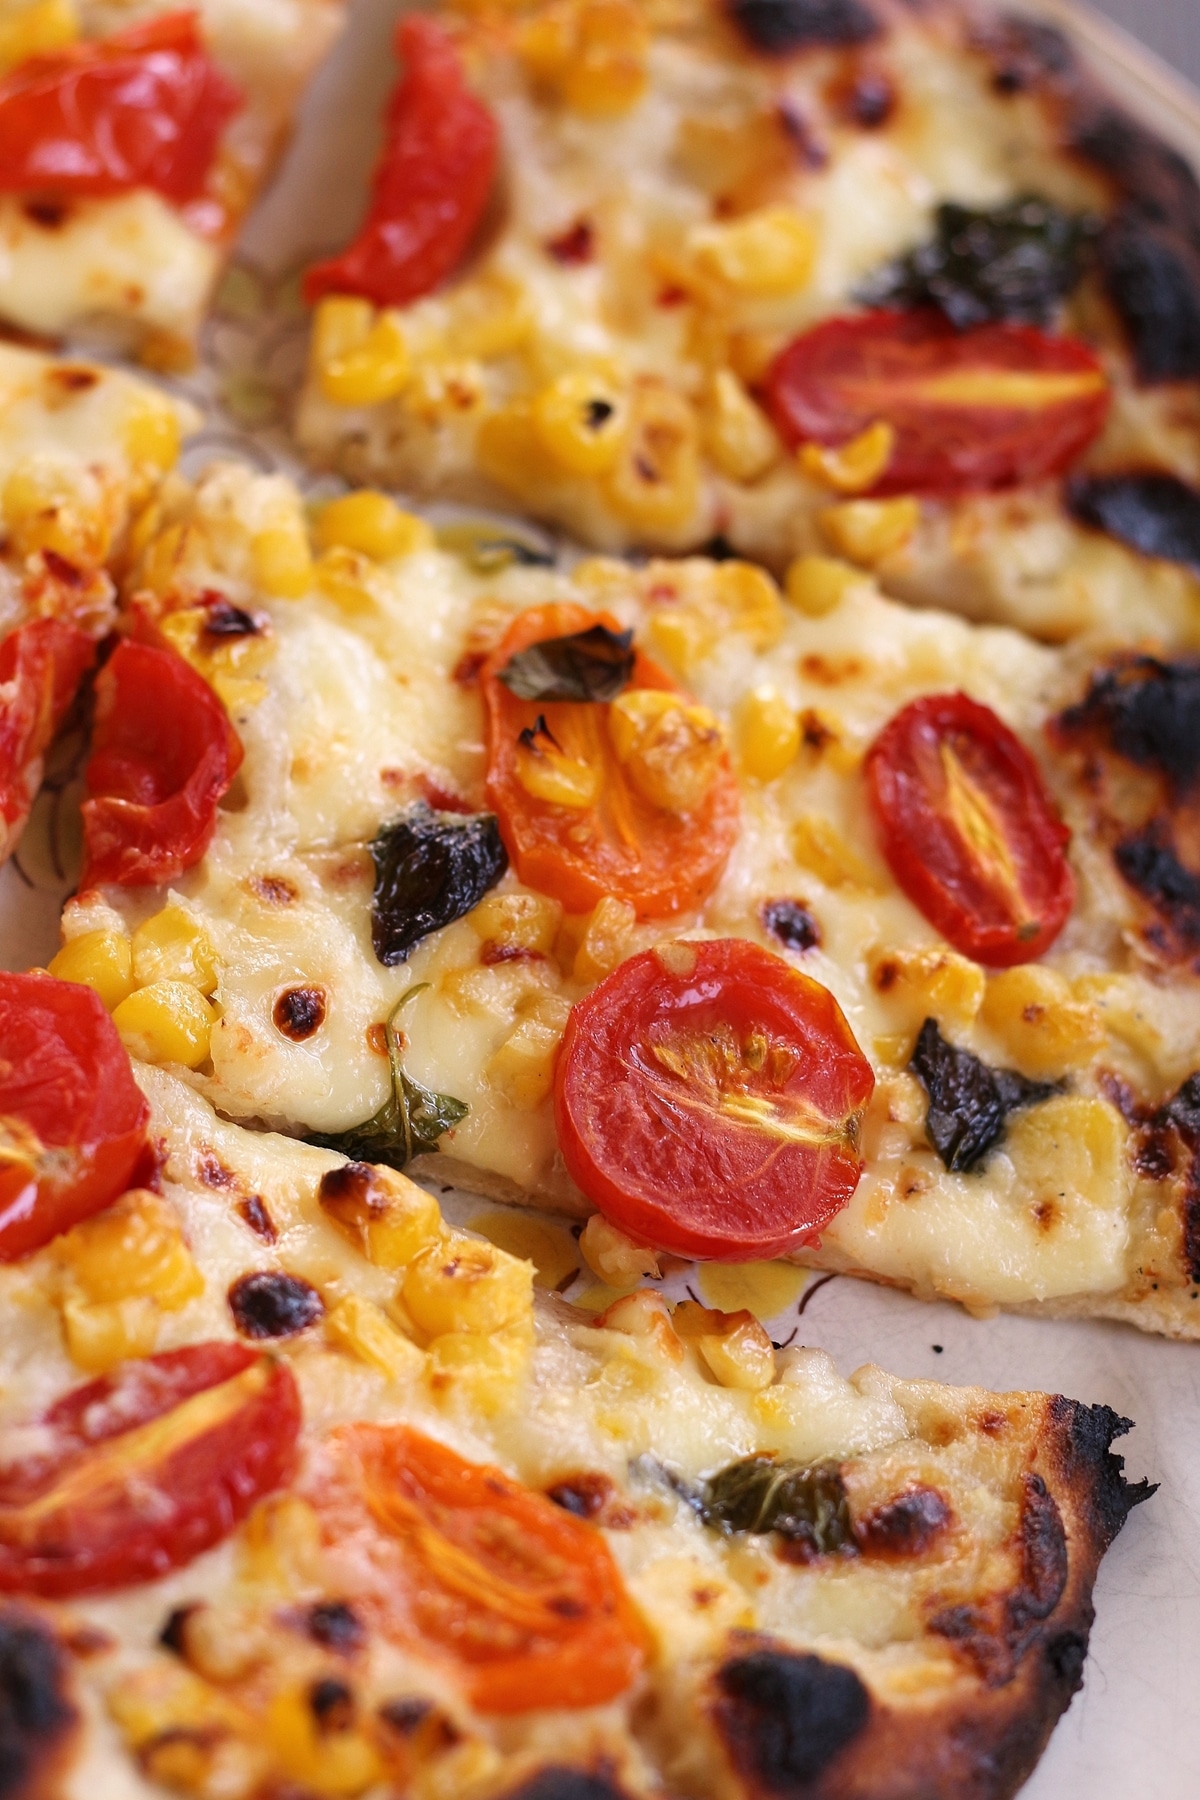
With quick, jerking motions, slide the corn and tomato pizza onto the stone. Broil for 3 ½ minutes under gas (somewhat longer with an electric oven), until the top is bubbling and the crust is nicely charred but not burnt.
Use the peel, transfer the pizza to a tray or serving platter before slicing it into wedges. Repeat with the remaining ingredients to make three more corn and tomato pizzas.
As I noted above, you can also return the pizzas back into the hot oven very briefly on baking sheets (or back onto the pizza stone with the broiler off) to reheat them right before serving if you plan to serve them all at once instead of as they emerge from the oven.
Please scroll to the bottom of the post for the full recipe (in a printable recipe card) including ingredient amounts and detailed instructions.
Other recipes you may like
- Pizza Marinara
- Radicchio Pizza
- Meatball Calzones
- Stromboli with Soppressata, Rapini, and Provolone
- Flammkuchen / Tarte Flambée (Flatbread Pizza with Bacon and Onions)
Tried this recipe? Please leave a star ⭐️⭐️⭐️⭐️⭐️ rating in the recipe card below and/or a review in the comments section further down the page. You can also follow me on social media on Facebook, Instagram, and Pinterest!
Corn and Tomato Pizza
Ingredients
No Knead Pizza Dough:
- 500 grams (17 ½ ounces or 3 ¼ cups) all purpose flour, plus more for shaping the dough
- 1 gram (¼ teaspoon) active dry yeast
- 16 grams (2 teaspoons) fine sea salt
- 350 grams (1 ½ cups) water
Béchamel Sauce:
- 182 grams (¾ cup) milk
- 42 grams (3 tablespoons) unsalted butter
- 7 grams (about 2 ¾ teaspoons) all-purpose flour
- 1 grams (pinch) fine sea salt
- 2 rasp grates of nutmeg or a pinch of ground nutmeg
Pizzas:
- 40 grams (about ¾ cup) finely grated Parmigiano-Reggiano
- 240 grams (about 8 ounces) fresh mozzarella, pulled into large clumps
- 4 medium garlic cloves finely chopped
- Pinch of chili flakes
- Fine sea salt
- Extra-virgin olive oil for drizzling
- 200 grams (16 to 24) cherry or grape tomatoes, halved
- 240 grams (about 1 ⅓ cups) fresh corn kernels
- 32 medium basil leaves roughly torn
Instructions
No Knead Pizza Dough:
- In a medium bowl, thoroughly blend the flour, yeast, and salt. Add the water and, with a wooden spoon or your hands, mix thoroughly.
- Cover the bowl with plastic wrap or a kitchen towel and allow it to rise at room temperature (about 72°F) for 18 hours or until it has more than doubled. It will take longer in a chilly room and less time in a very warm one.
- Flour a work surface and scrape out the dough. Divide it into 4 equal parts and shape them: For each portion, start with the right side of the dough and pull it toward the center; then do the same with the left, then the top, then the bottom. (The order doesn’t actually matter; what you want is four folds.) Shape each portion into a round and turn seam side down. Mold the dough into a neat circular mound. The mounds should not be sticky; if they are, dust with more flour.
- If you don’t intend to use the dough right away, wrap the balls individually in plastic and refrigerate for up to 3 days. Return to room temperature by leaving them out on the counter, covered in a damp cloth, for 2 to 3 hours before needed.
Béchamel Sauce:
- Pour ¼ cup of the milk into a saucepan. Cut the butter into a few chunks (so they’ll melt more easily) and add to the milk. Heat over medium-low heat, stirring, until the butter melts but without allowing the milk to reach a boil.
- Meanwhile, put the flour in a small mixing bowl, add the remaining ½ cup milk, and whisk into a slurry. Once the butter has been completely incorporated into the hot milk pour some of the warm mixture into the cold flour mixture to warm it. Pour the contents of the bowl back into the saucepan and whisk it in. Stir in the salt.
- Over medium-low heat, whisk the mixture frequently–to prevent sticking–as it cooks and thickens. The béchamel is done when it has reached the consistency of a runny sauce or heavy cream (it should easily coat the back of a spoon). Grate in the nutmeg and allow the sauce to cool to room temperature. It will continue to thicken slightly as it cools. Use the béchamel immediately or cool, cover, and refrigerate for up to 5 days; bring it back to room temperature before using.
To Make the Pizzas:
- Put the pizza stone on a rack in a gas* oven about 8 inches from the broiler. Preheat the oven on bake at 500°F for 30 minutes. Switch to broil for 10 minutes.
- Take one ball of the dough and generously flour it, your hands, and the work surface. Then press it down and gently stretch it out to 6 to 8 inches. Supporting the disk with your knuckles toward the outer edge and lifting it about the work surface, keep stretching the dough by rotating it with your knuckles, gently pulling it wider and wider until the disk reaches 10 to 12 inches. Alternatively, stretch the dough on the work surface by massaging it into a roundish disk about 10 to 12 inches, but don’t handle it more than necessary. Set the disk on a well-floured peel. It is now ready to be topped.
- With the dough on the peel, spoon ¼ of the béchamel sauce over the surface and spread it evenly, leaving about an inch of rim untouched. Sprinkle the surface with ¼ each of the Parmigiano and mozzarella. Evenly sprinkle the pie with ¼ of the garlic, chili flakes, and salt and drizzle just a little olive oil over the top. Arrange ¼ of the tomato pieces over the pie and scatter ¼ of the corn on top. Distribute ¼ of the basil around the pie.
- With quick, jerking motions, slide the pie onto the stone. Broil for 3 ½ minutes under gas (somewhat longer with an electric oven--see notes below), until the top is bubbling and the crust is nicely charred but not burnt.
- Use the peel, transfer the pizza to a tray or serving platter before slicing it into wedges. Serve immediately. Repeat with the remaining ingredients to make 3 more pizzas.
Notes
- *For an electric oven* place the stone 4 inches from the top heating element, and preheat, on bake, at 500 degrees F for the usual 30 minutes. Then, open the oven door a few inches and leave it ajar for about 30 seconds. Some of the ambient heat will escape, but the stone with stay just as hot. Now close the oven door and switch to broil for 10 minutes to heat the surface to the maximum. Open the door and slide the pizza in to broil. Because the stone is so close to the element, you may need to pull the rack out a few inches to get the pie centered on the stone; do it quickly and don’t worry about losing too much heat. With the door closes, broil for roughly 1 to 2 minutes longer than specified for gas–until the crust is adequately charred but not burnt and the toppings are bubbling.
- *For a bottom broiler* start with the stone in the broiler at the lowest level or on the floor of the oven. Preheat on low for about 20 minutes, and then switch to high for another 5 minutes. Slide in the pizza, close the drawer, and broil as instructed by the recipe (most often 3 ½ to 4 minutes), until bubbling and properly charred–checking to be sure it’s not burning.
- Every oven is different. Every pizza stone is different. You may need to test out this technique and make some adjustments for your own oven and pizza stone to get it just right. Please be aware of this before following the recipe!
- Some ovens have safety features that will cause the oven door to lock or the oven to turn off (perhaps with an error code) if it overheats. I personally have experienced this with two different electric ovens! Don’t panic. You can usually reset this by unplugging the oven or resetting the circuit breaker in your breaker box. I just want to be crystal clear on these potential issues different ovens may cause because I have experienced them myself, and lived to tell you about them (and still had delicious pizza to eat afterward).
- If you find that your pizza is getting super charred on top but not baked or browned enough on the bottom, don’t panic! Here’s a good method that has worked for me. When the pizza is charred to your liking, remove it from the pizza stone with your peel and transfer it to a baking sheet. You can return it to the oven on a lower rack (not on the stone directly) and continue to bake it for another minute or two if needed.
- I actually do this above method with my pizzas after they are all baked and I want to heat them back up right before serving. I will turn off the broiler and switch the oven back to bake, and then return the pizzas to the oven on baking sheets, or even back onto the pizza stone. Without the broiler on they shouldn’t continue to char, but instead will heat back through.
- The pizza dough should be cooked through since it’s so thin, even if it’s not too browned underneath compared to the charred top. It’s hard to mimic a professional pizza oven even with these steps, but your pizza will still be crusty and bubbly despite the limitations.
- Although this béchamel technique is not classically French (making a roux and then whisking in the hot milk), it works beautifully. I may not use it for all of my béchamel needs (making macaroni and cheese, etc), but I’m glad to have learned something new and will definitely use it in the future for making white pizzas and to make béchamel for other purposes.
- Adapted from My Pizza
Nutrition
*All nutritional information is based on third-party calculations and should be considered estimates. Actual nutritional content will vary with brands used, measuring methods, portion sizes and more.*




Mary Kabakian says
What a great summer pizza recipe!