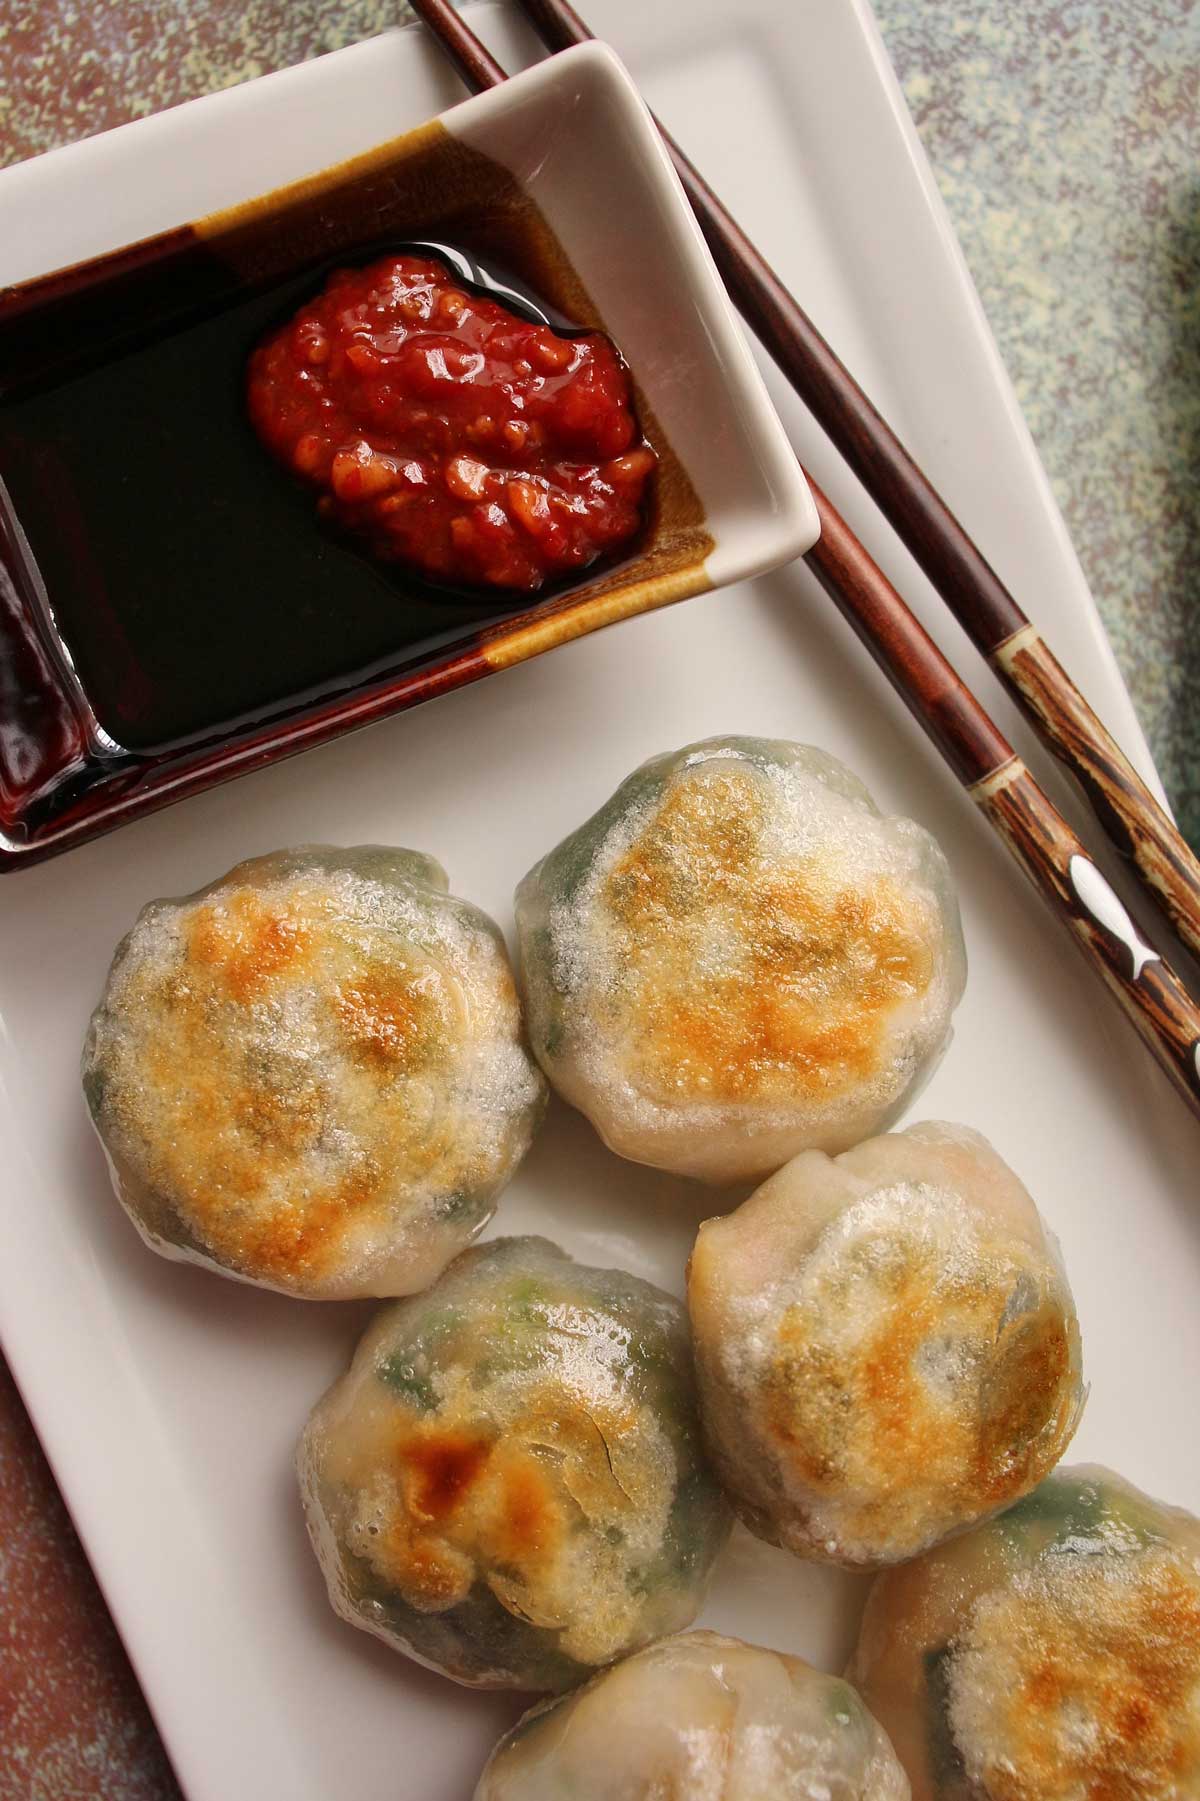
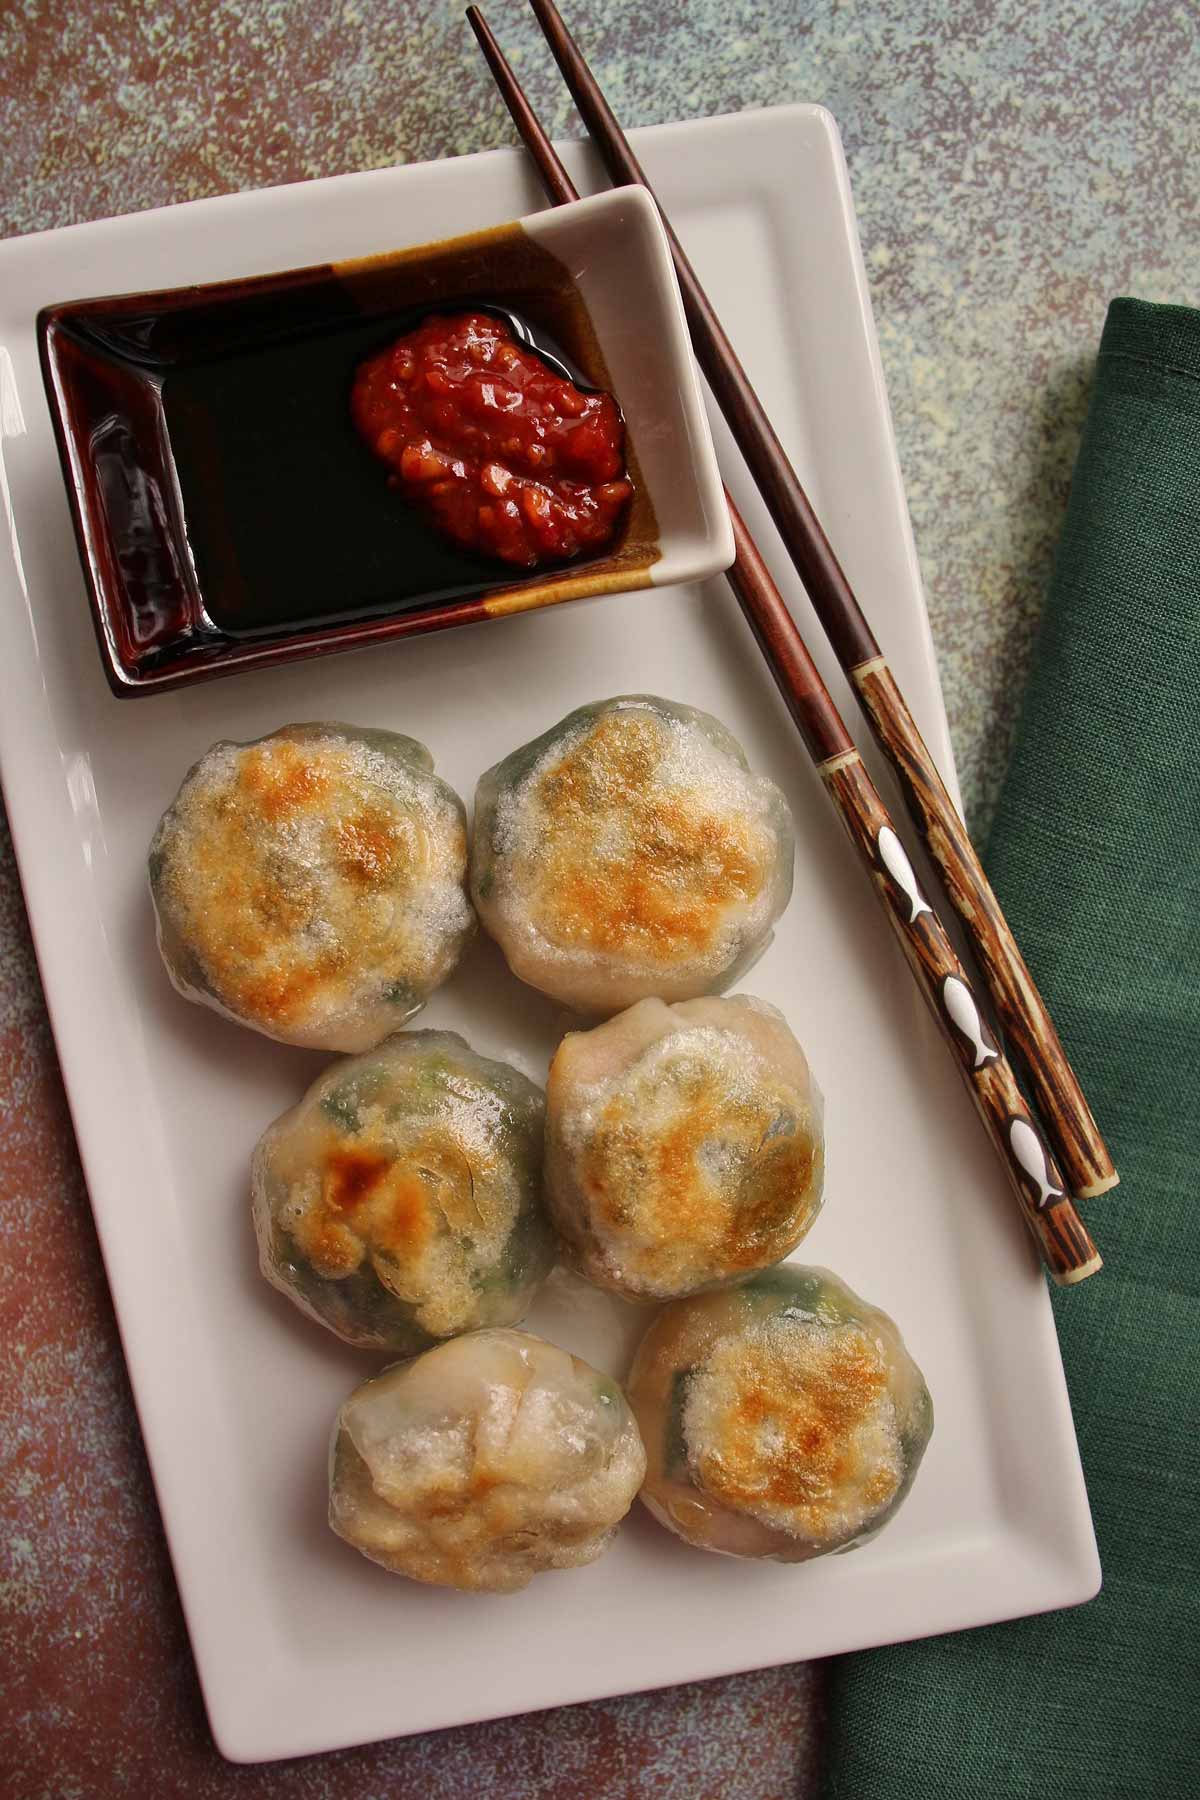
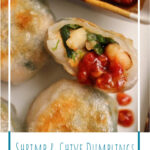
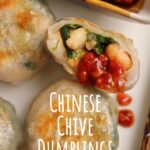
Crisp and chewy pan-fried Chinese chive dumplings (jiu cai jiao) are a delicious treat! They're filled with a hearty shrimp and chive dumpling filling, perfect for a pescatarian dim sum feast.
(This recipe was originally published in July 2014, but was updated with new photos and content in 2021).
One of my favorite dumplings when I go to dim sum is pan-fried Chinese chive dumplings with shrimp. These shrimp and chive dumplings feature a traditional translucent dough used in many steamed dumplings at dim sum establishments.
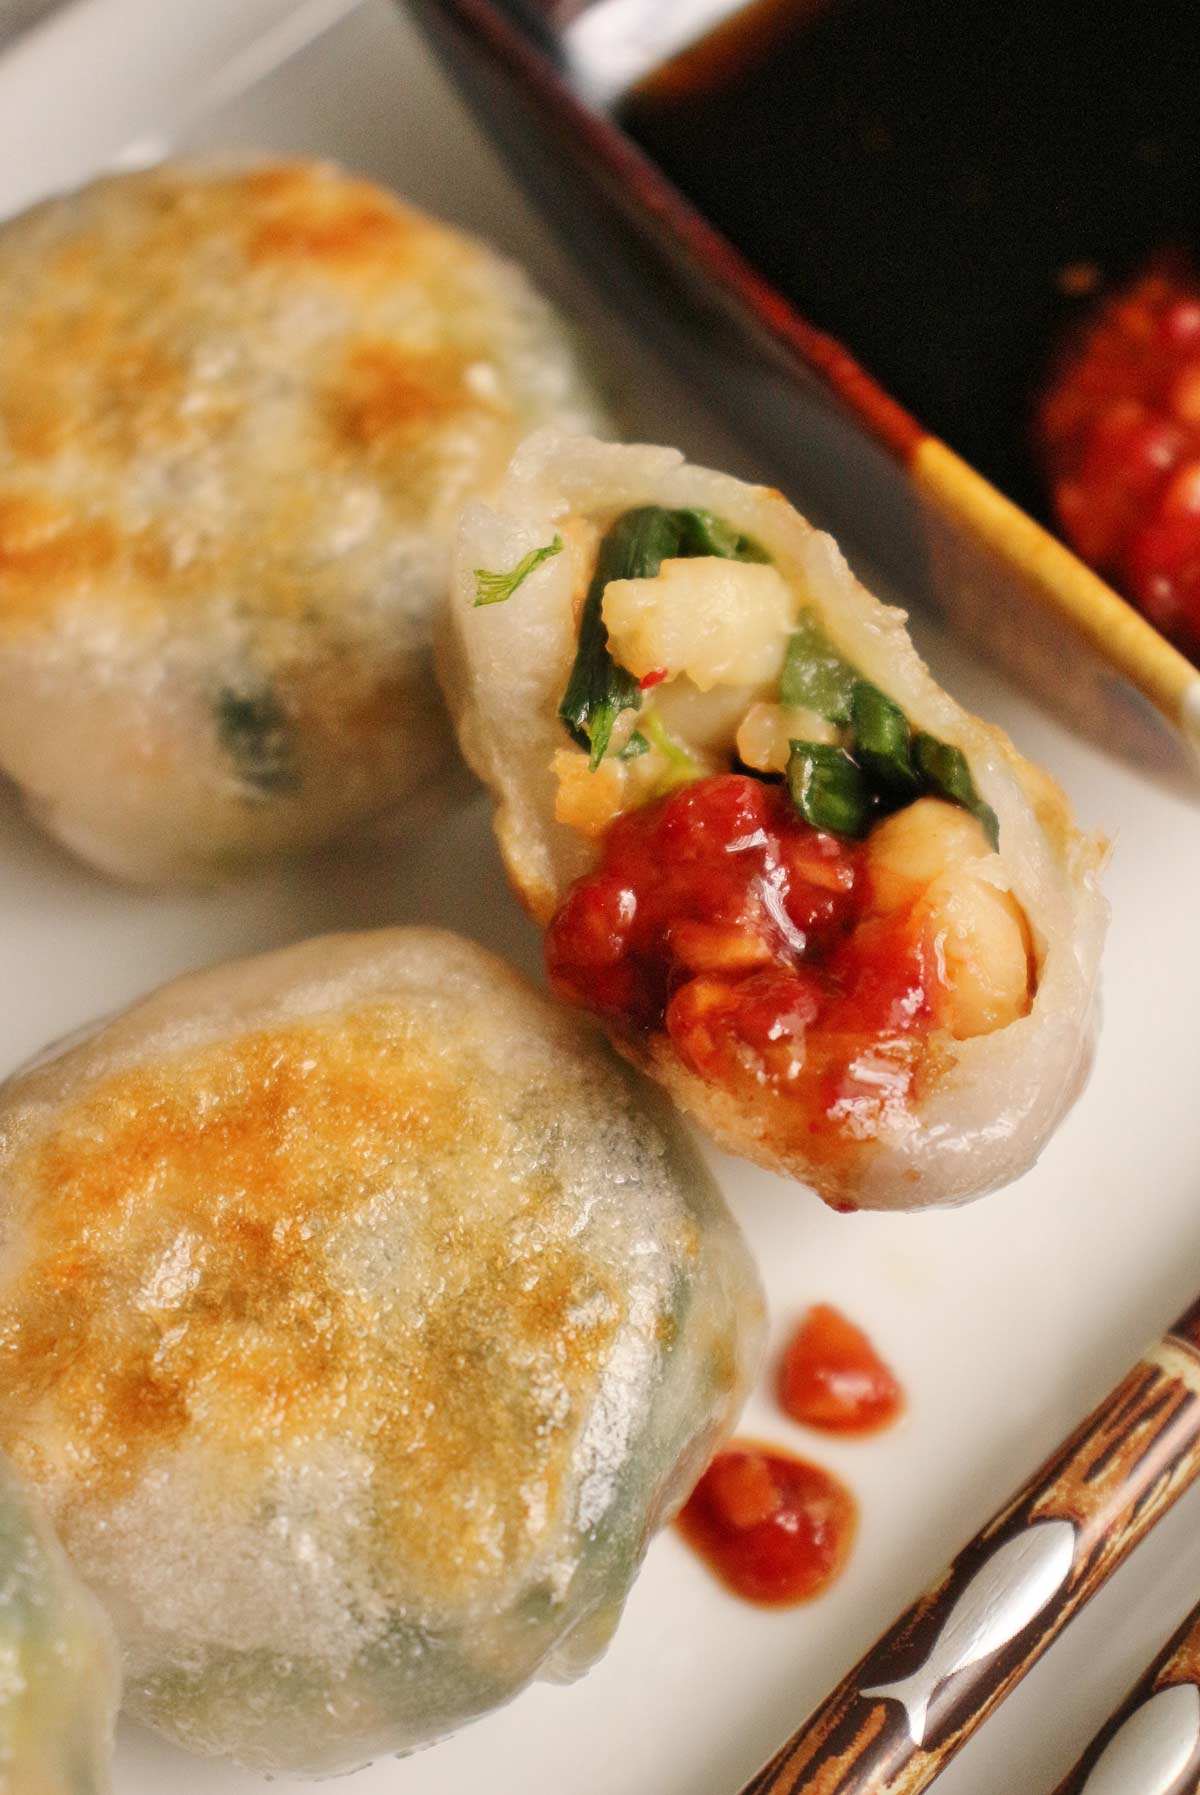
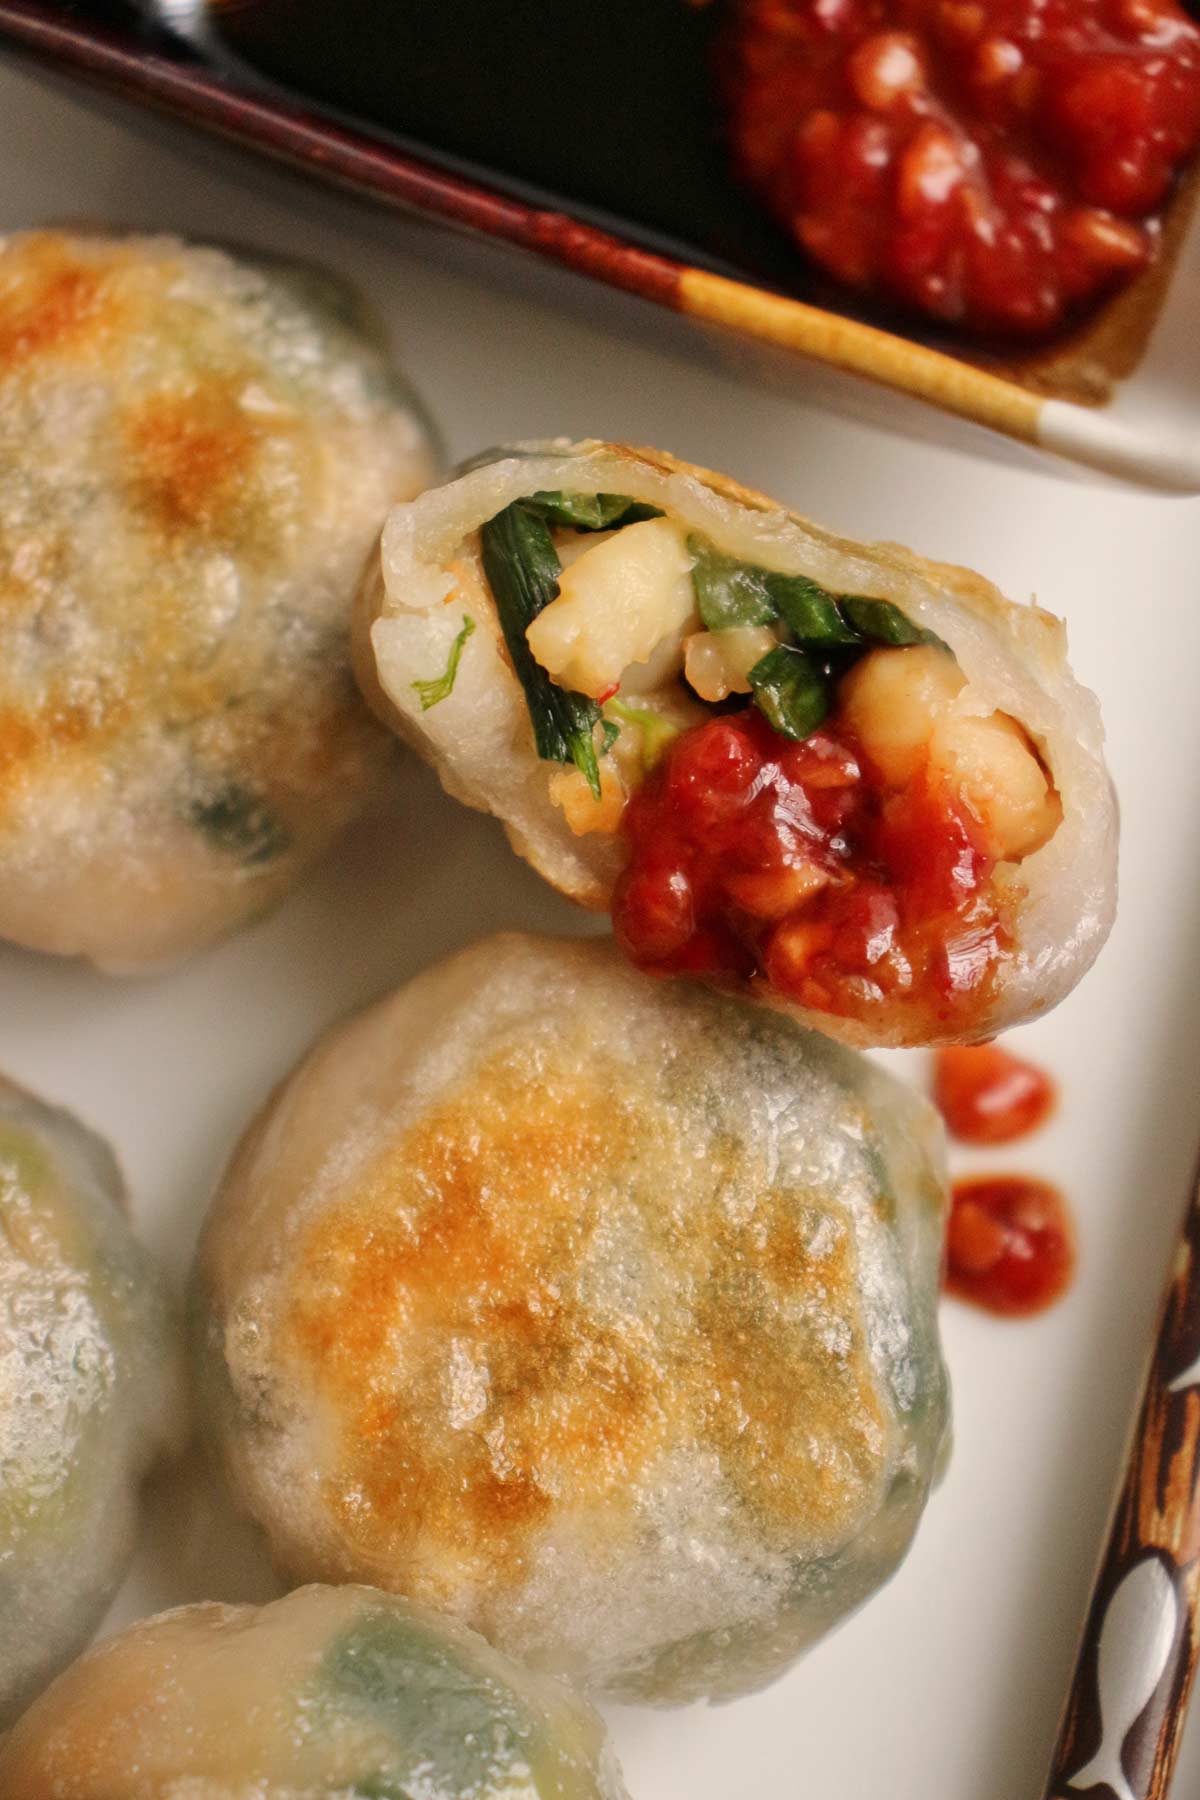
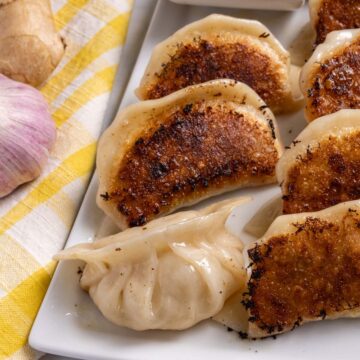
This style of dumplings sometimes bears the name crystal dumplings because of their shimmering transparent wrappers. What really sets these chive dumplings apart from the others is that they're actually pan-fried after steaming. This yields a chewy and crispy wrapper which encases an intensely shrimp-and-chive laced filling.
Dumpling terminology
These chive dumplings are called jiu cai jiao (韭菜饺) or occasionally jiu cai bao (韭菜包) in Mandarin. Jiu cai is Mandarin for chive. Jiao refers to small, sometimes transparent dumplings that are Hong Kong style and common in dim sum restaurants.
Bao refers to buns that are typically a bit larger but also often made with other types of dough. In this case it could apply because of the bun-like shape. As an example Shanghai soup dumplings are called xiao long bao.
Meanwhile, jiaozi (饺子) is the term for a more Northern Chinese style dumpling with a non-translucent wheat wrapper. I'd like to thank my friend from China for helping to clarify the differences in terminology here!
Ingredient notes
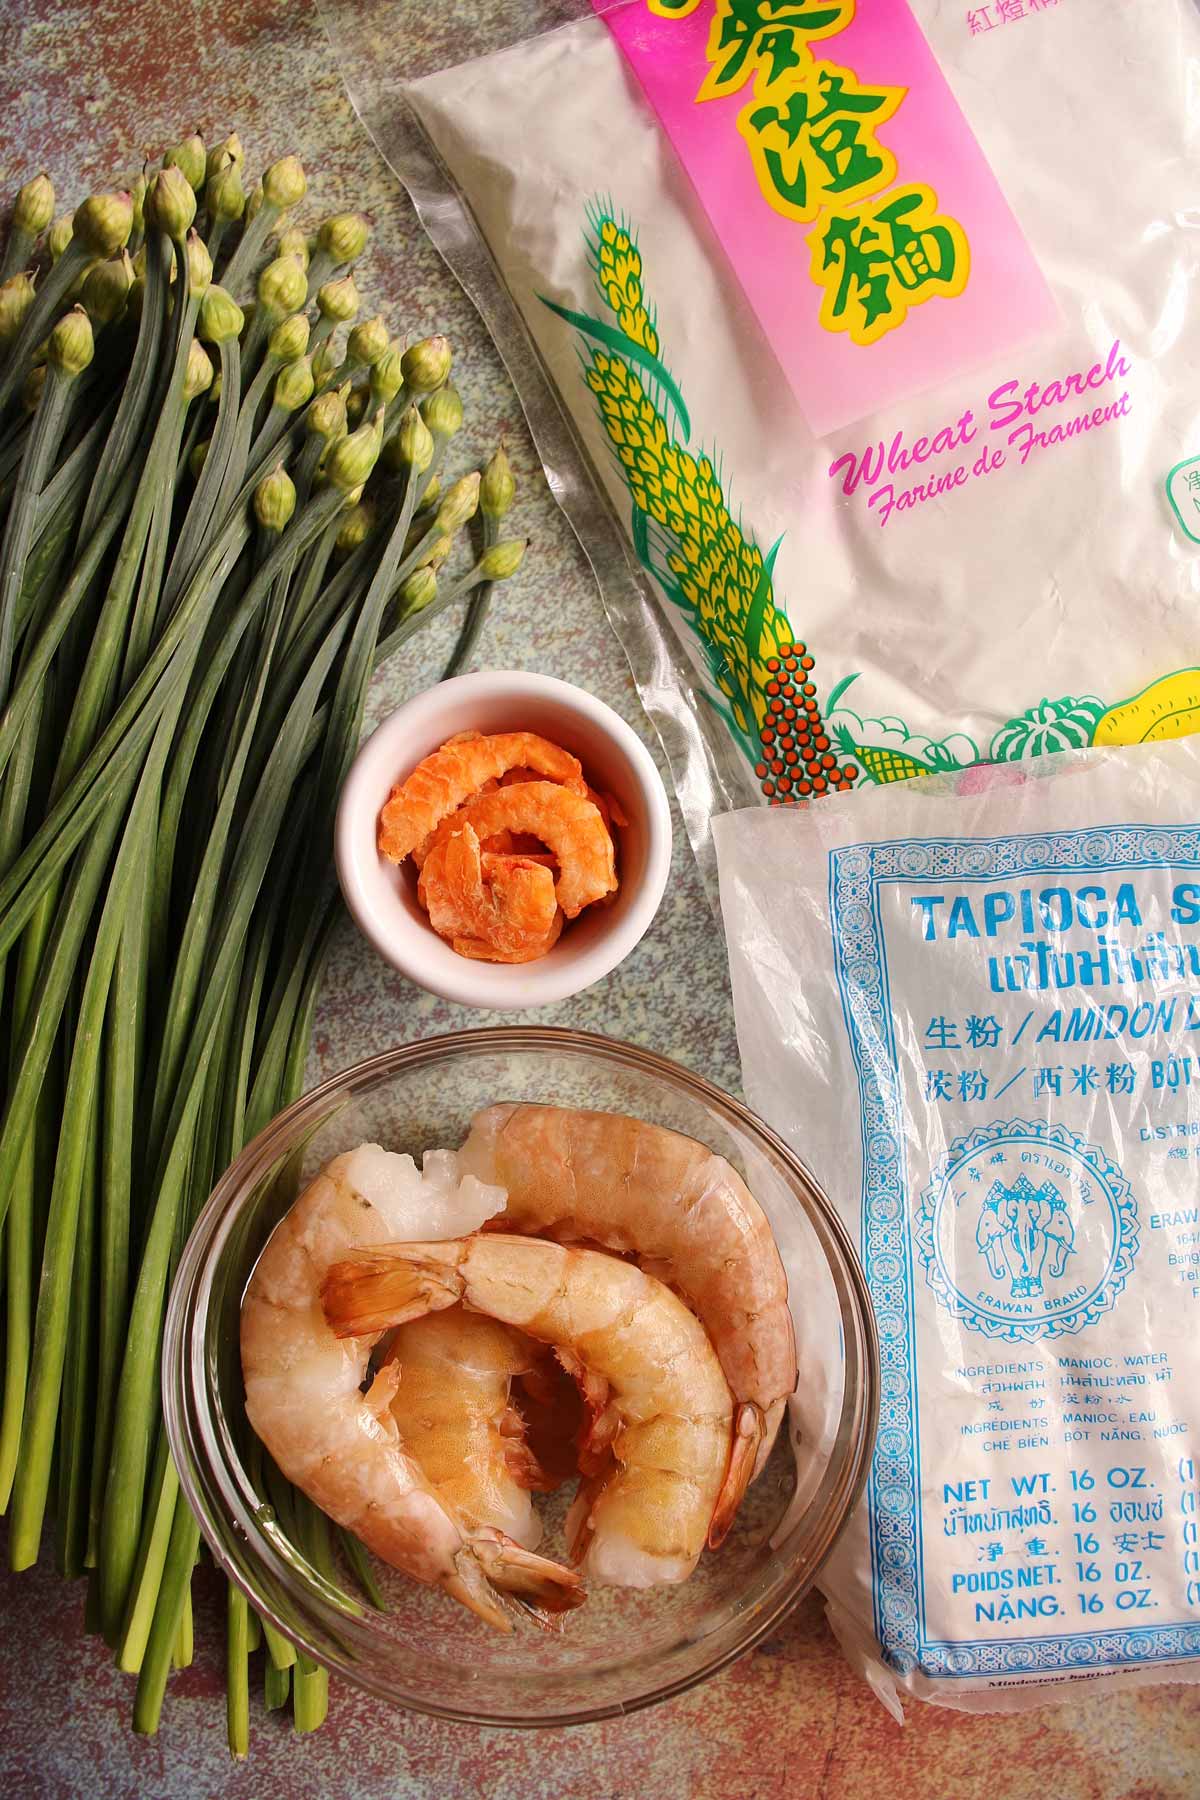
- Wheat Starch: This particular dough is made predominantly with wheat starch. Wheat starch is the byproduct of making wheat gluten (seitan), however it's difficult to completely separate the gluten protein in a grain of wheat. Therefore to be safe I would not recommend wheat starch for someone who is Celiac or requires a gluten-free diet because it may contain trace amounts of gluten. Find wheat starch in Asian markets (cheaper) or online (pricier).
- Tapioca Starch: Also called tapioca flour, this is the starch of the cassava root (yuca or manioc). Adding tapioca starch to the dumpling dough provides additional translucency and elasticity. It's also a great gluten-free thickener. Find it in Asian, Latin, African, Caribbean, or specialty markets (cheaper), and online (pricier).
- Chinese Chives: Chinese chives (jiu cai 韭菜) are also known as garlic chives. They have flat, dark green spear-like leaves and an intense garlicky flavor and aroma. Meanwhile flowering chives (jiu cai hua 韭菜花) have hollow stems and little flower buds on top. They both come from the same plant but the former is the leaves while the latter is the stems and buds. The flat garlic chives are more traditional in this dim sum staple, but flowering chives are also very delicious and the ones pictured here in this post. Find both at Asian markets. Swap them out for scallions as a last resort though your shrimp and chive dumplings won't be the same.
- Fresh Shrimp: The size of the fresh shrimp doesn't matter too much since you will be cutting it into small pieces. I recommend purchasing the best shrimp you can afford, and personally prefer wild Gulf shrimp rather than farm raised from ambiguous sources. Stock up when they're on sale, as shrimp freezes very well.
- Dried Shrimp: Although the dried shrimp are optional, they add a salty, chewy bite to the dumplings which acts as a foil to the tender and succulent fresh shrimp pieces. This is more of a specialty ingredient you may need to stake out in an Asian market. Don't feel bad if you have to skip it, but I personally love its inclusion!
How to make it
Begin by making the shrimp and chive dumpling filling. Combine soy sauce, rice wine, and cornstarch. Add the raw shrimp and stir to coat well.
Meanwhile, in another bowl, create a seasoning sauce by stirring together cornstarch, sugar, pepper, oyster sauce, sesame oil, and water. Set aside.
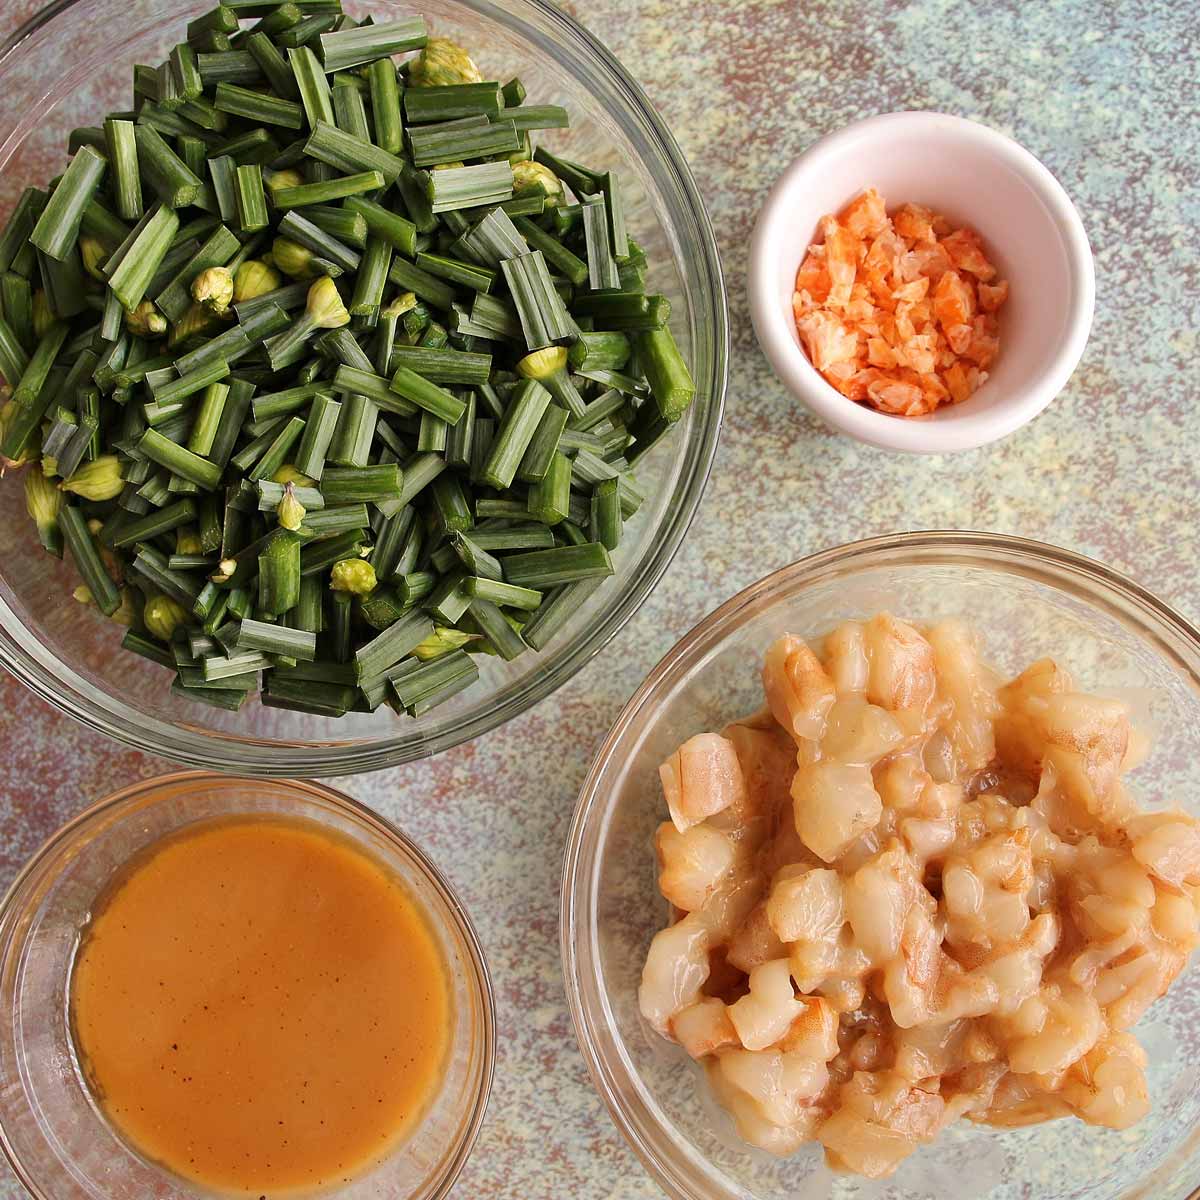
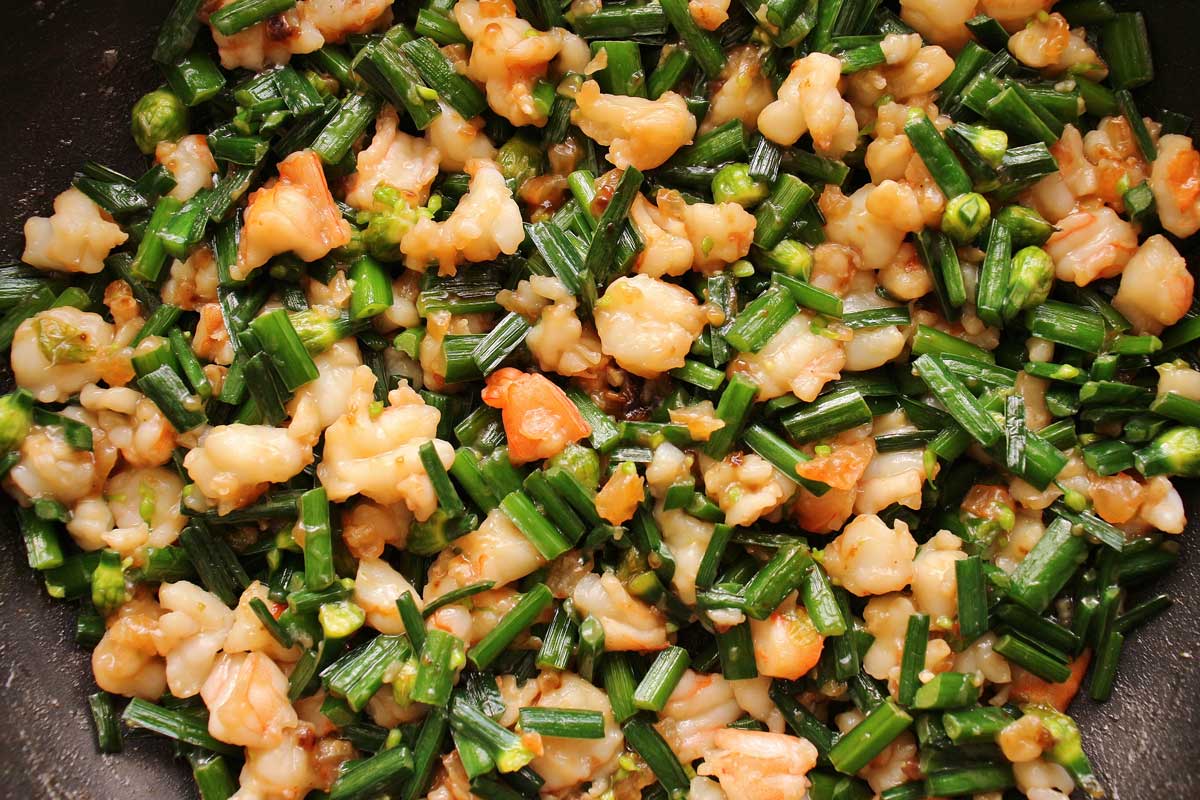
Heat oil in a medium skillet over medium-high heat. Add chopped dried shrimp and cook until fragrant. Then add ½-inch pieces of Chinese chives and continue cooking for another minute. Add the raw shrimp and cook until they have just turned orange.
Give the seasoning sauce a stir and add to the skillet. Cook until the mixture thickens and coheres. Transfer the shrimp and chive dumpling filling to a bowl and set aside to cool completely.
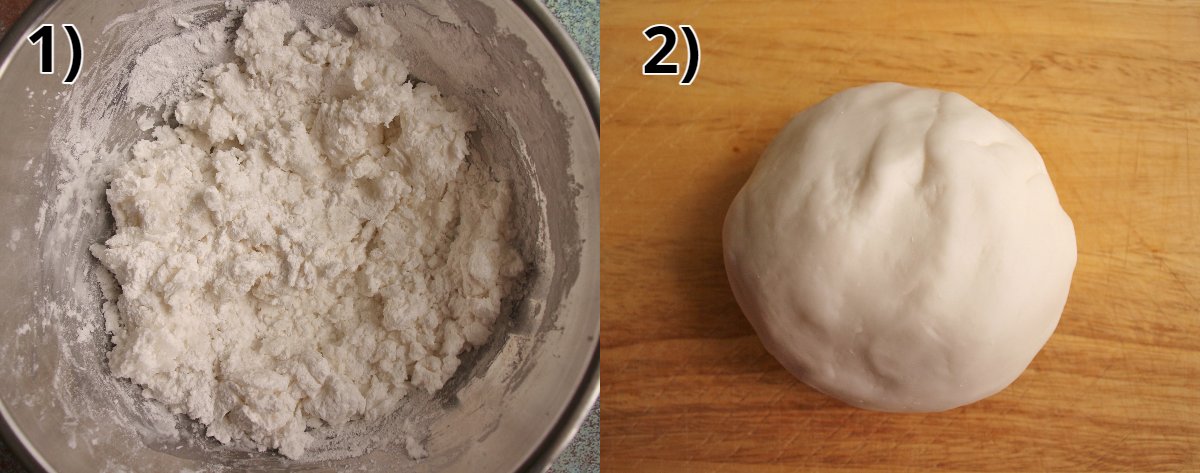
Next, make the dough. In a bowl combine wheat starch, tapioca starch, and salt. Make a well in the center and pour in some just-boiled water. Use a spoon to stir the ingredients together (PHOTO 1).
Once the water has been mostly incorporated, stir in the oil. Press the ingredients together into a rough ball. Knead until the dough is smooth and resembling Play-Doh in texture (PHOTO 2).
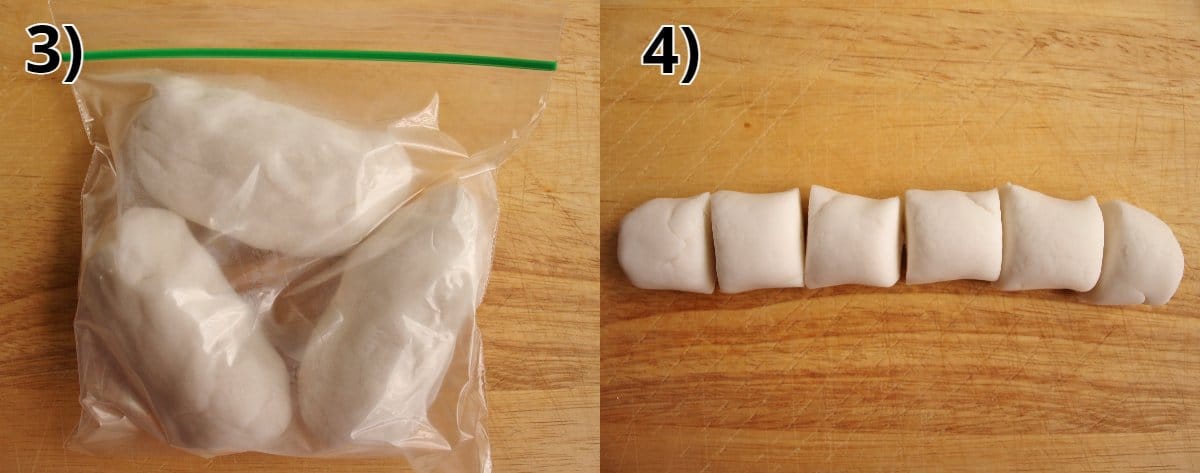
Cut the dough into 3 equal pieces and put them into a zip-top plastic bag and seal well (PHOTO 3). Set aside for 5 minutes to rest before using. Then, working with 1 piece of dough at a time, roll it into a chubby 6-inch log, and cut into 6 equal pieces (PHOTO 4).
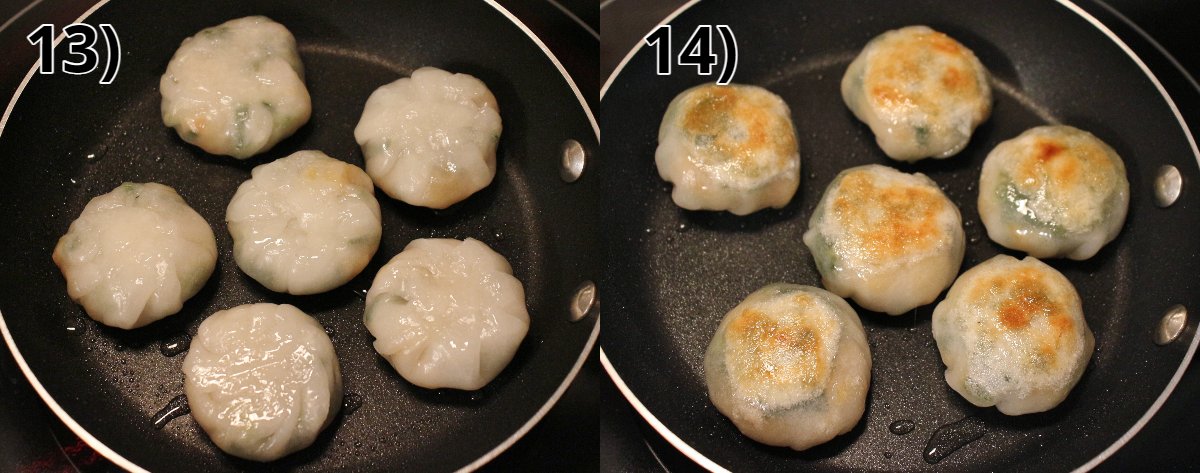
Cut the sides of a zip-top bag, leaving the far side connected so it opens like a book. To prevent drying and sticking, dab your finger in some canola oil and rub a tiny bit on each of the ends of the dough pieces, pressing each one into a ¼-inch-thick disk as you work (PHOTO 5).
Place a disk inside the cut zip-top bag and apply moderate pressure with a tortilla press, the flat side of a cleaver, or the bottom of a skillet (PHOTO 6).
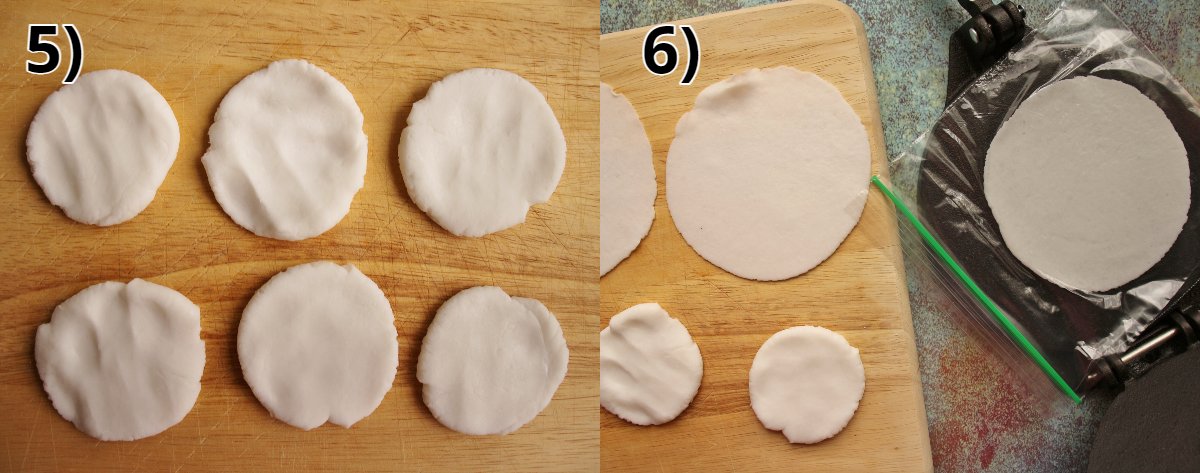
To assemble a dumpling, hold a wrapper in a slightly cupped hand. Use a spoon to center a heaping tablespoon of filling in the wrapper. Then fold, pleat, and press to enclose the filling (PHOTOS 7-8).
It helps to use your thumb to hold the filling in place as you pleat around it with your other hand. After pinching the opening closed, twist off any excess dough and discard (PHOTOS 9-10).
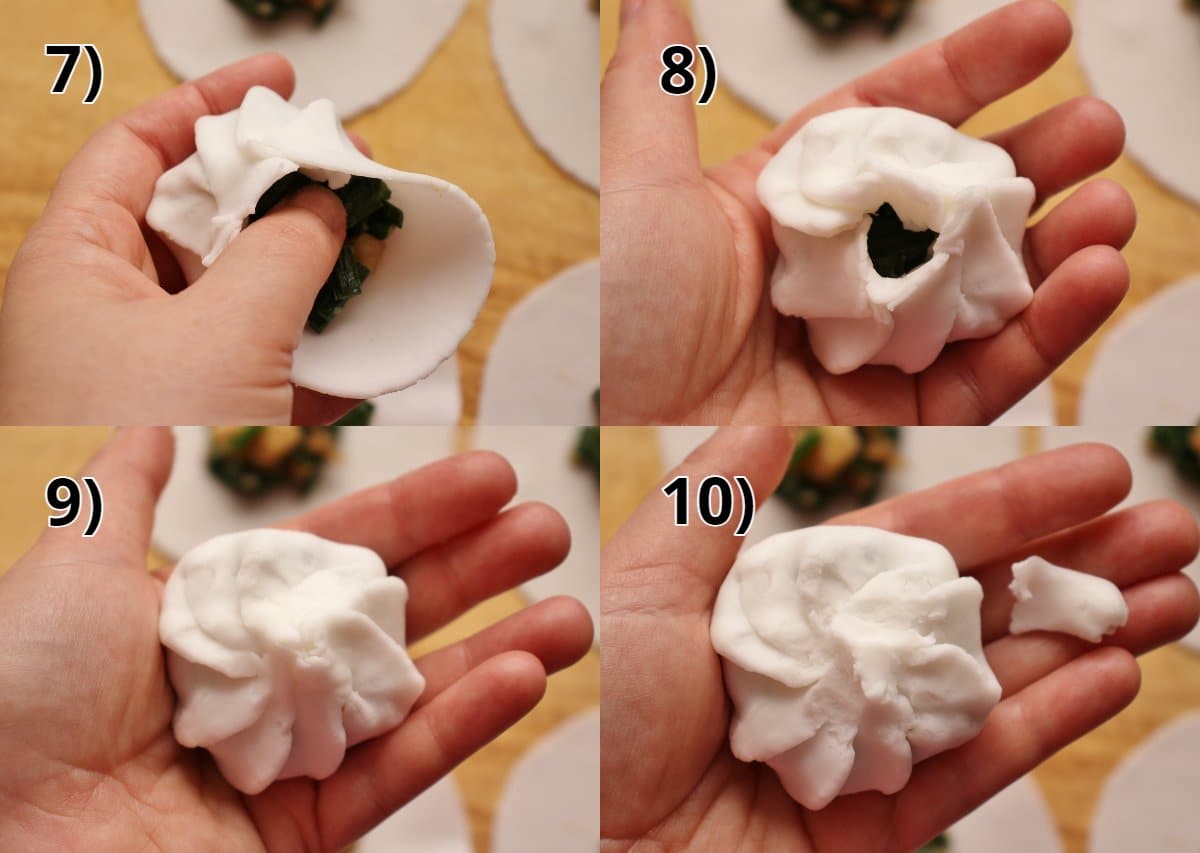
Set the finished shrimp and chive dumpling closed side down in a prepared steamer tray (PHOTO 11). Repeat with the remaining dough and filling.
Steam the dumplings over boiling water for about 7 minutes, or until they have puffed slightly and are glossy and translucent (PHOTO 12).
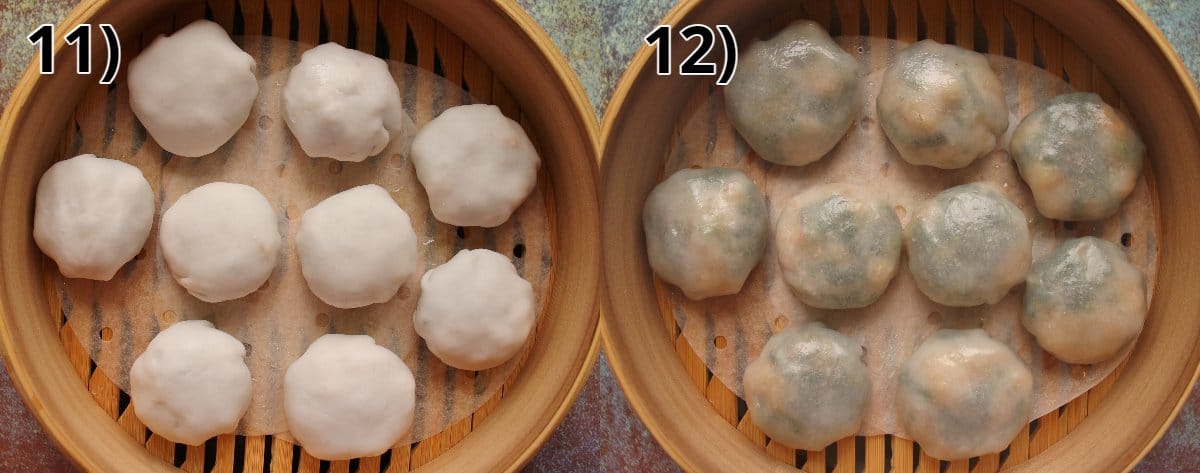
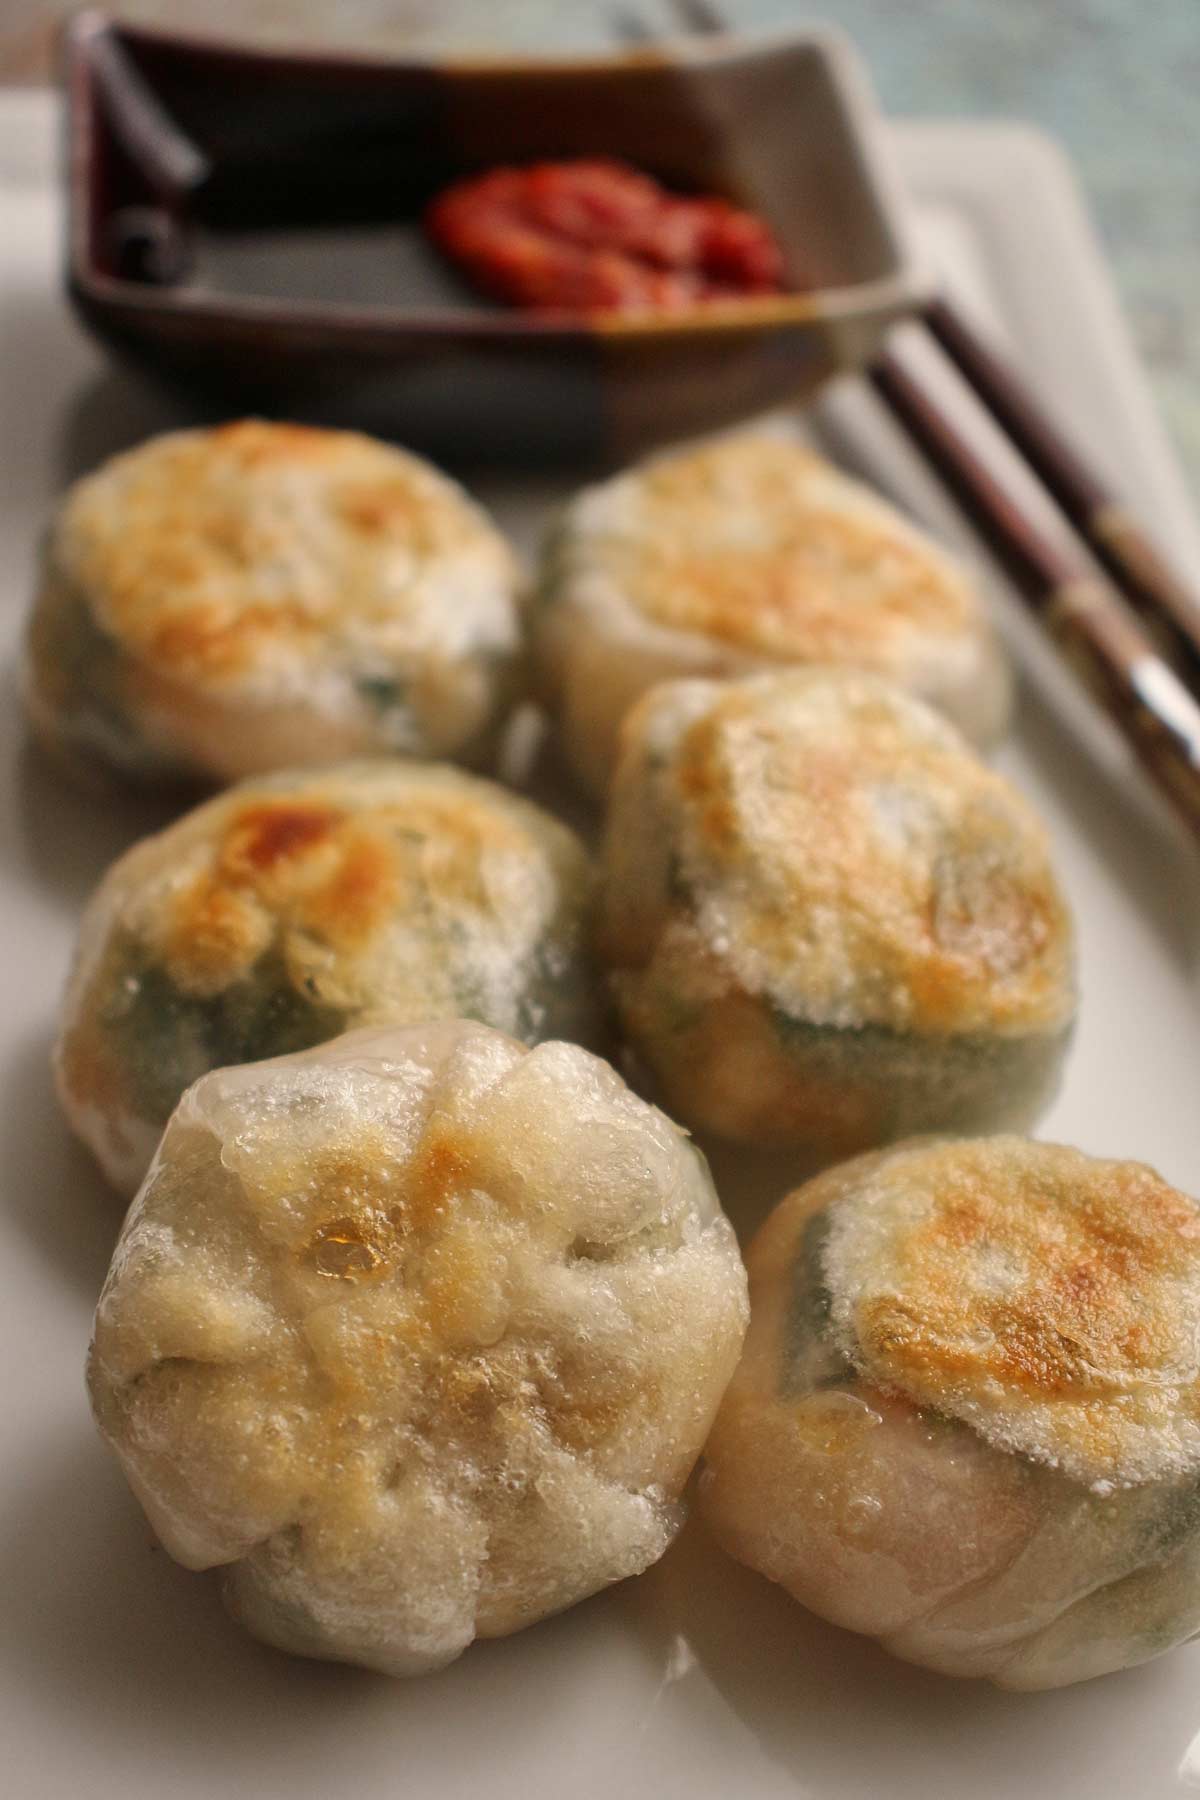
To pan-fry, first let the chive dumplings cool to room temperature. Heat a skillet over medium-high heat and oil. When the oil is just about to smoke, add the dumplings, smooth side down (PHOTO 13).
Fry for about 3 minutes, or until crisp and golden brown. Flip each over to crisp the sealed (pleated) side for about 2 minutes (PHOTO 14).
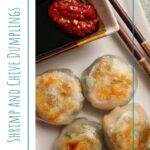
Serve with soy sauce and chile garlic sauce for dipping. Though I've never seen them served with the chile garlic sauce in dim sum restaurants, I have enjoyed using the combination at home. I highly recommend including it in your dipping sauce for these scrumptious shrimp and chive dumplings!
Please scroll to the bottom of the post for the full recipe (in a printable recipe card) including ingredient amounts and detailed instructions.
Expert tips and FAQ
These dumplings MUST be cooked before refrigerating or freezing. Plan on steaming all the dumplings you make even if you aren't going to eat them right away. You cannot refrigerate or freeze them in their raw state.
To freeze steamed dumplings, arrange in a single layer on a tray and freeze until solid. Then transfer frozen dumplings to a zip-top freezer bag and freeze for up to 1 month.
Thaw frozen Chinese chive dumplings in the refrigerator, making sure you cover them so they don't dry out. Then re-steam them for 3 to 5 minutes in a steamer basket to refresh them to their earlier state. Then pan-fry them as directed.
Freeze bags of wheat starch and tapioca starch for freshness and longevity.
Wheat starch dough is actually easier to work with and more forgiving than flour-based dumpling wrappers. Because the wrappers are made by pressing the dough flat rather than rolling them out, a lot less elbow grease is required to form a batch of wrappers. If a dumpling skin breaks, dab a tiny bit of oil on the area and try smoothing out and patching up the wrapper.
Because these traditional dumplings feature wheat starch wrappers instead of flour wrappers, I would not recommend swapping out the wrappers for store-bought if you want to obtain the authentic texture and look of these translucent dumplings. With that said the filling would still be delicious in any other type of wrapper.
Other recipes you may like
- Har Gow (Steamed Shrimp Dumplings)
- Fish Dumplings
- Pork and Chive Dumplings
- Steamed Pearl Balls
- Edamame Dumplings
- Pea Shoots and Leek Dumplings
- Chicken and Mushroom Siu Mai
- Char Siu Sou (Chinese Roast Pork Pastries)
- Browse all Dumpling Recipes
Tried this recipe? Please leave a star ⭐️⭐️⭐️⭐️⭐️ rating in the recipe card below and/or a review in the comments section further down the page. You can also follow me on social media on Facebook, Instagram, and Pinterest!
Chinese Chive Dumplings (Jiu Cai Jiao)
Ingredients
Filling:
- ½ teaspoon soy sauce (I prefer low-sodium)
- 1 teaspoon Shaoxing rice wine or dry sherry
- 3 teaspoons cornstarch
- ⅓ pound (5 ⅓ ounces) fresh shrimp peeled, deveined, and cut into ¼-inch pieces (4 ½ ounces net weight)
- ½ teaspoon sugar
- 2 pinches of white or black pepper
- 2 teaspoons oyster sauce
- ½ teaspoon toasted sesame oil
- 2 tablespoons water
- 1 tablespoon canola or vegetable oil (or other neutral tasting oil)
- 1 tablespoon finely chopped dried shrimp (optional)
- 6 ounces Chinese chives aka garlic chives, trimmed of thicker bottom portion, cut into ½-inch lengths (about 1 ¾ cups)
- Salt (optional)
Wheat Starch Dough:
- 4 ½ ounces (1 cup) wheat starch
- 2 ¼ ounces (½ cup) tapioca starch
- ⅛ teaspoon kosher salt
- About 1 cup just-boiled water (let boiled water cool for 30 seconds before measuring and using)
- 4 teaspoons canola oil
To Finish:
- Canola or vegetable oil for pan-frying
- Soy sauce, for dipping
- Chile garlic sauce homemade or store-bought (optional)
Instructions
Filling:
- Combine the soy sauce, rice wine, and 1 teaspoon of the cornstarch in a bowl, stirring to dissolve the cornstarch. Add the raw shrimp and stir to coat well. Set aside. In another bowl, create a seasoning sauce by combining the remaining 2 teaspoons cornstarch, sugar, pepper, oyster sauce, sesame oil, and water. Set aside.
- Heat the oil in a medium skillet over medium-high heat. Add the dried shrimp and cook stirring constantly, for about 30 seconds, or until fragrant. Add the Chinese chives and keep stirring and cooking for 1 minute, or until the chives have wilted slightly. Add the raw shrimp and cook for 1 minute, or until they have just turned orange.
- Make a well in the center, give the seasoning sauce a stir, and add to the skillet. Stir and cook for about 45 seconds, or until the mixture thickens and comes together. Taste and, if needed, add salt. Transfer to a bowl and set aside to cool completely. Make the filling up to 1 day ahead of time and refrigerate it until needed. You should have about 1 ¼ cups.
Dough:
- In a bowl combine the wheat starch, tapioca starch, and salt. Make a well in the center and pour in about 14 tablespoons of the water (to measure easily, this is exactly halfway between ¾ cup and 1 cup in a liquid measuring cup). Use a sturdy metal spoon to stir the ingredients together. The dough will look translucent at first and then become mottled, whitish, and lumpy.
- Once the water has been roughly incorporated, add the oil. Stir at first with the spoon, and later with your hands (beware the mixture will be relatively hot) to work in the oil. If the dough looks dry, add a little more water. Aim for a medium firm texture, not a soft and mushy one. Add wheat starch by the tablespoon if you add too much water. Press the ingredients together into a rough ball that feels a bit bouncy.
- Knead the dough either in the bowl if it's large enough or on an unfloured surface for 1 to 2 minutes, until snowy white, smooth and resembling Play-Doh in texture. When you squeeze on it, it should not crack. If it cracks, very lightly oil one hand and knead it into the dough to increase the dough's suppleness.
- Cut the dough into 3 equal pieces (weigh them with a digital scale if you have one for accuracy) and put them into a zip-top plastic bag and seal well. Set aside for 5 minutes to rest before using. This dough can be made up to 6 hours in advance and left at room temperature in the zip-top bag.
Assembly and Cooking:
- Before assembling the dumplings, line steamer trays and baking sheets with parchment paper (perforated preferred for steamer trays), then lightly oil the paper with oil spray.
- Cut the sides of a zip-top bag, leaving the far side connected so it opens like a book. Smear a little oil on the inside of the cut zip-top bag. Working with 1 piece of dough at a time, roll it on an unfloured work surface into a chubby 6-inch log, and cut into 6 equal pieces. To prevent drying and sticking, dab your finger in some neutral oil and rub a tiny bit on each of the ends of the dough pieces, pressing each into a ¼-inch-thick disk as you go.
- Place a disk inside the cut zip-top bag (inside the "book"). Apply moderate pressure with a tortilla press, the flat side of a cleaver, or the bottom of skillet. You maybe have to press more than once to arrive at the desired size (about 4 inches in diameter). Unpeel the plastic and set the slightly shiny wrapper aside. Repeat with the remaining prepped dough pieces. There should be no need to re-oil the plastic between pressings. To prevent the dough from drying, assemble a batch of dumplings before forming more wrappers from another portion of dough.
- To assemble a dumpling, hold a wrapper in a slightly cupped hand. Use a spoon or small cookie scoop to center a heaping tablespoon of filling atop the wrapper, flattening the filling a bit and keeping about ½ to ¾ inch of wrapper clear on all sides. Then fold, pleat, and press to enclose the filling. Try to make large pleats so that the dumpling is not too thick on one side. After pinching the opening closed, twist off any excess dough and discard. If the skin breaks, dab a tiny bit of oil on the area and try smoothing out and patching up the wrapper.
- Set the finished dumpling closed side down in a prepared steamer tray. Assemble more dumplings from the remaining wrappers before working on the next batch of dough. Space them about ½ inch apart (if using a metal steamer tray, keep the dumplings 1 inch away from the edge where condensation will collect). Place overflow dumplings on the baking sheet with a good ½ inch between each and cover with plastic wrap to prevent them from drying out as you go. Once assembled the dumplings should be cooked as soon as possible, because they cannot be refrigerated uncooked.
- Steam the dumplings over boiling water for about 7 minutes, or until they have puffed slightly and are glossy and translucent (they will become more translucent as they begin to cool as well). Remove each tray and place it atop a serving plate if serving as steamed dumplings.
- To pan-fry, remove the trays and let the dumplings cool to room temperature. They can sit for up to 2 hours. Heat a nonstick skillet over medium-high heat and add a bit of oil just to lightly coat the surface (1 tablespoon or so depending on the dimensions of the pan).
- When the oil is just about to smoke, add the dumplings, smooth side down, in batches if necessary. Fry for about 3 minutes, or until crisp and barely golden brown. Flip over to crisp the sealed (pleated) side for about 2 minutes. Reduce the heat if the oil smokes. There is no need to brown the bottom as it will not show. Transfer to a platter.
- Serve hot or warm with soy sauce and chile garlic sauce for guests to create their own dipping sauce.
Notes
- These dumplings MUST be cooked before refrigerating or freezing. Plan on steaming all the dumplings you make even if you aren't going to eat them right away. You cannot refrigerate or freeze them in their raw state.
- To freeze steamed dumplings, arrange in a single layer on a tray and freeze until solid. Then transfer frozen dumplings to a zip-top freezer bag and freeze for up to 1 month.
- Gently thaw frozen Chinese chive dumplings in the refrigerator until completely thawed. Make sure you cover them so they don't dry out. Then re-steam them for 3 to 5 minutes in a steamer basket to refresh them to their earlier state. Once they are glossy and translucent like their predecessors, pan-fry them as directed.
- Because these traditional dumplings feature wheat starch wrappers instead of flour wrappers, I would not recommend swapping out the wrappers for store-bought if you want to obtain the authentic texture and look of these translucent dumplings. With that said the filling would still be delicious in any other type of wrapper.
- I once broke the handle off a wooden spoon mixing this type of dough, so instead I generally recommend using a sturdy metal spoon until you are ready to dig in with your hands.
- Freeze bags of wheat starch and tapioca starch for freshness and longevity.
- Adapted from Asian Dumplings
Nutrition
*All nutritional information is based on third-party calculations and should be considered estimates. Actual nutritional content will vary with brands used, measuring methods, portion sizes and more.*


J Martin says
A very, very good recipe. Any person who craves savory, fragrant, juicy dumplings (jiaozi) will certainly just love them using pork / Chinese chive stuffing (zhurou jiucai jiaozi). The recipe here, which uses dried shrimp (xia mi) but which adapts perfectly to pork (zhurou), is certainly as authentic as it is possible to be authentic and the flavor highlights the best flavor - which in my estimation is the chive (jiucai). For dumplings, one can easily use store-bought wrappers to significantly ease preparation time. American ramps can be substituted, but ramps are much less flavorsome than juicai. Anyone visiting Taiwan will find wonderful jiucai jiaozi stalls in every nightmarket. If you are _really_ lucky, dumpling makers will be close to the stinky beancurd (chou doufu) sellers. Just follow your nose.
Ris says
This turned out wonderfully as written, and the instruction is excellent. Do not hesitate to make this recipe exactly as-is. It was exciting because I've never made this kind of dough. Thank you so much!
I weighed out the starches and used the dried shrimp, which I would definitely recommend. I love chives and I found the filling to be savory and delicious, with just the right amount of shrimp to add something different, and a nice thickened consistency. I chopped my shrimp to about 1/4 in. as stated in the directions, which seemed a little smaller than the pictures, as I wanted smaller pieces in the dumplings.
I will be making these often and checking out the rest of the blog! <3
Judy Chiu says
Can I use potsticker wrapper than wonton wrapper since I
will steam & pan fry the chives? Thank you.
Victoria says
Hi Judy. Yes, you could certainly use store-bought wrappers with this filling to yield delicious dumplings, but please bear in mind the final product will be very different in flavor and texture from the dim sum classic.
Lillian says
Hi, if I'm using pre-made wonton wrappers do I still need to cook the dumplings before freezing (in addition to cooking the shrimp / chive mix)?
Victoria says
No you don’t. The cooking before freezing is necessary for the specific type of homemade dough in the recipe. If you are using other wrappers you don’t have to do that.
RR says
The good - loved the dough and it was so easy! I tend to measure EVERYTHING because it is so much easier. I used 207 g of water (measured into a cup before pouring into the starch) and 18.5 g of oil measured directly into the dough.
The bad/confusing - this is the only recipe I've ever seen that cooks the shrimp first. I tried it, and am not a fan. Even with the cornstarch mixture my filling isn't cohesive enough ... and is just a bit bland. Definitely ok, but you want it to be amazing when putting in this much effort! I might reduce the chive ratio by 25% or so and maybe pump it up the flavor somehow. I like the idea of wilting the chive before adding it to raw shrimp. Really think the raw shrimp helps bind the dumpling filling as it steams.
chinachef says
Hi, Victoria. I'm rating this five stars because twice I've made it, they come out beautifully. However, twice I've made it and the dough stayed gooey-soupy, not soft and pliable. I think the key is in the hot water. Do you pour boiling water into a cup and wait a few seconds before pouring it into the wheat starch-tapioca starch? Or do you wait a full minute? Or do you let the boiling water sit in the kettle for a few seconds or minutes and then pour?
Victoria says
To answer your question, I've done it both ways where I boil it, let it sit in the kettle or pot (whatever I have boiled it in) for maybe 30 seconds to 1 minute (I don't actually count the seconds but it's quite brief) and then pour into the measuring cup and use it right away in the dough. I've also done it where I boil it, pour it into the measuring cup and let it sit for a few seconds in there before using it. I haven't noticed any differences based on which vessel I give it a few seconds to cool in. I imagine maybe letting it sit for too long might be the problem? Many people boil the water and use it immediately, which works just fine too. If in doubt just boil it and use it right away. Also, just curious are you weighing the starches or measuring by volume? I always weigh them and wonder if measuring by volume might be impacting the results at all. Good luck!
chinachef says
Interesting, Victoria. When I halve the recipe, the volume method works. When I use the full recipe, the volume method fails. So you may have a point, measuring by weight when doing a full recipe may be what I need to do. Thank you.
Victoria says
You're welcome! I definitely think that might be it because cooling boiling water for 30 to 60 seconds extra shouldn't make such a big difference in how the starches absorb it (not to the degree you are describing). Good luck!