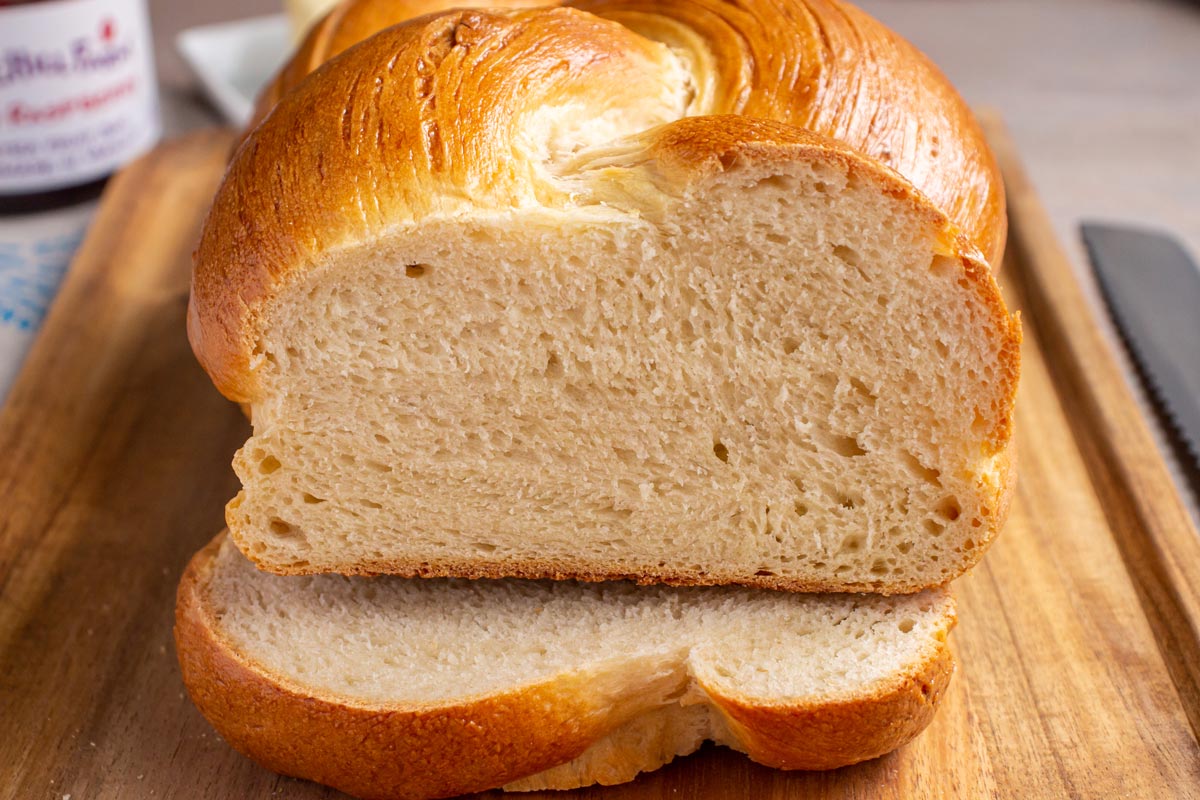
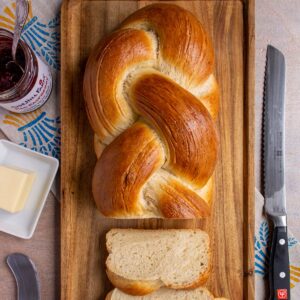
Zopf (aka Butterzopf) is a Swiss braided bread with a soft and spongy texture, perfect for a breakfast treat. It features a unique braiding technique, but is easy to make even for a less experienced bread baker!
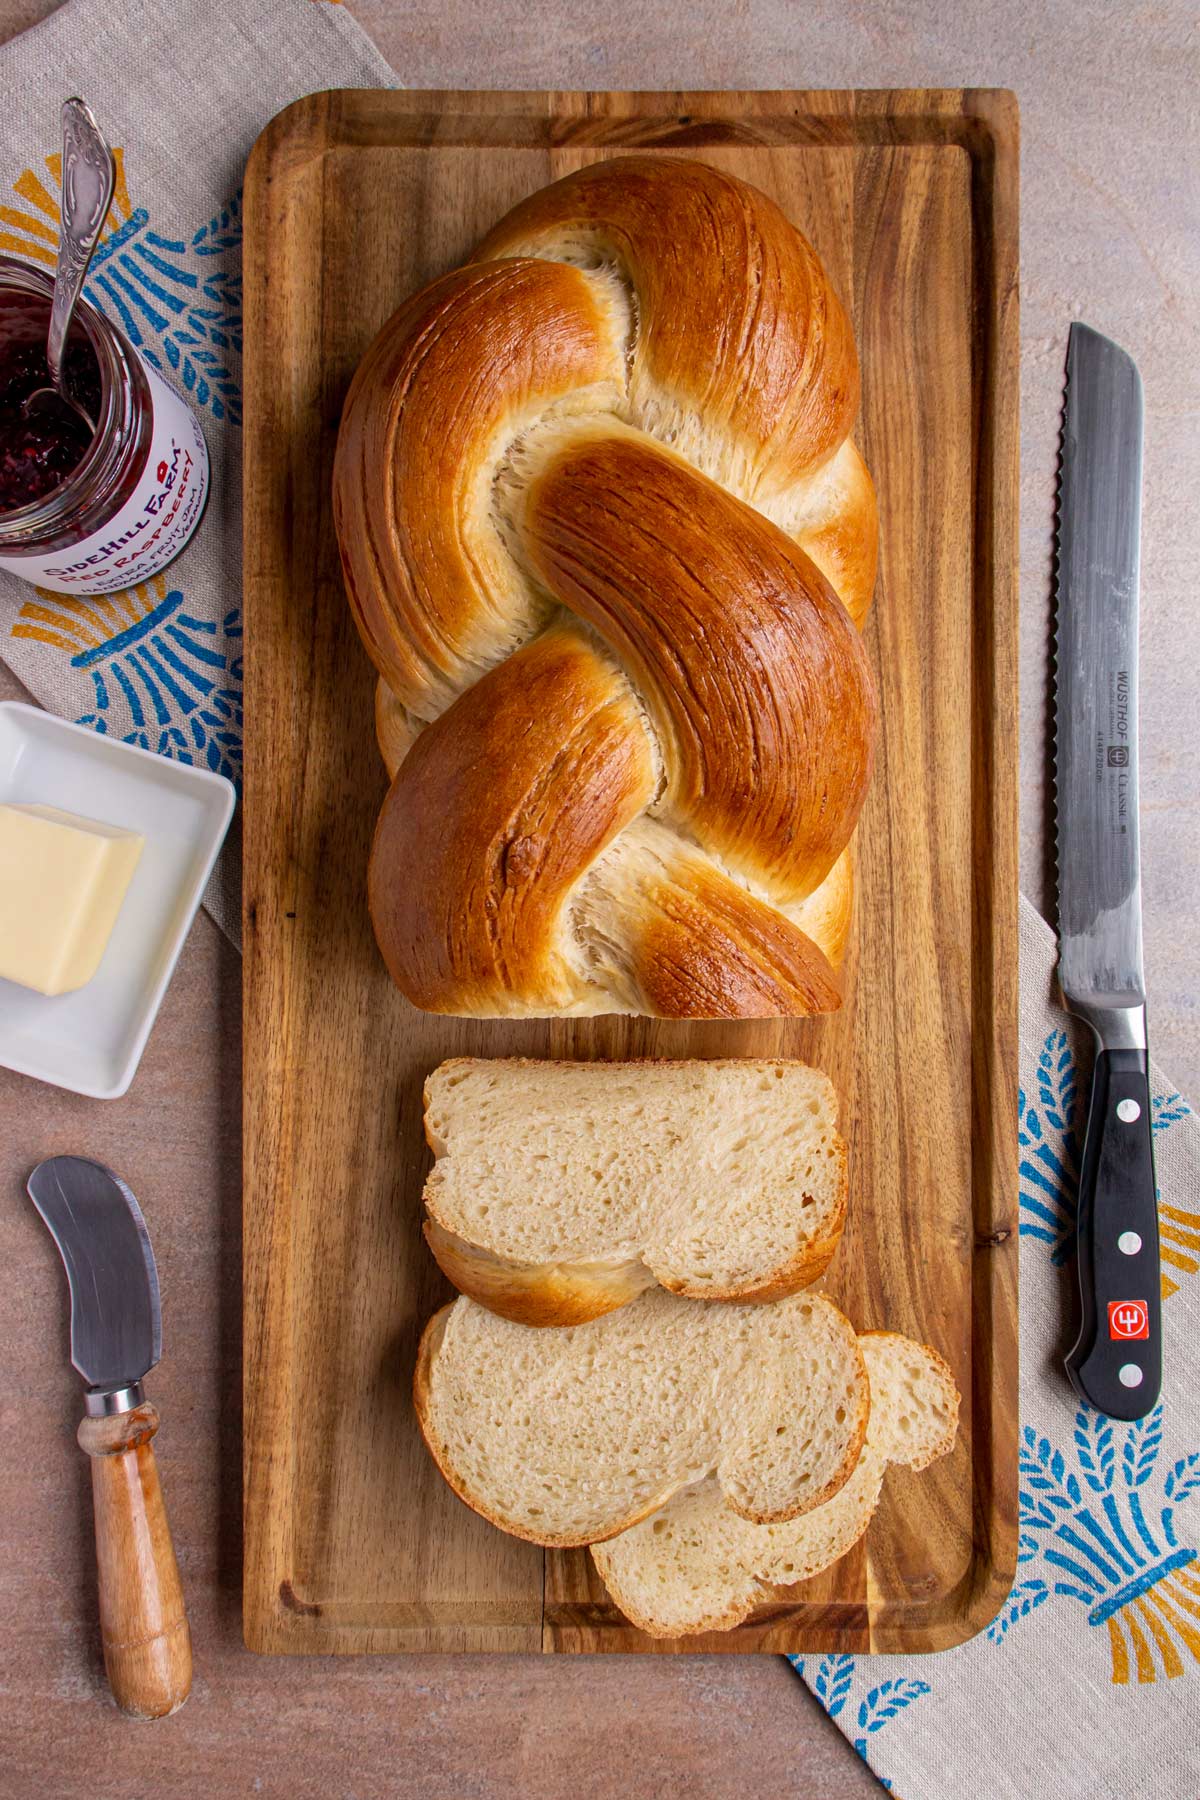
Zopf or Butterzopf is perhaps the most famous type of Swiss bread. It also goes by a few different names in different regions of Switzerland, such as Züpfe (in Bern), Tresse (French-speaking regions), and Treccia (Italian-speaking regions).
Zopf literally translates to “braid.” It's an enriched bread featuring the addition of milk and butter, and is shaped into a traditional braid.
It’s commonly considered a Sunday bread and is popular for breakfast on the weekends. It’s most typically baked in home kitchens and is less commonly sold in bakeries. In fact, the bakeries that make it don’t usually even sell it during the week, only dedicating their production to weekends.
Some bakeries which sell zopf actually make giant loaves and sell the bread by the meter! You can buy as little or as much as you’d like.
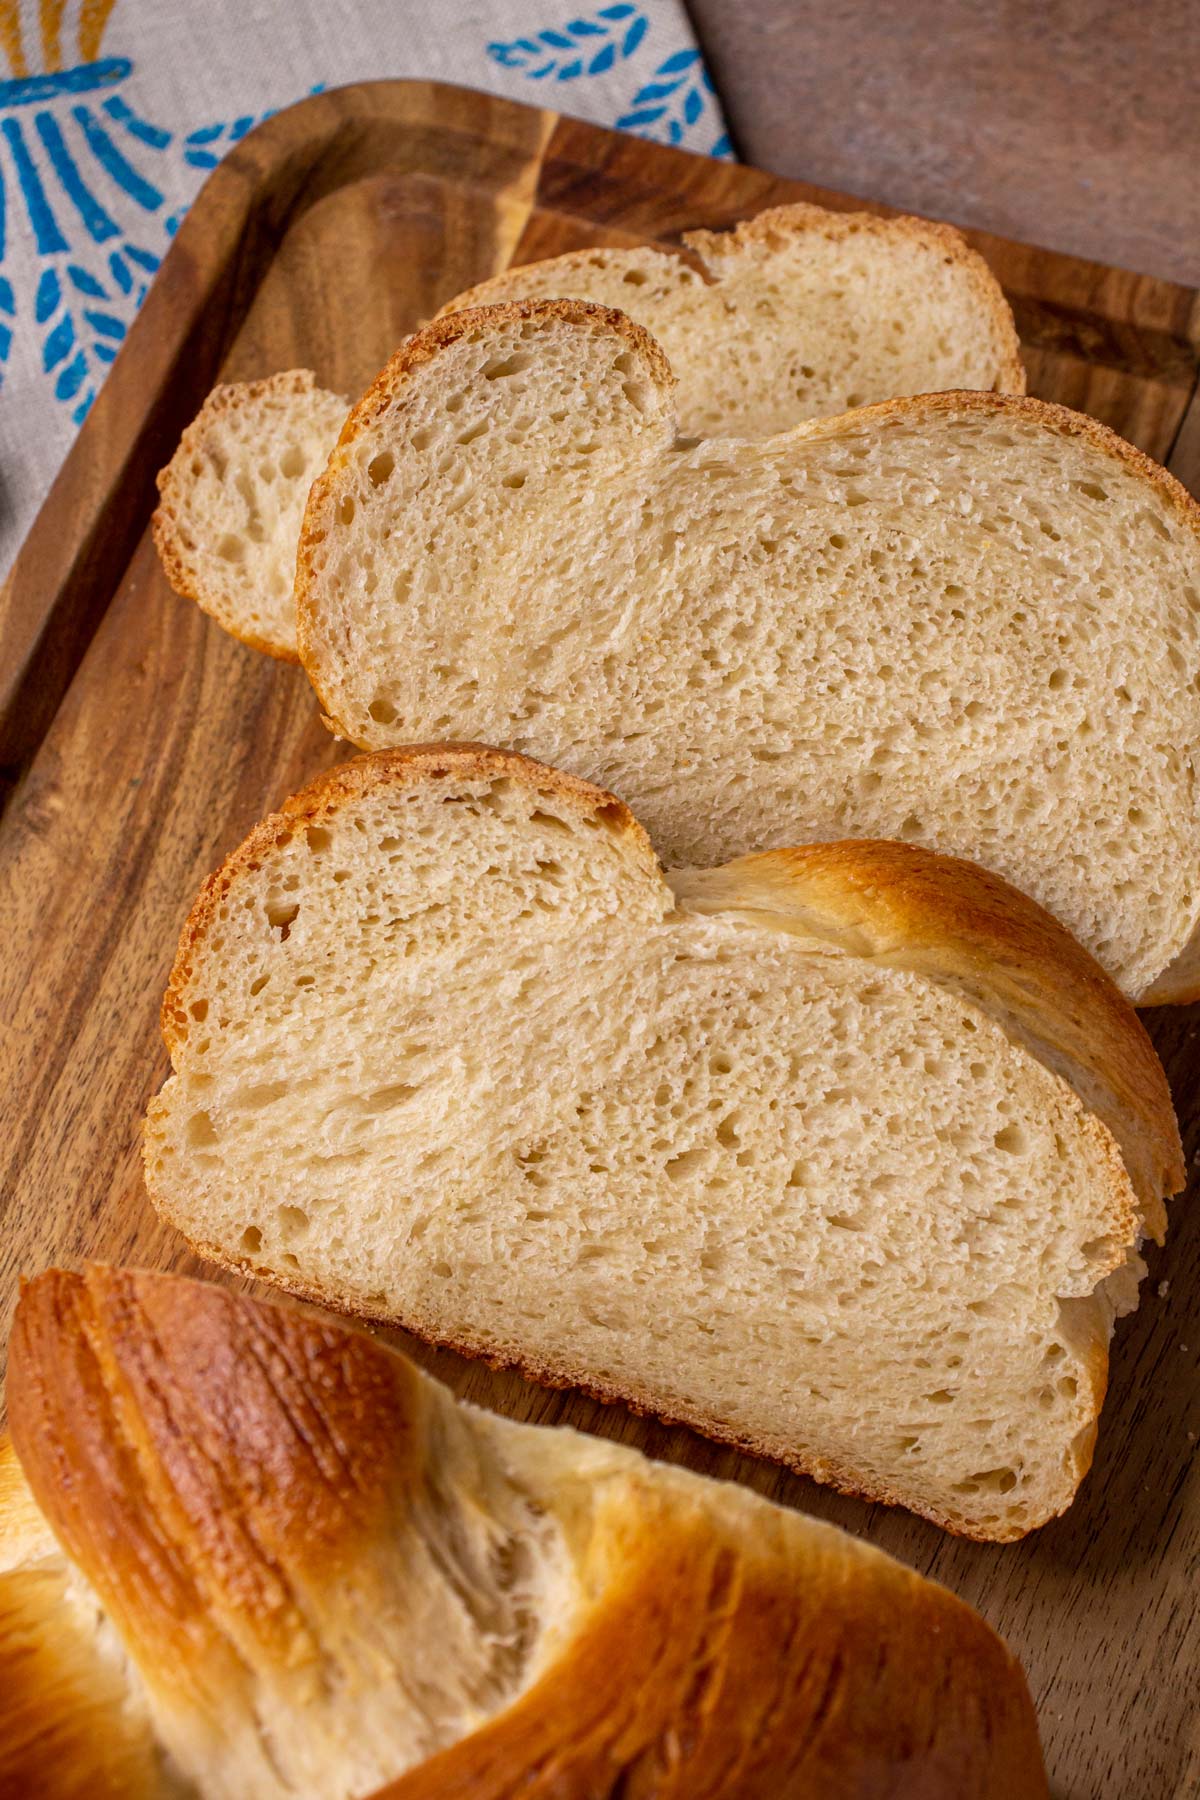
Butterzopf is believed to date back to the middle of the 15th century. At the time, widows would cut off their braided hair to bury with their late husbands. Later, they would bake zopf and bury the braided bread instead of their hair.
Although some might want to compare zopf with challah, there is a main difference between the two. While both enriched breads have a braided shape, challah is made with oil while zopf features butter, hence the name butterzopf.
Ingredient notes
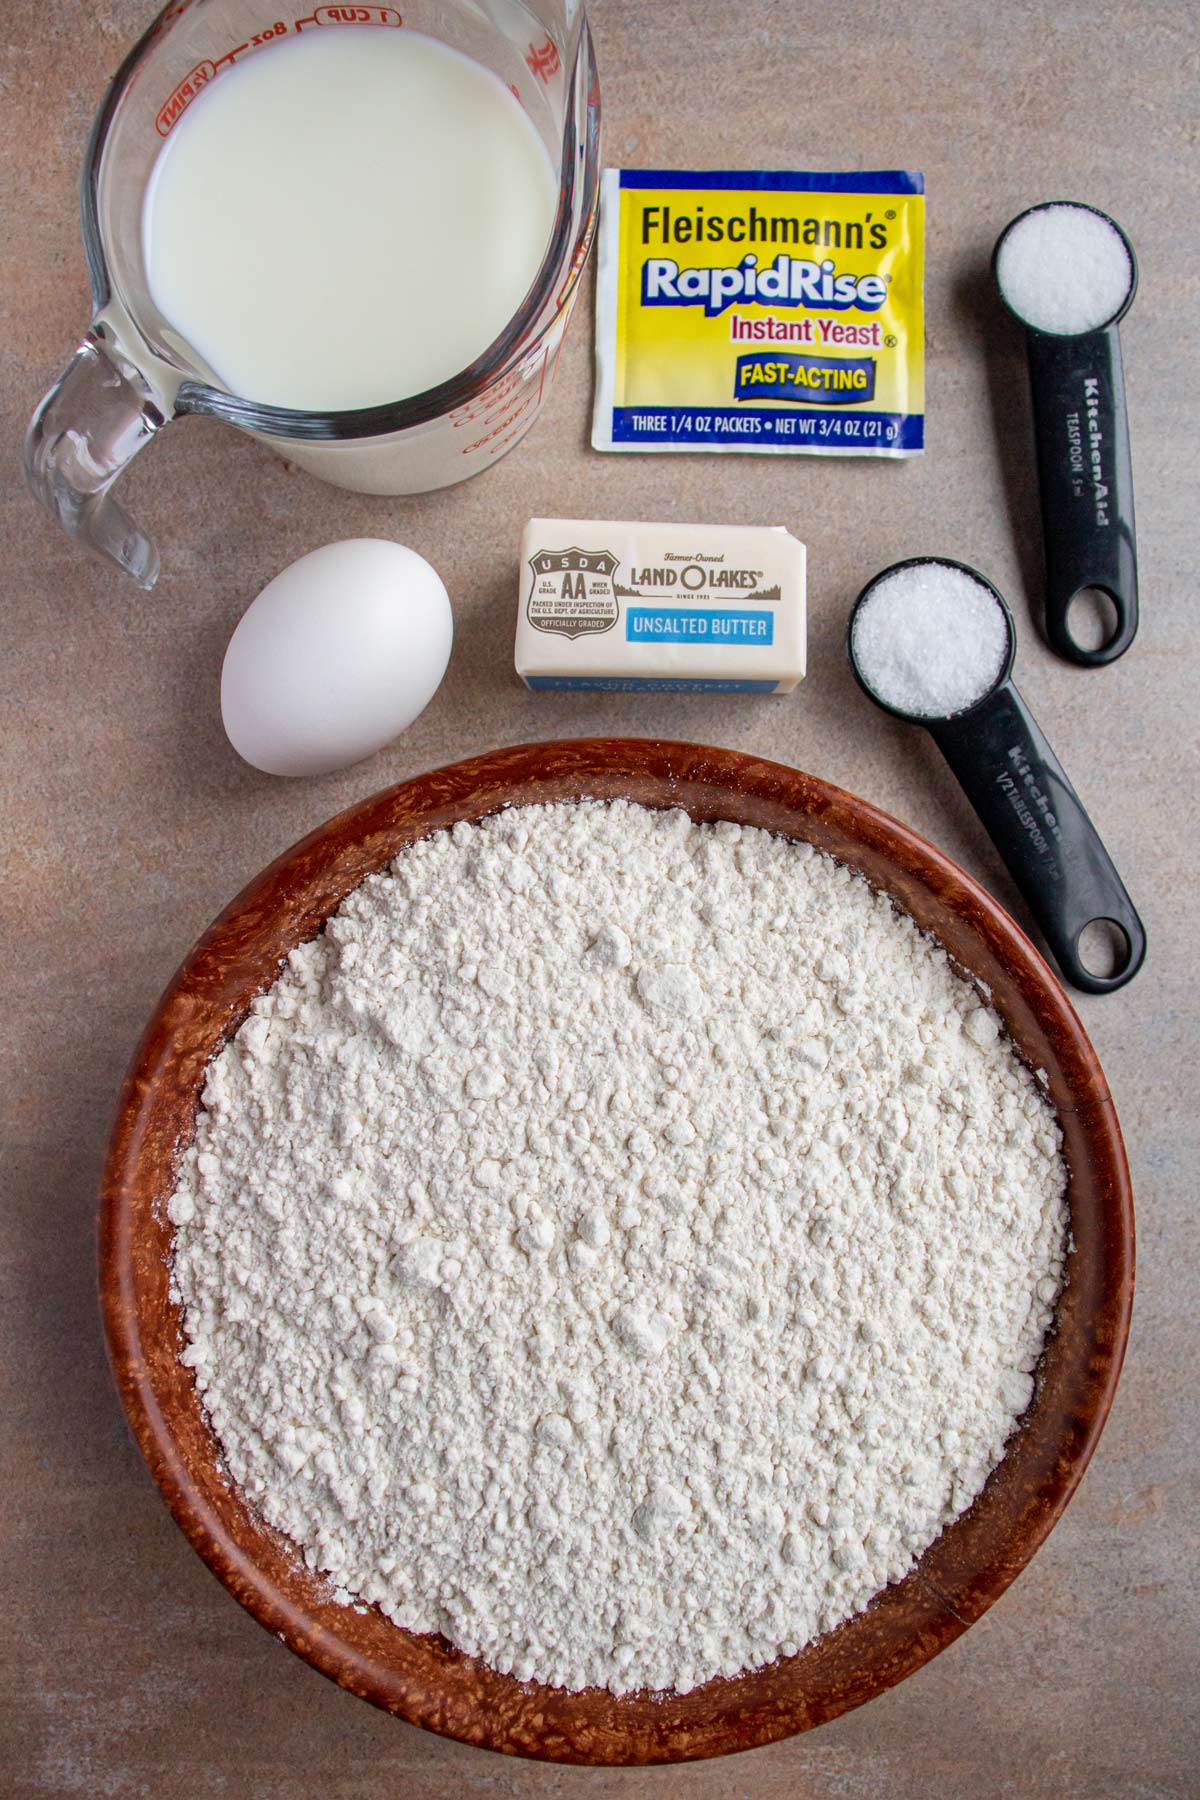
- Flour: Use plain, all-purpose flour for this butterzopf recipe. No need to use a higher-gluten bread flour here. You want the bread to have a soft and tender finish rather than a chewy one.
- Yeast: This recipe uses instant yeast, sometimes called rapid rise yeast. I have not tested it with different types of yeast, however here is a general substitution if using active dry yeast. First combine the active dry yeast with the lukewarm milk and allow it to bloom. After a few minutes once it dissolves and starts to get frothy, add it to the dry ingredients mixture. Proceed with the recipe as directed.
- Milk: You want to heat the milk to about 100°F to 110°F (38°C to 43°C). Using lukewarm milk instead of cold milk helps to activate the yeast, but if your milk is too hot it can actually kill the yeast and your dough won't rise.
- Butter: You can't make butterzopf without the butter! Make sure your butter is soft and at room temperature to ensure it blends easily into the dough.
How to make it
Combine flour, yeast, salt, and sugar in the bowl of an electric stand mixer fitted with the dough hook and stir on low just enough to mix.
Add warm milk and soft butter and mix on medium speed until combined. Continue to mix at medium speed for another 5 minutes until soft, smooth, and elastic. When you poke the dough softly with your index finger, it should bounce back. (Alternatively you can knead the dough by hand for 10 minutes until smooth and elastic.)
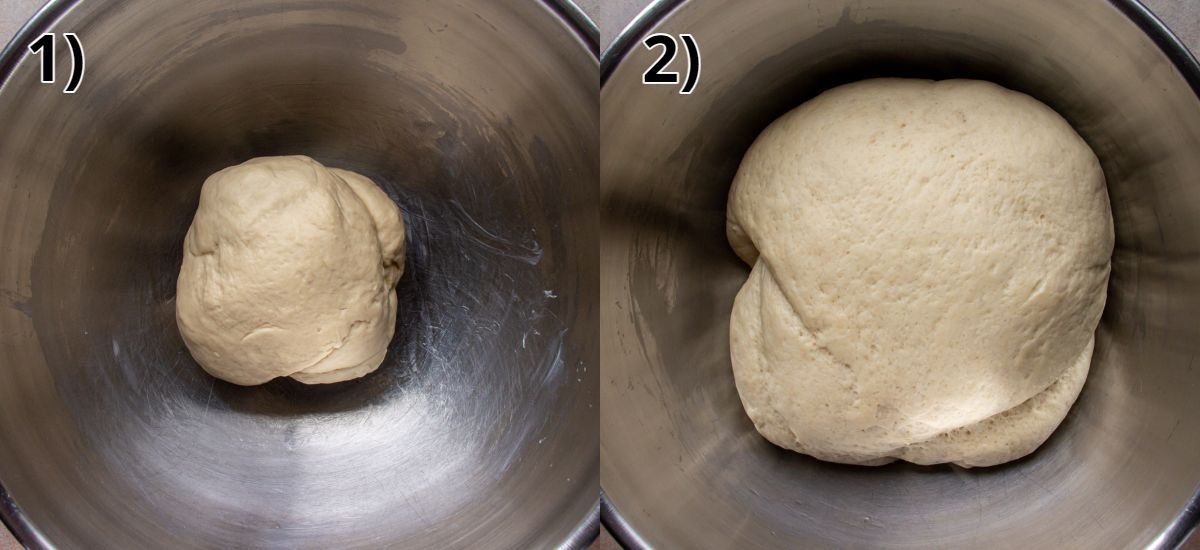
Lightly grease a large mixing bowl and transfer the dough to the bowl (PHOTO 1). Cover with plastic wrap or a clean tea towel, and set in a slightly warm, draft-free place to proof. Let the dough rise for about 1 to 1 ½ hours, or until doubled in size (PHOTO 2).
Punch the dough to deflate the air, then turn it out onto a lightly floured surface. Divide the dough into 2 equal pieces.
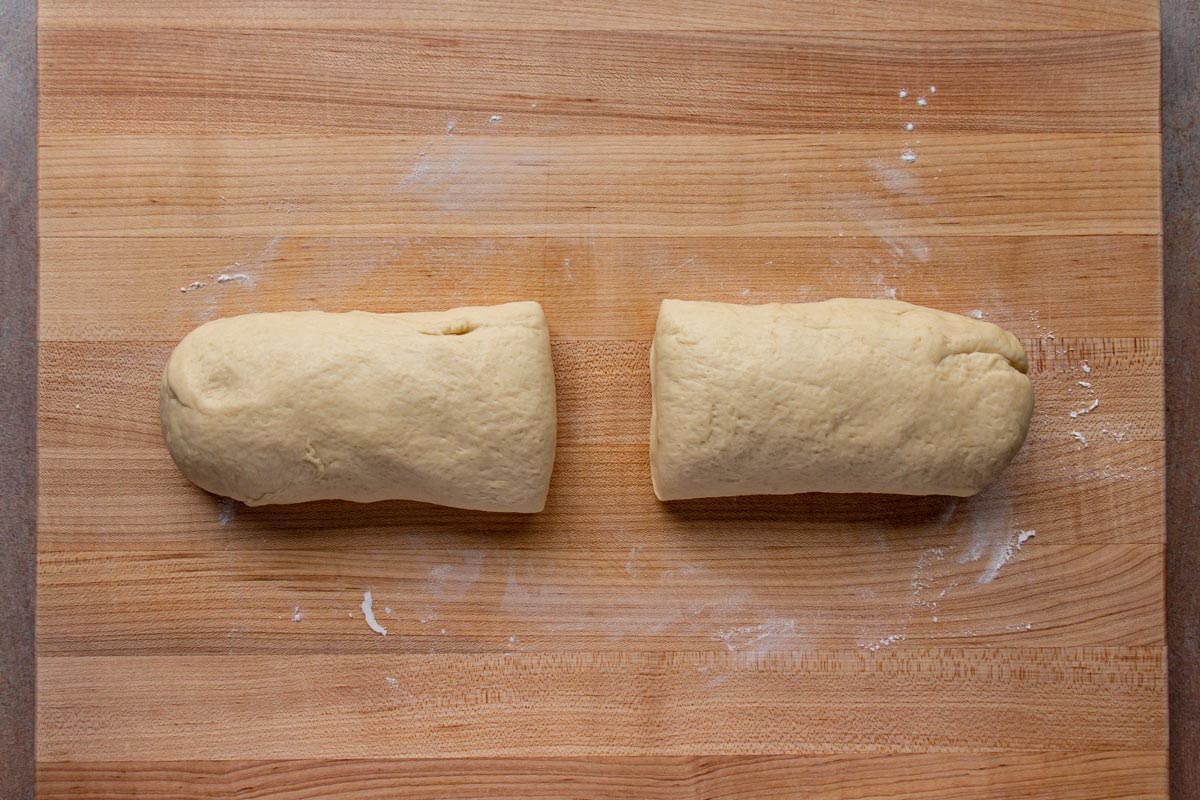
Roll each of the pieces into a long log, each approximately 2 feet long or longer if your workspace allows it.
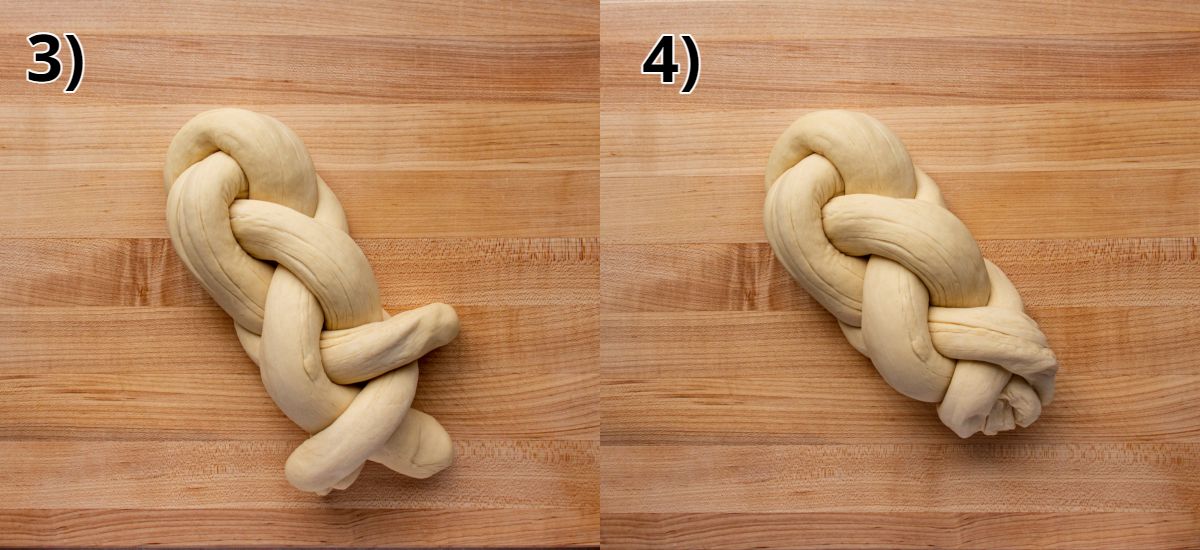
Place the 2 logs of dough overlapping each other so they make an X. Braid the strands of dough following the photo guide below.
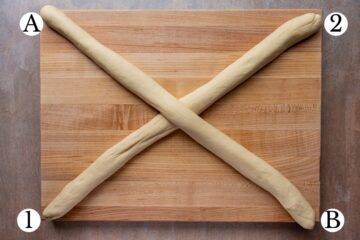
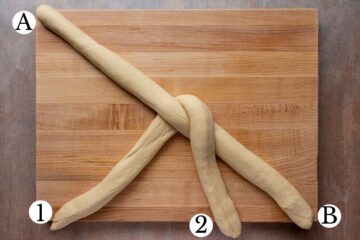
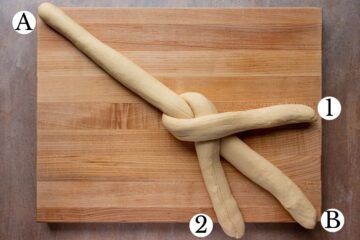
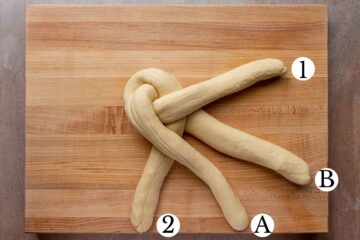
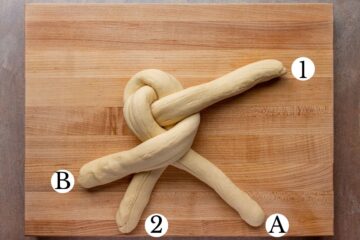
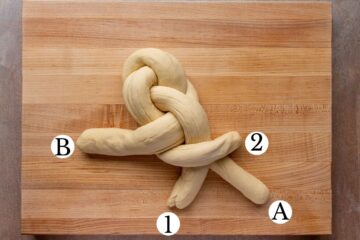
In the step-by-step images above, I show one half of the strand moving into place at a time, however in action, I find it easier to lift both ends at once (one with my left hand and one with my right) and crisscross them simultaneously. For the first crossing of the strands (ends 1 and 2), the left side goes over the right (1 goes over 2), and for the second crossing (ends a and b) the right side overlaps the left (b goes over a). Repeat, making sure to alternate left over right and right over left.
When you get to the end of the dough, do your best to finish the braid and tuck and pinch the ends of the dough together to seal the braid closed (PHOTOS 3-4).
Transfer the braided zopf to a parchment paper-lined baking sheet (PHOTO 5). Cover loosely with a clean tea towel and let it proof for another 30 minutes (PHOTO 6).
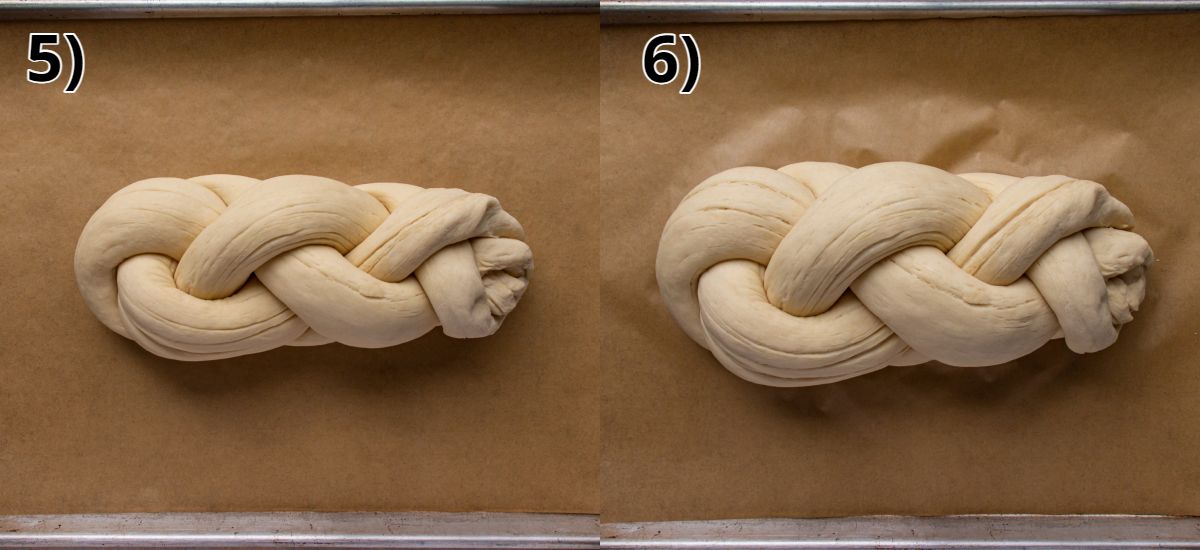
Meanwhile, preheat the oven to 425°F (220°C) with the oven rack in the center. Brush the proofed butterzopf evenly with egg wash (PHOTO 6). Bake for about 30 minutes or until the loaf is golden brown (PHOTO 7).
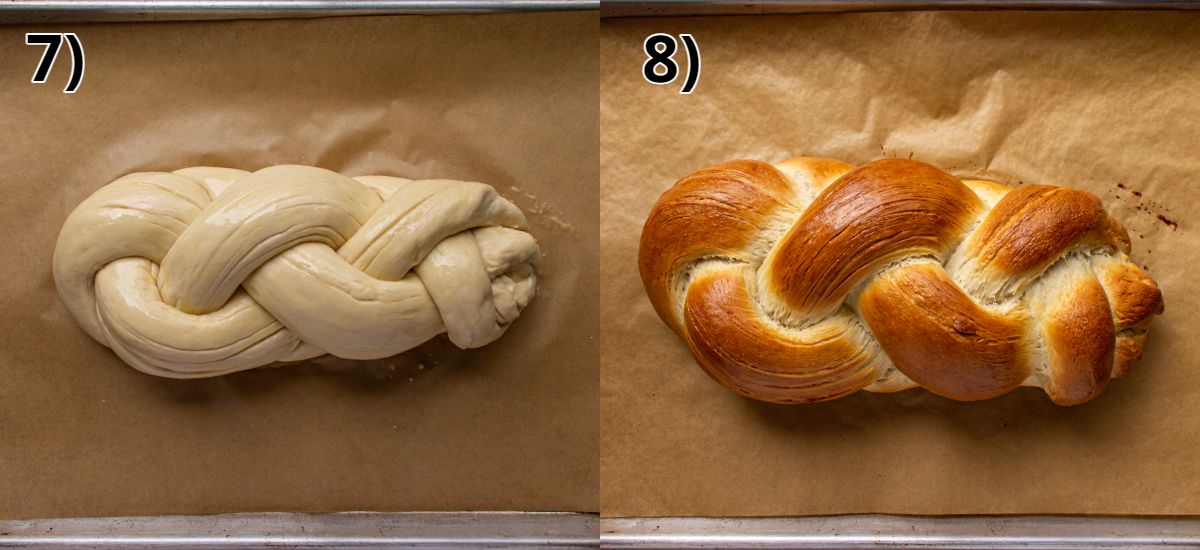
Remove from the oven to a wire rack and cool completely before slicing and serving.
Please scroll to the bottom of the post for the full recipe (in a printable recipe card) including ingredient amounts and detailed instructions.
Expert tips and FAQ
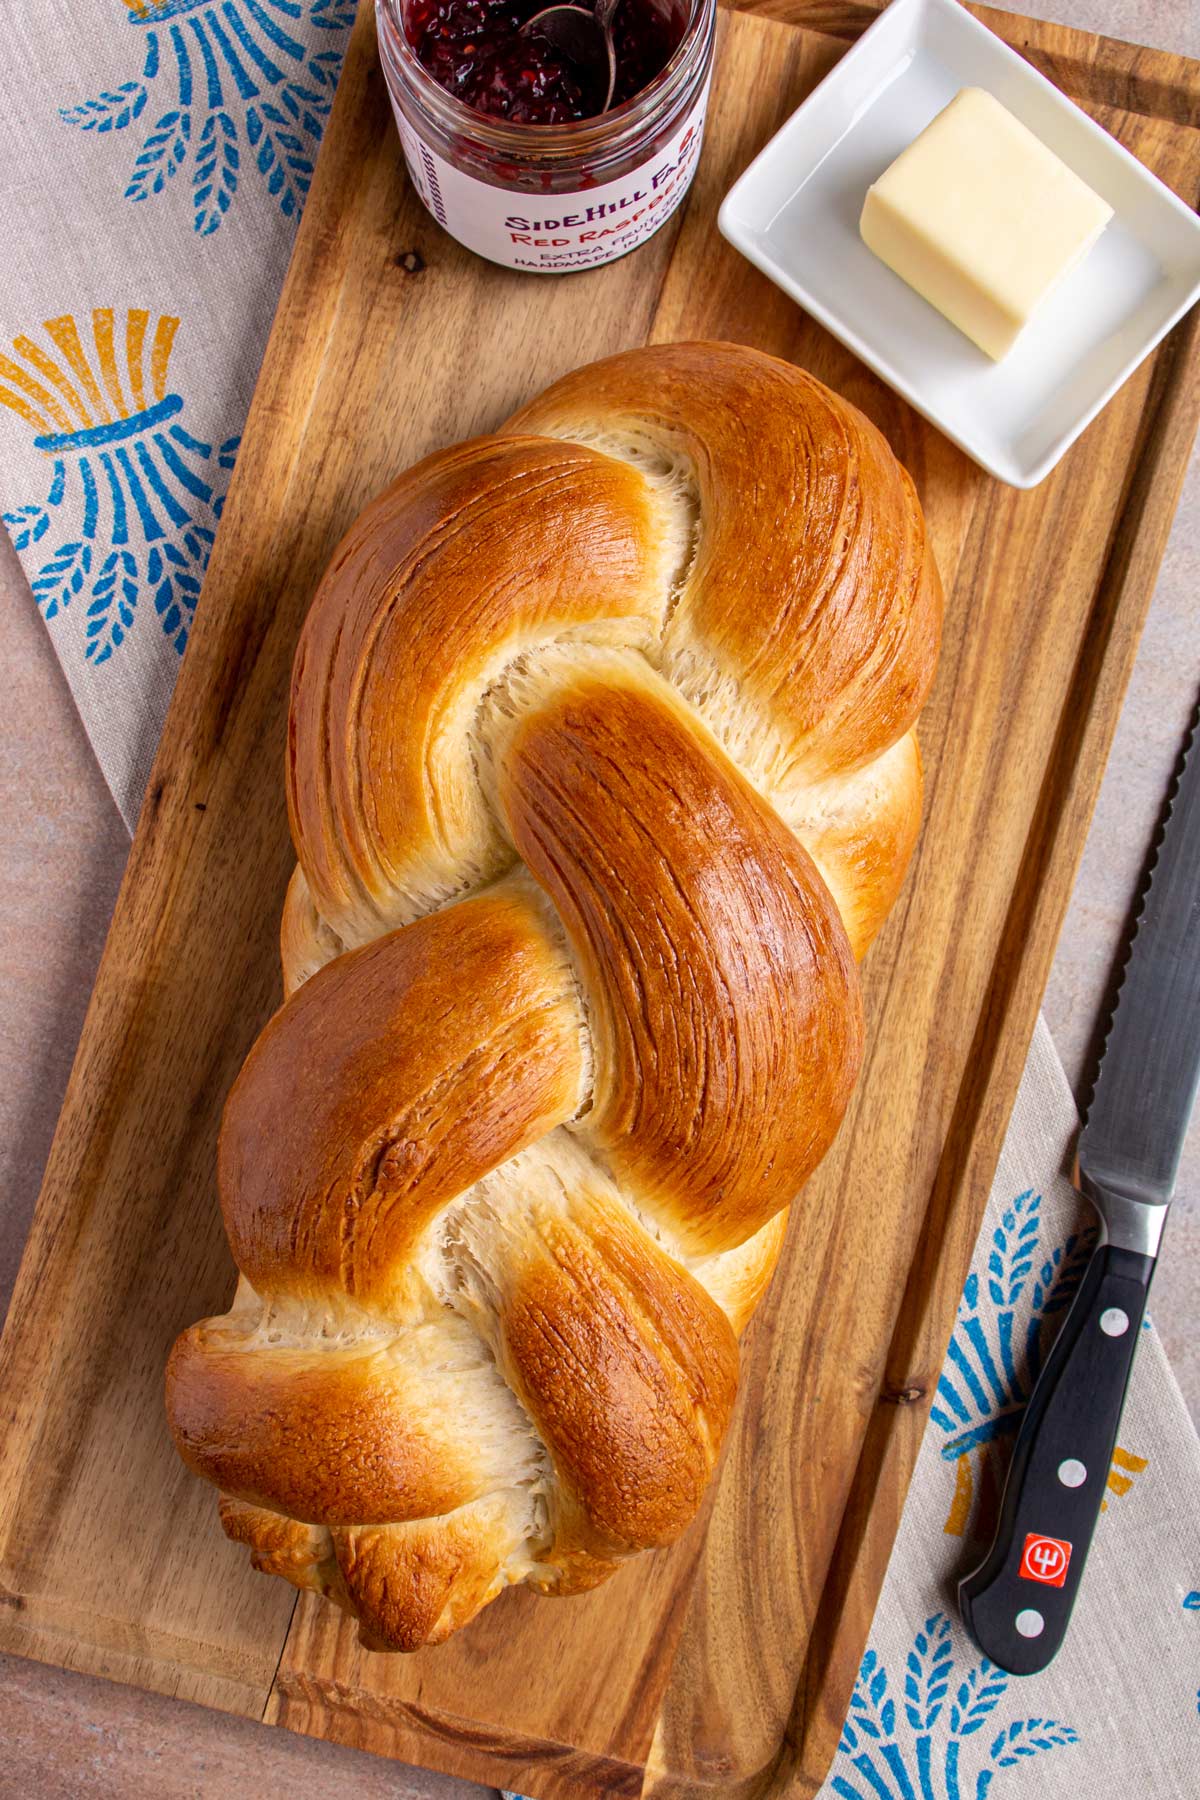
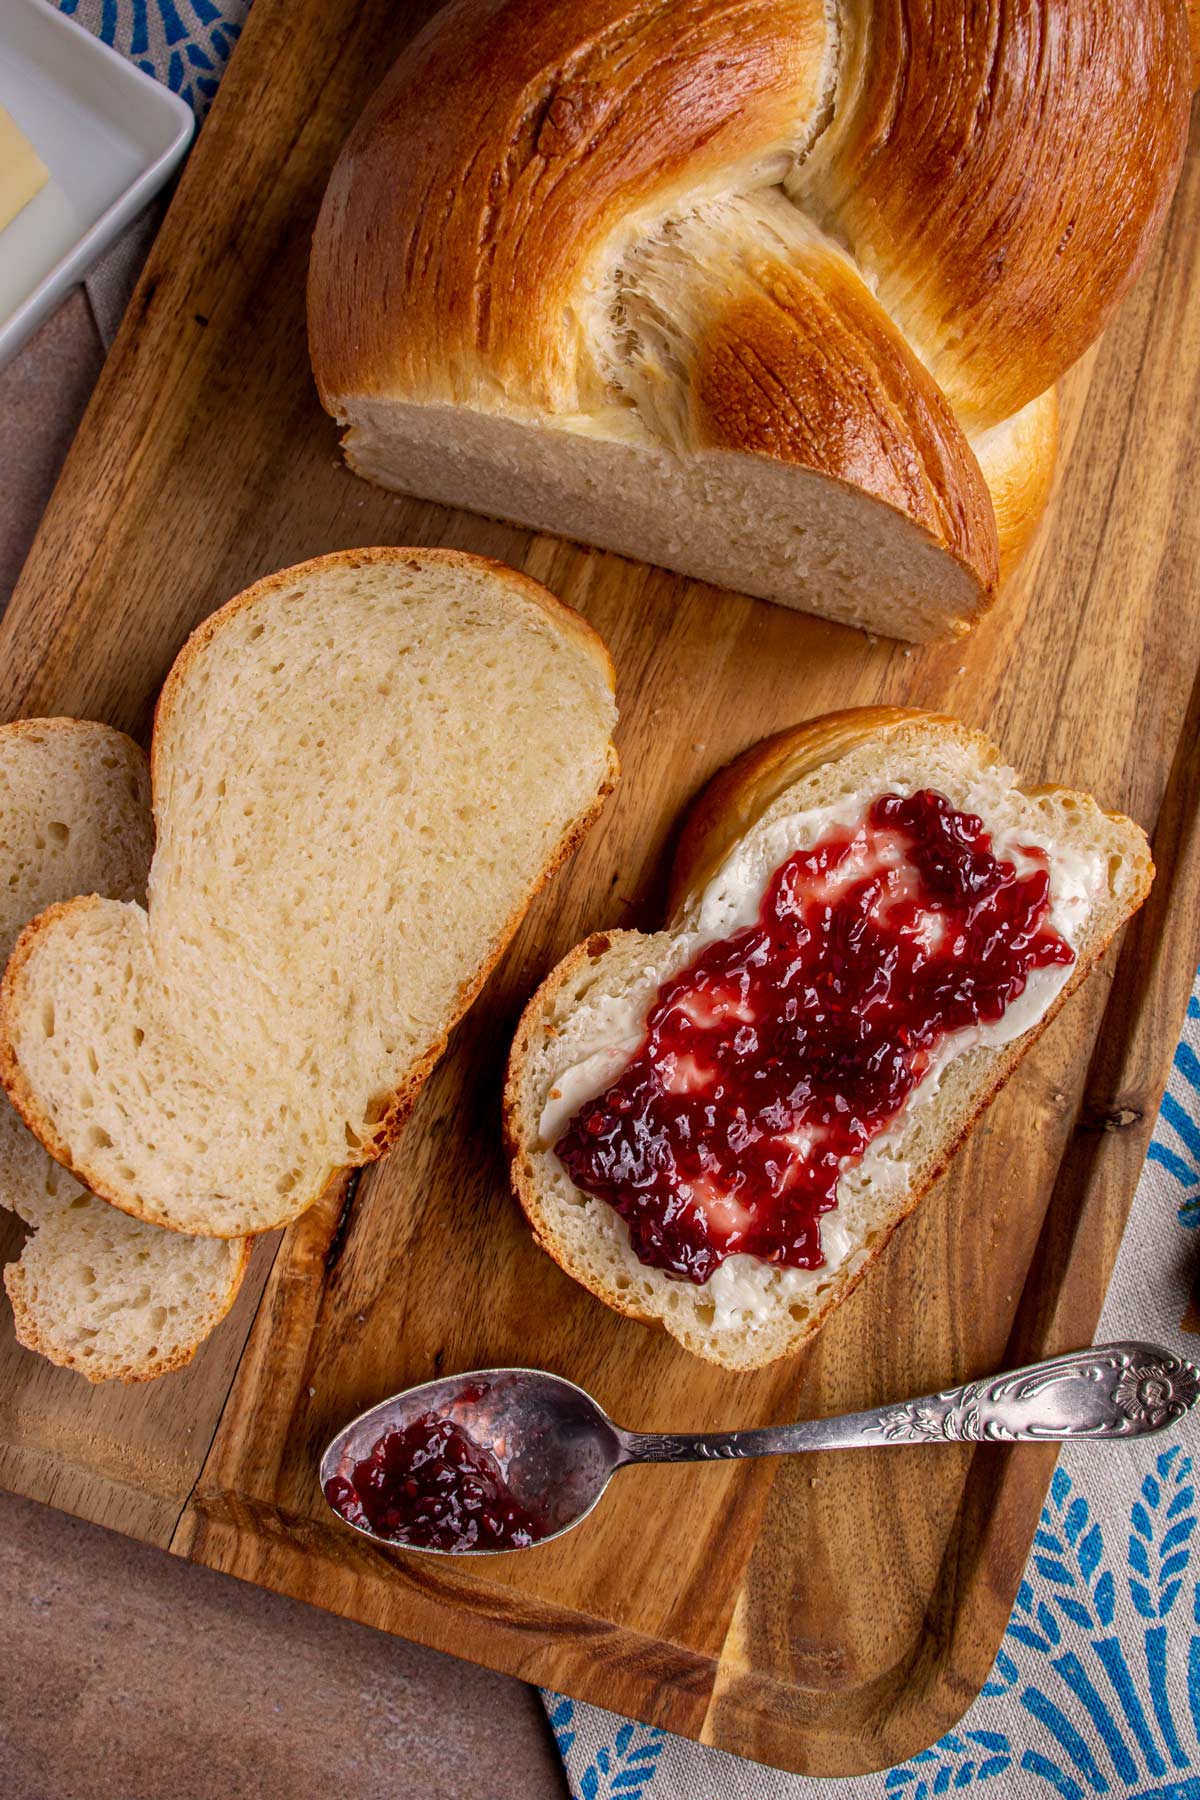
Zopf is best served fresh the day it’s baked, sliced thickly and served with butter and jam or even butter and honey. Nutella is another popular topping!
Store leftover zopf in an airtight bag at room temperature for 3 to 4 days. You may want to lightly toast the leftover slices before eating them, but it’s up to you! Refrigerate for up to 1 week or freeze for up to 3 months—Slice the bread first before freezing and wrap tightly in plastic wrap.
If you feel overwhelmed by the unique braiding instructions, you can easily divide the dough into 3 pieces instead of 2 to make a standard 3-strand braid instead.
Don't braid the dough too tightly. It will continue to expand both while proofing and baking. If you braid it too tightly the loaf can be extra dense because it won't have room to expand.
If your house is particularly cool or drafty, and you don’t have a warm spot to proof the dough, try this technique. Turn on your oven (at any temperature) for just 30 to 60 seconds or so. Turn it off the moment the oven feels slightly warm but not hot (just keep opening the door and checking). Then cover your dough and place it in the slightly warm oven and let it proof in there. This works great during winter months. On a warm summer day, regular room temperature should be sufficient.
Other recipes you may like
- Chorek / Choreg (Armenian Sweet Bread)
- Viennoise au Chocolat (Vienna Bread with Chocolate)
- Sally Lunn Buns (Solange Luyon Buns or Solilemmes)
- Buchteln (Austrian Stuffed Sweet Rolls)
- Homemade Brioche
- Apple Cinnamon Yeast Bread
- Honey Glazed Beer Bread
Tried this recipe? Please leave a star ⭐️⭐️⭐️⭐️⭐️ rating in the recipe card below and/or a review in the comments section further down the page. You can also follow me on social media on Facebook, Instagram, and Pinterest!
Zopf / Butterzopf (Swiss Braided Bread)
Ingredients
- 500 grams (4 cups) all-purpose flour
- 7 grams (2 ¼ teaspoons) instant yeast (1 envelope)
- 1 ½ teaspoons kosher salt
- 1 teaspoon granulated sugar
- 1 ¼ cups milk heated to about 100°F to 110°F (38°C to 43°C)
- 56 grams (4 tablespoons) unsalted butter room temperature/soft
- 1 egg, beaten with 1 tablespoon milk
Instructions
- Combine the flour, yeast, salt, and sugar in the bowl of an electric stand mixer fitted with the dough hook and stir on low just enough to mix.
- Add the warm milk and soft butter and mix on medium speed until combined. Continue to mix at medium speed for another 5 minutes until soft, smooth, and elastic. When you poke the dough softly with your index finger, it should bounce back. (Alternatively you can knead the dough by hand for 10 minutes until smooth and elastic.)
- Lightly grease a large mixing bowl and transfer the dough to the bowl. Cover with plastic wrap or a clean tea towel, and set in a slightly warm, draft-free place to proof. Let the dough rise for about 1 to 1 ½ hours, or until doubled in size.
- Punch the dough to deflate the air, then turn it out onto a lightly floured surface. Divide the dough into 2 equal pieces. Roll each of the pieces into a long log, each approximately 2 feet long or longer if your workspace allows it.
- Place the 2 logs of dough overlapping each other so they make an X. Braid the strands of dough (follow the photo guide in the post above).
- Transfer the braided zopf to a parchment paper-lined baking sheet. Cover loosely with a clean tea towel or plastic wrap and let it proof for another 30 minutes.
- Meanwhile, preheat the oven to 425°F (220°C) with the oven rack in the center. Brush the proofed zopf evenly with some of the prepared egg wash. Bake for about 30 minutes or until the loaf is golden brown and the internal temperature reads at least 185°F (85°C) with an instant read thermometer.
- Remove from the oven to a wire rack and cool completely before slicing and serving.
Notes
- Zopf is best served fresh the day it’s baked, sliced thickly and served with butter and jam or even butter and honey. Nutella is another popular topping!
- Store leftover zopf in an airtight bag at room temperature for 3 to 4 days. You may want to lightly toast the leftover slices before eating them, but it’s up to you! Refrigerate for up to 1 week or freeze for up to 3 months—Slice the bread first before freezing and wrap tightly in plastic wrap.
- If you feel overwhelmed by the unique braiding instructions, you can easily divide the dough into 3 pieces instead of 2 to make a standard 3-strand braid instead.
- If your house is particularly cool or drafty, and you don’t have a warm spot to proof the dough, try this technique. Turn on your oven (at any temperature) for just 30 to 60 seconds or so. Turn it off the moment the oven feels slightly warm but not hot (just keep opening the door and checking). Then cover your dough and place it in the slightly warm oven and let it proof in there. This works great during winter months. On a warm summer day, regular room temperature should be sufficient.
Nutrition
*All nutritional information is based on third-party calculations and should be considered estimates. Actual nutritional content will vary with brands used, measuring methods, portion sizes and more.*



Anna says
Does this recipe double well?
Victoria says
Hi Anna,
I've never doubled it myself but you shouldn't have a problem doing so. I would recommend weighing the ingredients (rather than using the volume measurements provided) and also weighing the finished dough so you can divide it evenly to make two loaves. If you have a large enough baking sheet, the loaves may fit on one baking sheet side by side with space in between. If not, bake them one after the other so they can both bake on the center rack.