


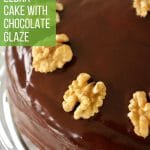

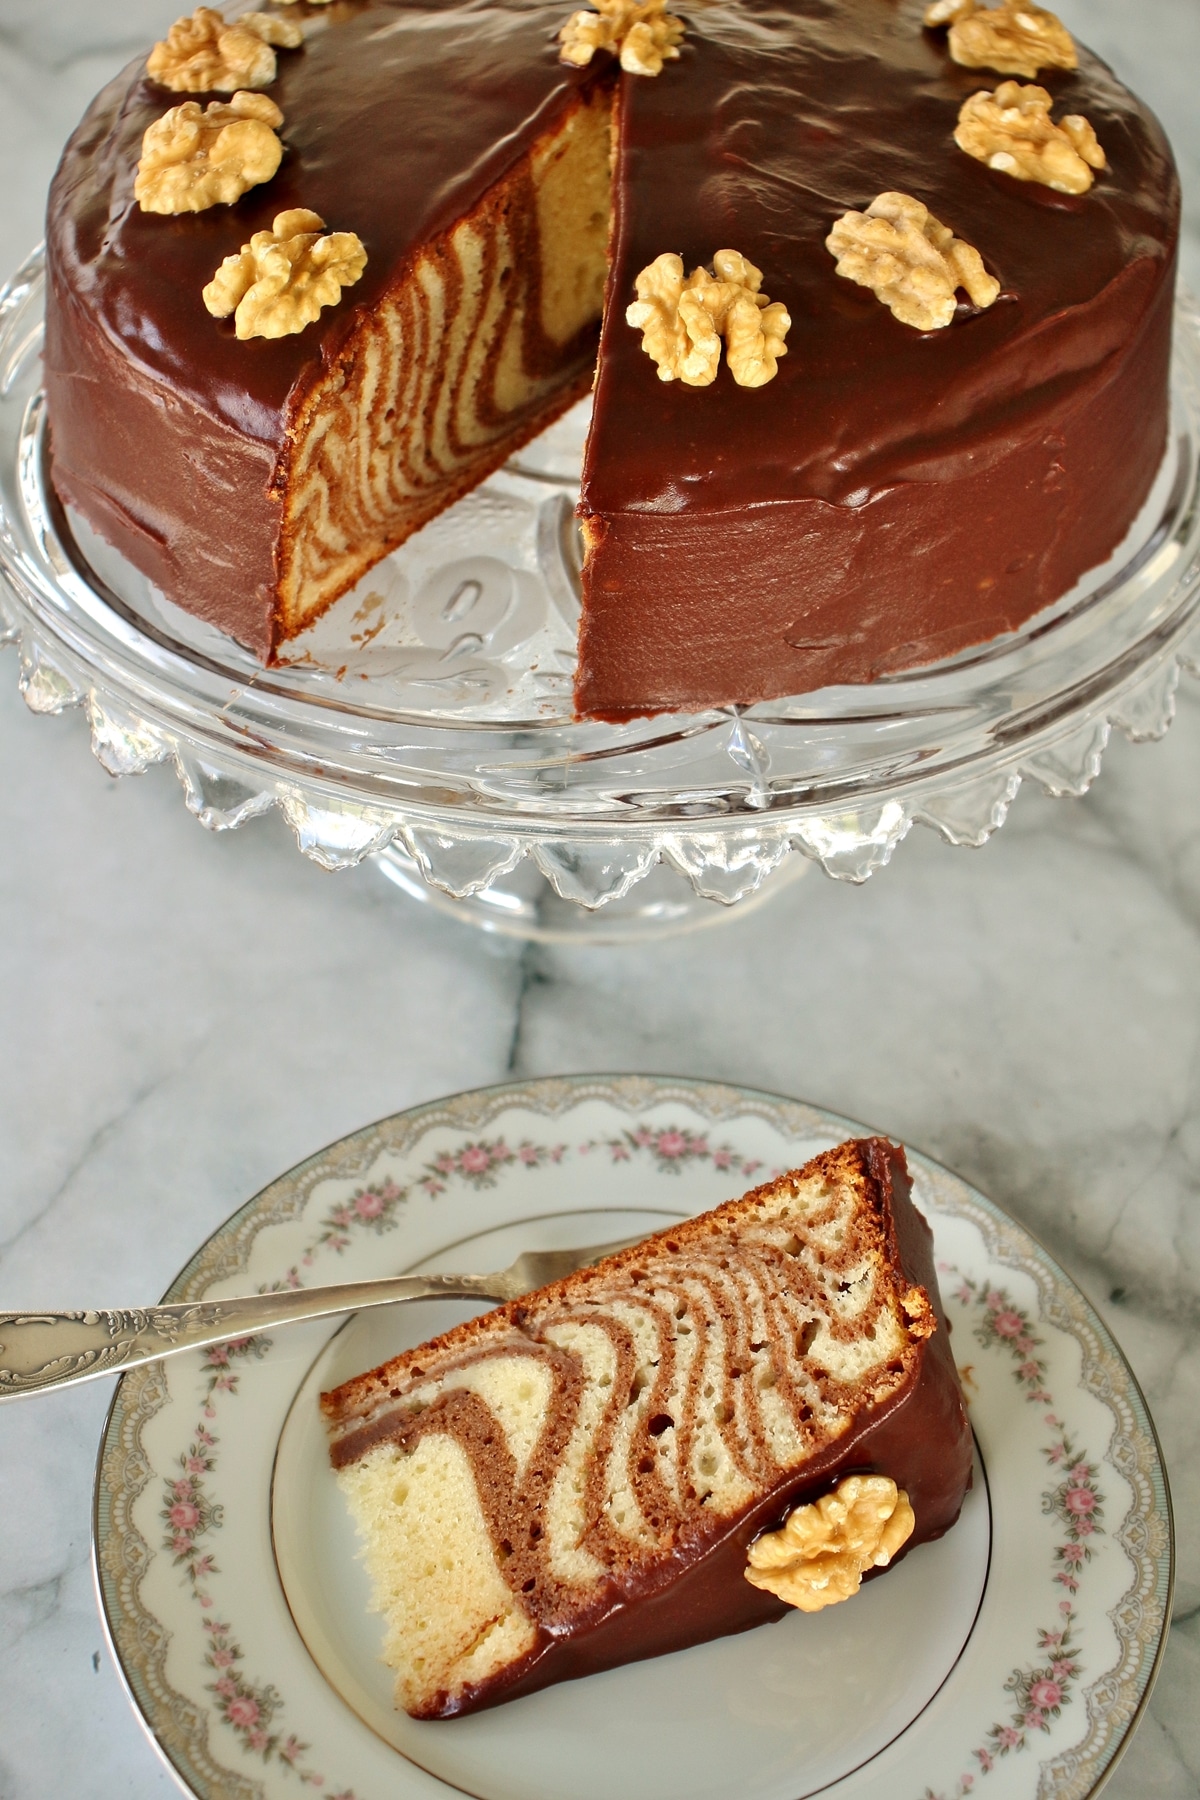
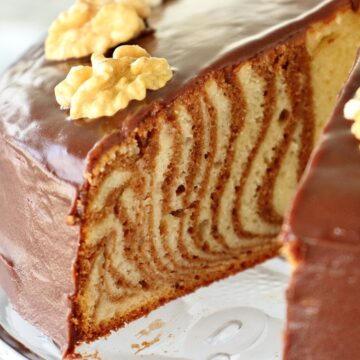
This beautiful retro Zebra Cake is as delicious as it is pretty. It has a dense texture and firm crumb, and a hint of tanginess from sour cream. Everyone's favorite part is the rich and glossy chocolate glaze! It provides an elegant flourish to a classic cake.
(This recipe was originally published in March 2011, but was updated with new photos and content in 2020)
I've eaten this cake for more birthdays than I care to count. The recipe dates back to 1960's Armenia. My aunt learned to make it in a baking class in Yerevan, and we have tweaked and improved it over the years. This family favorite cake has truly withstood the test of time.
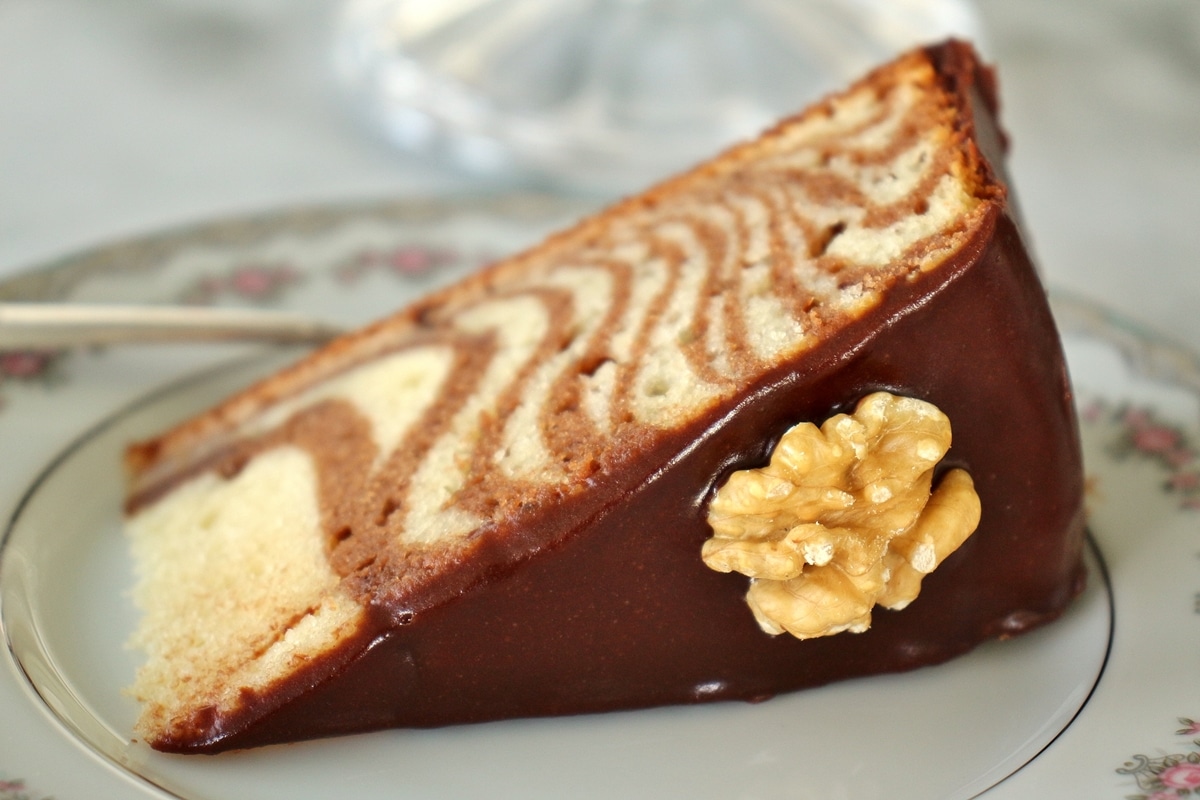
This particular zebra cake recipe has a denser structure with a firm crumb. It's not as fluffy as some other cakes, but that's part of why we love it so much. It contains a generous amount of sour cream, which provides a bit of tang, and almost a coffee cake essence. It's not super sweet, not overly decadent, and actually perfect for breakfast the next day.
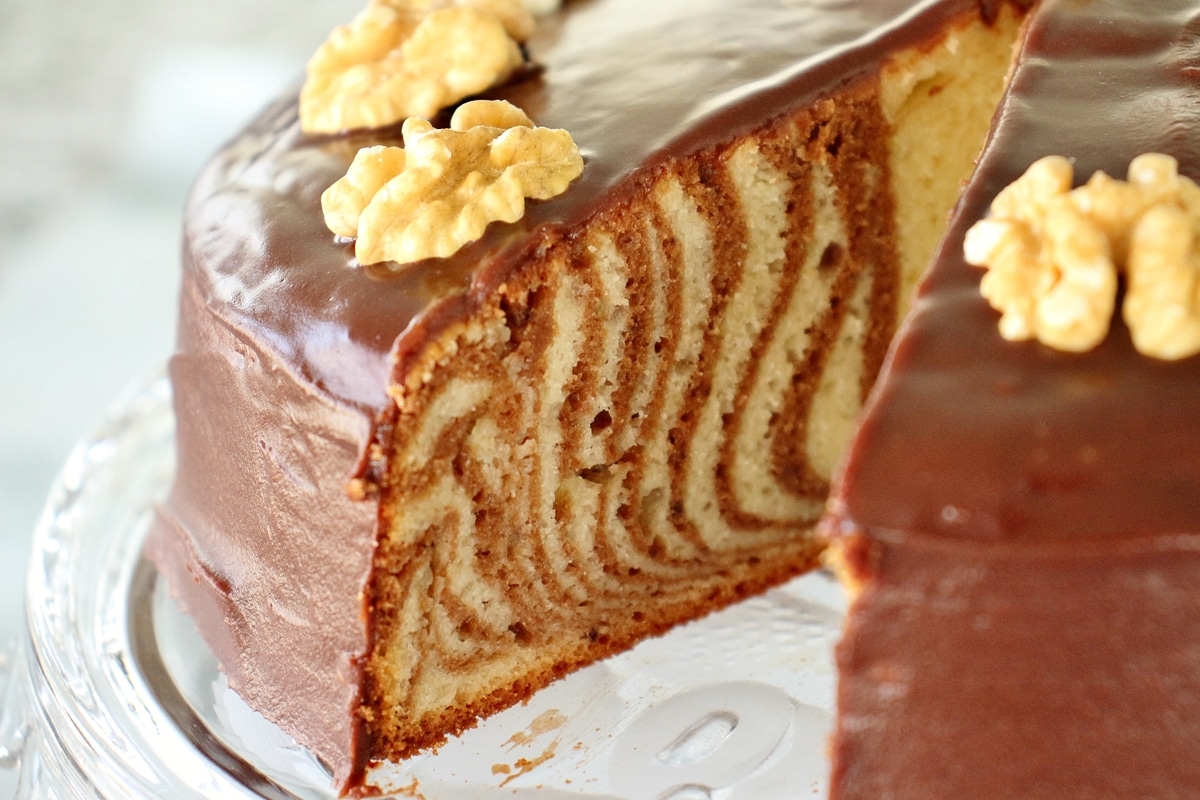
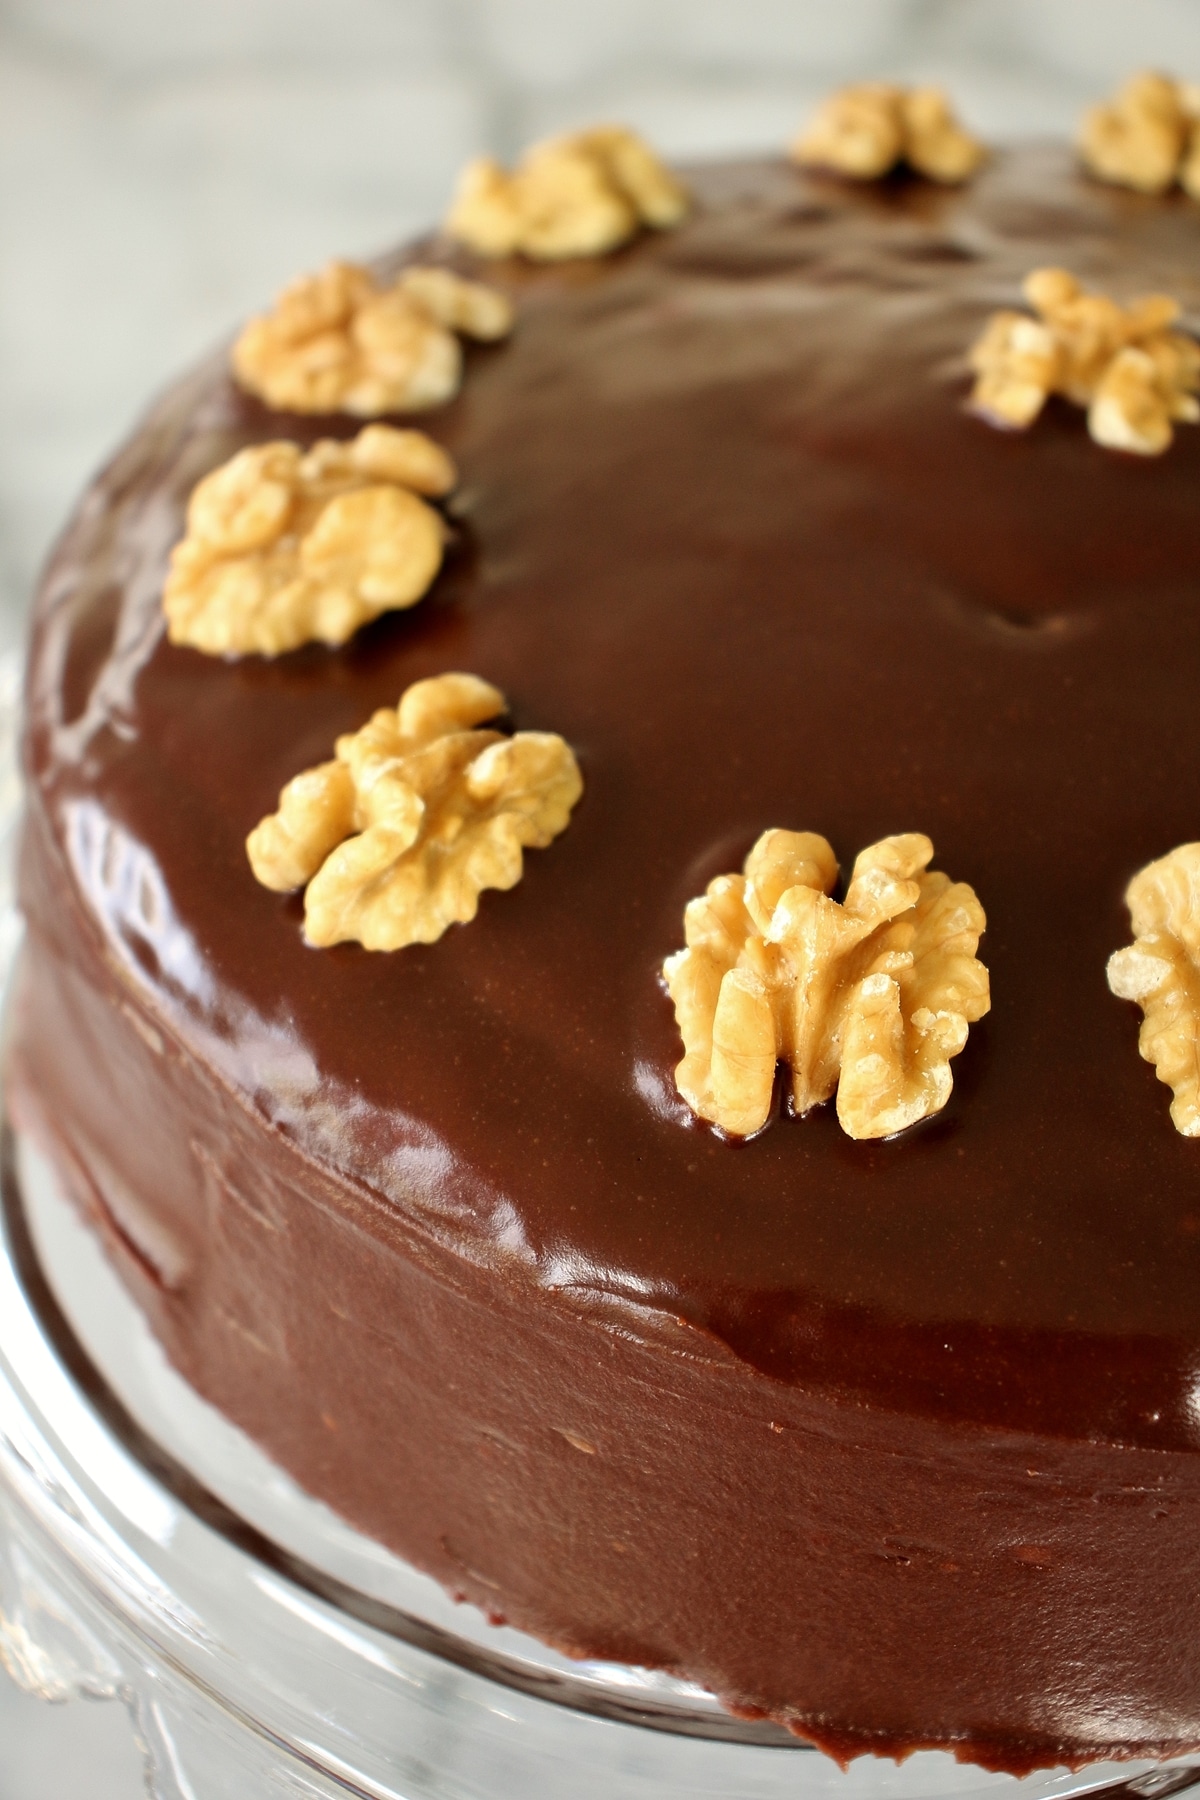
The best part of this zebra cake is the glossy chocolate glaze. It's rich and intensely chocolaty, but not overpowering. It just gently cloaks the cake, wrapping it in a velvety chocolate hug.
We always finish this cake with walnut halves, typically 12 to yield 12 slices of cake. You can also scatter walnut pieces along the circumference if that's what you have. Either way, it will be a beautiful presentation!
Ingredient notes
- Sour Cream: This zebra cake has a tangy element from the addition of an entire pint of sour cream. You may substitute plain yogurt and still get similar results.
- Unsweetened Cocoa Powder: Use plain unsweetened cocoa powder, NOT Dutch process cocoa powder for this recipe. Both the cake and the chocolate glaze require cocoa powder.
- Vinegar: You'll need a small amount of vinegar to help activate the baking soda in the recipe. We use red wine vinegar, but you can also try white wine vinegar or even distilled white vinegar. The important part is the acidity it imparts, and less the particular flavor of the vinegar.
How to make zebra cake
Unlike some other zebra cake recipes this is made in a 9-inch springform pan. This is the same type of pan one would use to make cheesecake. The cake unmolds from the pan very easily this way. Generously grease the pan and set it aside while you prepare the batter.
In the bowl of your electric mixer fitted with the paddle attachment, add room temperature unsalted butter and granulated sugar. Beat them together until smooth. It will be somewhat sandy in texture. One by one add 5 large eggs, scraping down the sides of the mixer bowl in between additions. Add sour cream and stir.
Then add red wine vinegar to a small bowl. Stir in baking soda. It will get fizzy, like a science experiment. Immediately pour it into the cake batter and stir. Then stir in vanilla extract, and finally mix in all-purpose flour. Mix until combined. Be careful not to over-mix.
Separate out half the vanilla batter into another bowl, about 3 cups. To the original mixer bowl, sift in unsweetened cocoa powder and stir until smooth. Now you have your 2 cake batters: vanilla and chocolate. We will layer these batters to create our zebra stripes!
Place your oven rack in the lower third of the oven, and preheat the oven to 325 degrees F.
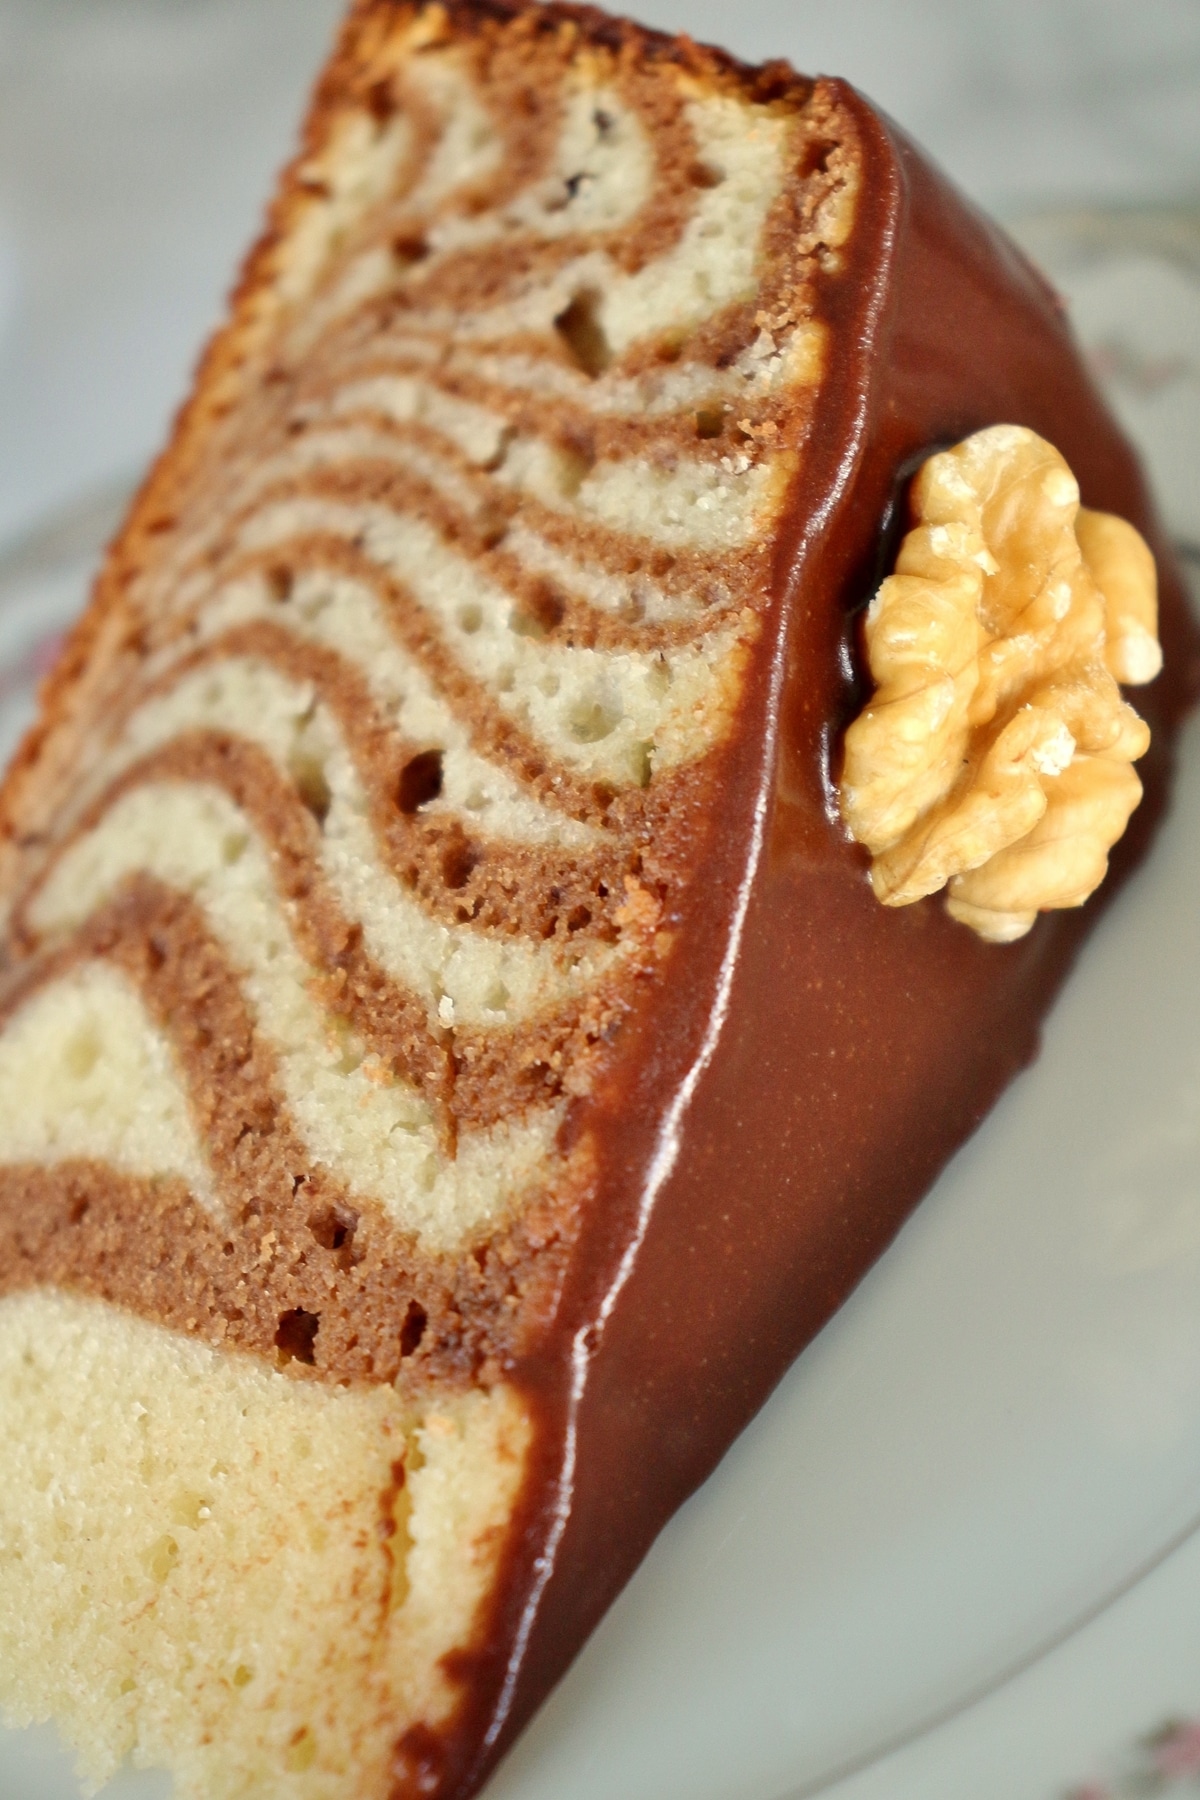
Scoop ¼ cup of vanilla batter into the center of your prepared springform pan. Pour ¼ cup of the chocolate batter directly over the center of the vanilla batter.
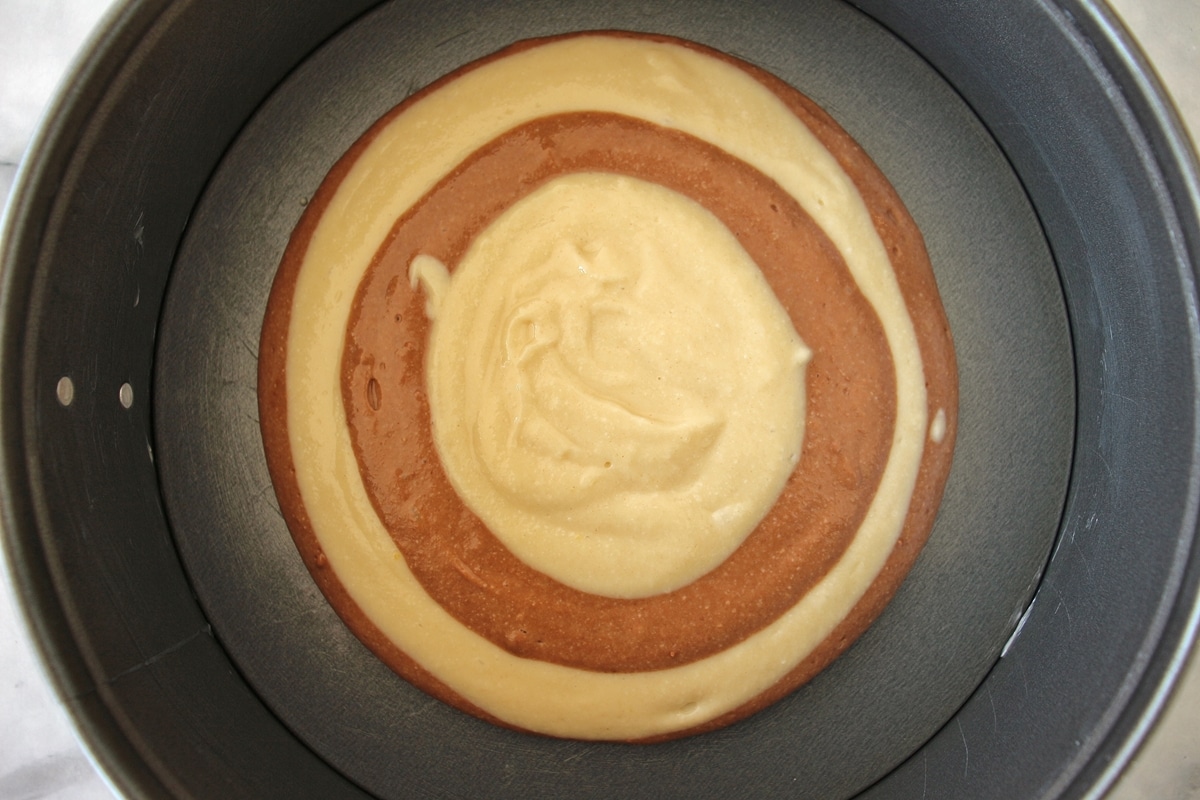
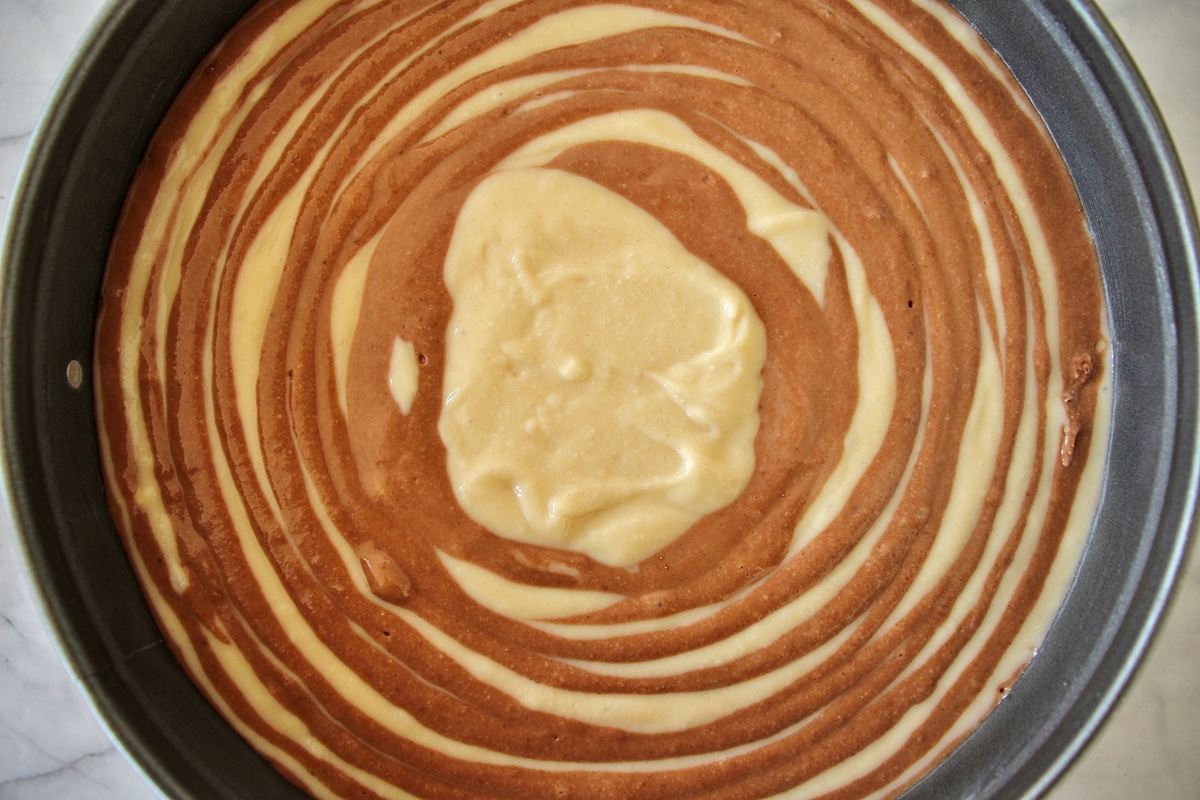
Repeat with alternating colors. The layers will spread out on their own, but a gentle rap of your pan on the counter will help them spread out evenly as needed.
Don't worry if you get a few drips, or your layers aren't perfectly even. No two zebras have identical stripes, and your zebra cake should be just as unique!
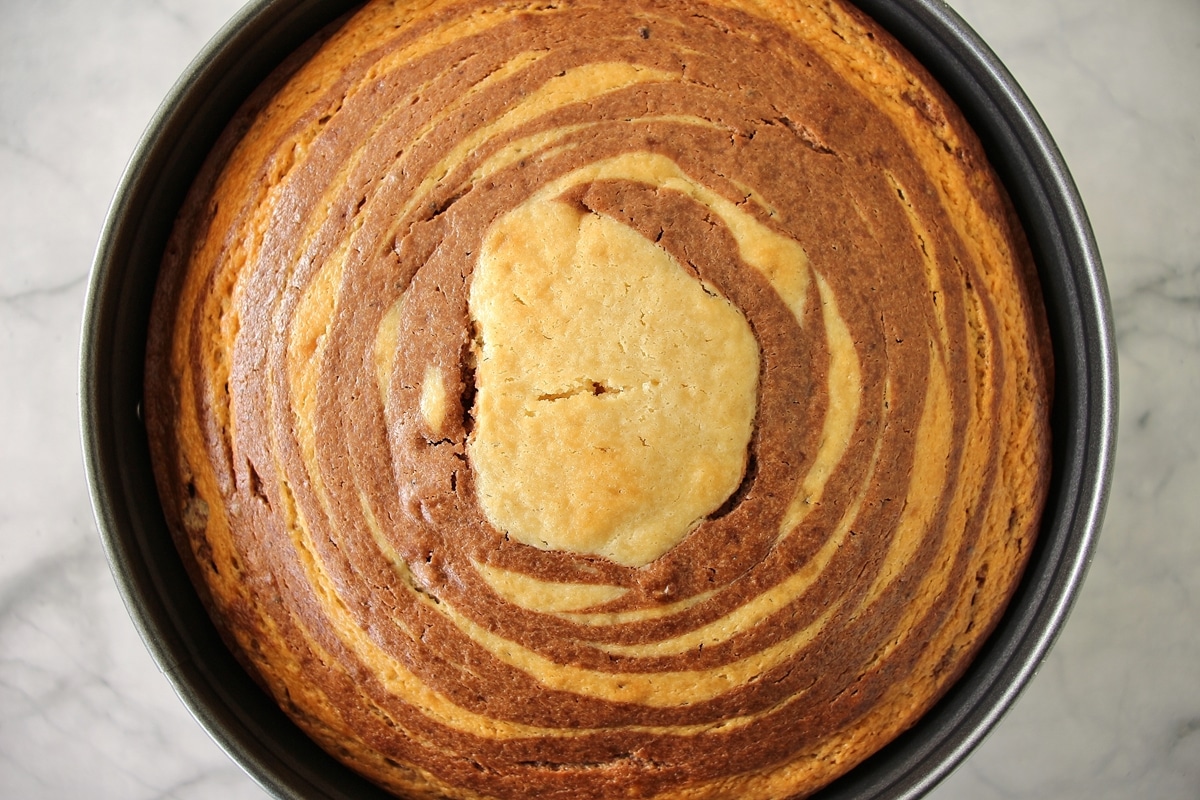
Bake the cake for about 75 to 90 minutes (it can vary quite a bit based on your oven and even your pan), or until a toothpick inserted into the center comes out clean. Cool for about 15 minutes before removing the ring from the springform pan. Cool completely before moving on to the next step.
How to make chocolate glaze
I've said it before and I'll say it again, the chocolate glaze on this zebra cake is THE BEST PART! It's also extremely easy to make. Sift confectioners' sugar and unsweetened cocoa powder into a saucepan. Add milk and heat over medium heat, stirring until smooth and chocolaty (STEPS 1-3).

Add unsalted butter, and stir until smooth (STEP 4). Then add vanilla extract, give it one more stir and remove from the heat. Let the chocolate glaze cool for about 30 minutes, stirring occasionally, until it cools a bit and starts to thicken.
If the glaze is too hot, it will be runny and create a super thin layer on your cake. You want it to be pourable but thick enough to slowly creep down the top and sides of your cake.
How to decorate it
Now that our cake is completely cool, and our glaze has cooled enough to thicken slightly, we're ready to decorate our zebra cake!
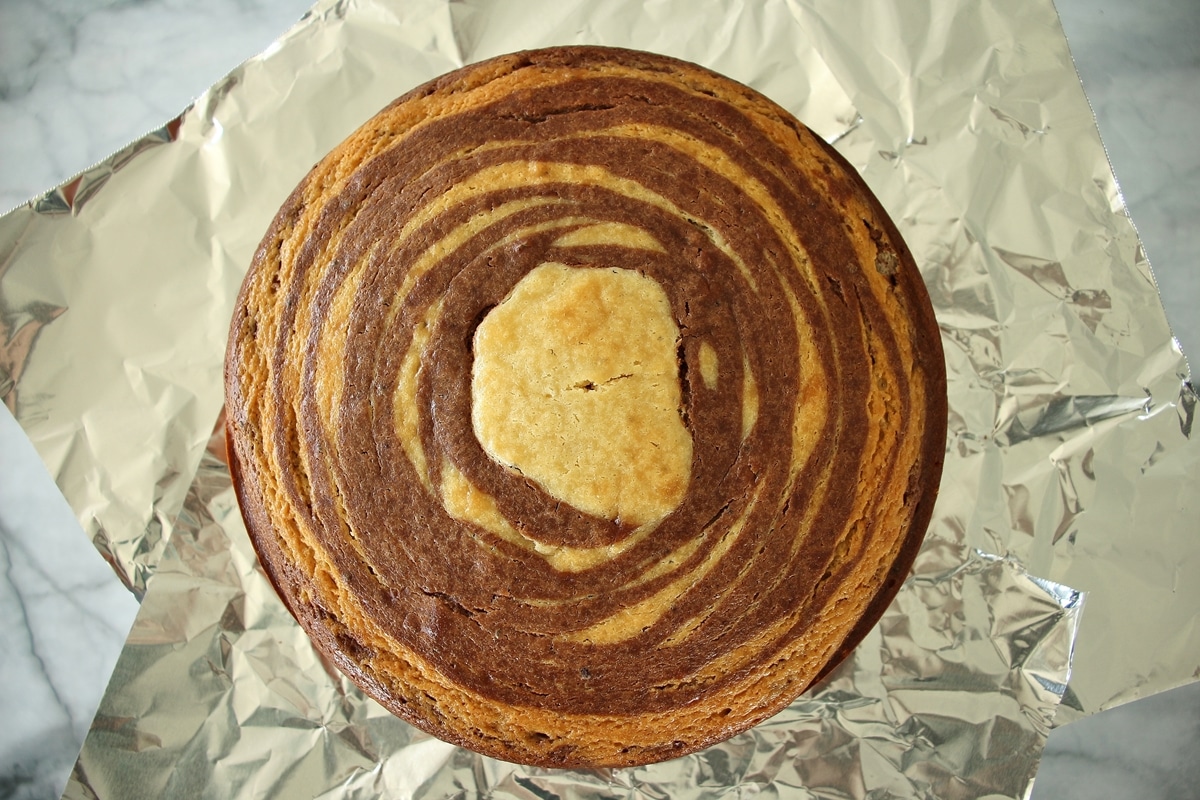
Select a pretty platter or cake stand and line it with 3 pieces of aluminum foil overlapping to cover the edges of the platter, but leaving the center exposed.
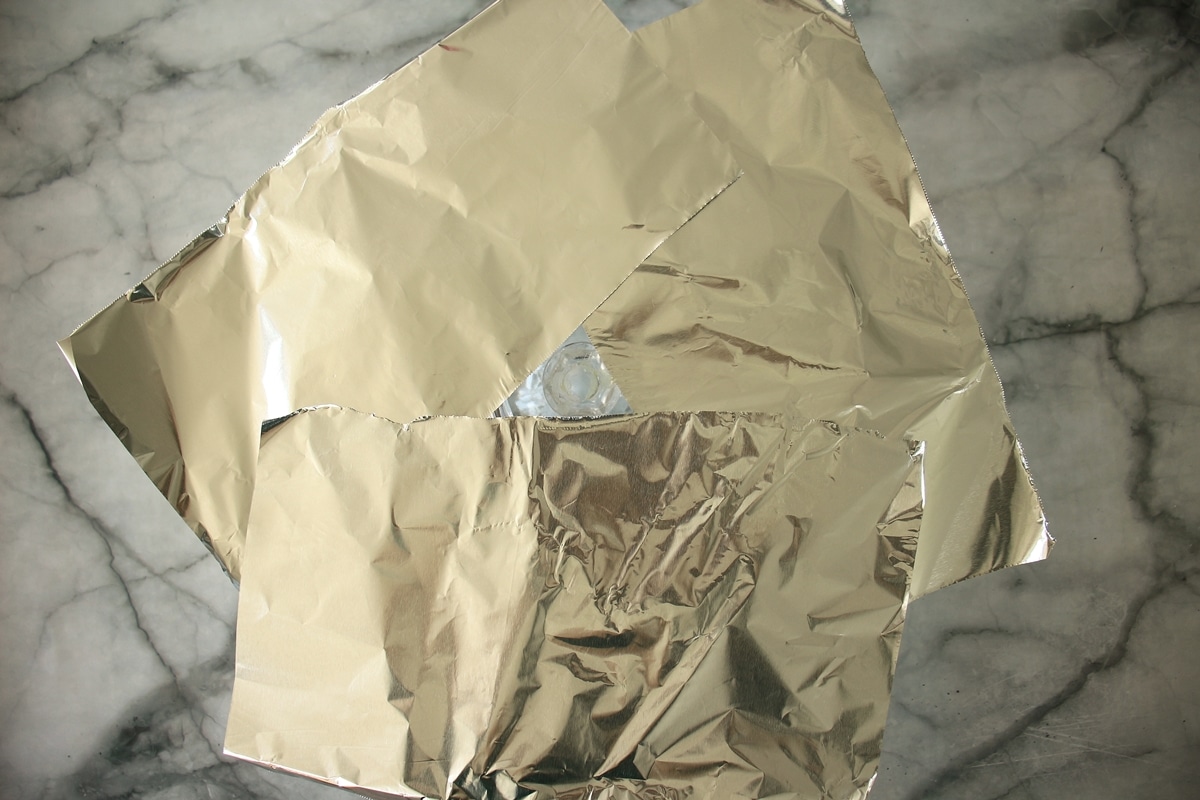
Carefully remove the cake from the base of your springform pan, and set it on top of the foil-lined cake platter. The foil will catch the drippings of your glaze.
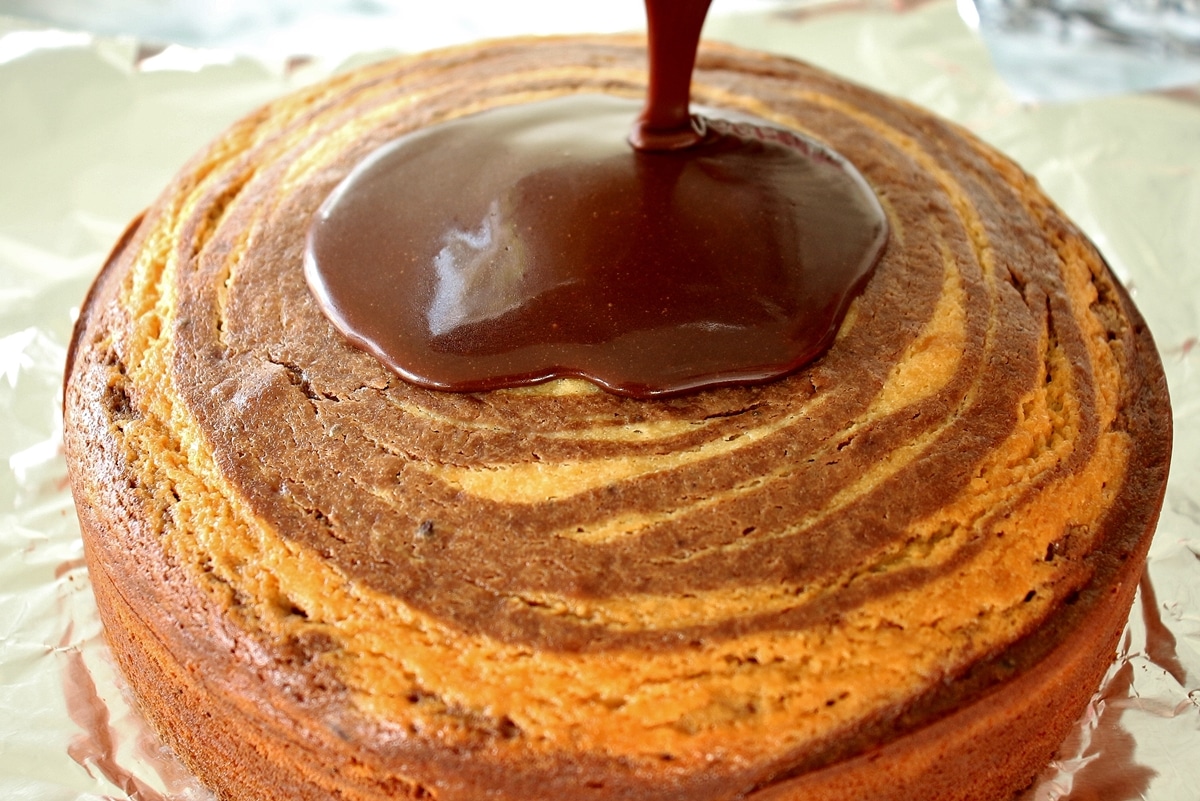
Carefully spoon or pour the warm glaze over the top of your cake. Use a rubber spatula to smooth the glaze as needed on the sides. I usually use the spatula to scoop and push the chocolate glaze off the foil back up onto the sides of the cake.
Once the glaze starts cooling and setting, you don't want to mess with it or it won't be a glossy sheen. The glaze is pretty forgiving, but just exercise caution.
After the glaze sets gently wiggle the pieces of foil loose, and pull them away from the cake. Be sure you EAT ALL OF THE EXCESS CHOCOLATE GLAZE OFF THE FOIL. I will be so disappointed in you if you don't!
Arrange walnut halves around the circumference of the top of the cake. Serve this cake to your favorite people in the world.
Please scroll to the bottom of the post for the full recipe (in a printable recipe card) including ingredient amounts and detailed instructions.
Expert tips
As you layer the white and chocolate batters to make stripes, it will naturally spread out. But it also doesn't hurt to rap the pan a couple times on your counter if needed to flatten it out.
It's fine if you get a few cracks on top of your cake. This is pretty normal, and the glaze will cover them up!
You will want to eat all of the extra chocolate glaze that settles on the foil after you finish decorating. This is completely justified and totally acceptable. I think the best part of making this cake is eating all the "extra" chocolate glaze off the foil. Consider it the baker's payment for doing all the hard work.
Other recipes you may like
- Aargauer Rüeblitorte (Swiss Carrot Cake)
- The Hollywood Brown Derby's Famous Grapefruit Cake
- Strawberry Cheesecake Bread Pudding
- Cherry Bakewell Cake
- Hummingbird Cupcakes
- Chocolate Peanut Butter Cup Cupcakes
- Pink Lemonade Cupcakes
- Chocolate Cupcakes with Red Wine Buttercream
- Tiramisu Ice Cream with Mocha Ripple
Tried this recipe? Please leave a star ⭐️⭐️⭐️⭐️⭐️ rating in the recipe card below and/or a review in the comments section further down the page. You can also follow me on social media on Facebook, Instagram, and Pinterest!
Zebra Cake with Chocolate Glaze
Ingredients
Zebra Cake:
- 7 tablespoons (100 grams) unsalted butter, room temperature
- 2 cups granulated sugar
- 5 large eggs
- 16 ounces (1 ¾ cups plus 2 tablespoons) sour cream (no need to measure if you use an entire 16 ounce container)
- 1 tablespoon red wine vinegar
- 1 teaspoon baking soda
- 1 teaspoon vanilla extract
- 2 ½ cups all-purpose flour
- ¼ cup unsweetened cocoa powder sifted
Chocolate Glaze:
- 1 cup confectioners' sugar sifted
- ¼ cup + 2 tablespoons unsweetened cocoa powder sifted
- ¼ cup milk
- 7 tablespoons (100 grams) unsalted butter, cut into chunks
- ½ teaspoon vanilla extract
- 12 walnut halves for garnish
Instructions
- Place the oven rack in the lower third of the oven and preheat to 325°F.
- In the bowl of an electric mixer fitted with the paddle attachment, cream together the butter and sugar at medium-high speed. When the mixture is smooth and somewhat sandy, add the eggs one at a time, making sure to fully incorporate each egg before adding another. Scrape down the sides of the bowl, then gradually add the sour cream and beat to combine.
- Pour the vinegar into a very small bowl. Add the baking soda, and once it fizzes quickly add it to the batter. Mix. Add the vanilla extract and mix again.
- Add the flour and mix until just combined. Do not over-mix. Reserve 3 cups batter to another bowl (half the batter). To the mixer bowl, add the cocoa powder and mix to combine. You will now have a bowl of vanilla cake batter and a bowl of chocolate cake batter.
- Grease a 9-inch springform pan. Pour ¼ cup of vanilla batter into the center of the pan. Pour ¼ cup of chocolate batter directly into the center of the vanilla batter. Repeat, using all of both batters, alternating colors. The layers will spread out on their own, but a gentle rap of the pan onto the table or counter will help the batter even out, if needed.
- Bake for 75 to 90 minutes, or until a toothpick inserted into the center comes out clean (the top may crack a bit, but is easy to cover up with the chocolate glaze later). Let cool for 15 minutes, then remove the sides of the springform pan and cool completely.
- Select a serving dish or platter and place 3 pieces of aluminum foil around the perimeter, leaving the center clear. Remove the cake from the springform pan base and place in the center of the pieces of foil. This will make for easy cleanup after you glaze the cake.
- To make the glaze, combine the confectioners' sugar and cocoa powder in a saucepan. Add the milk and place the pan over medium heat. Stir constantly until the mixture is completely dissolved and smooth. Add the butter and continue mixing until smooth. Add the vanilla extract and remove from the heat. Allow the glaze to cool for about 30 minutes to allow it to slightly thicken. Stir periodically.
- Spoon the sauce over the center of the top of the cake, and use a rubber spatula to gently smooth it over the surface and sides of the cake. Use the rubber spatula as needed to push some of the extra chocolate glaze on the foil back up the sides of the cake as needed to smooth it out.
- Line the perimeter of the top of the cake with walnut halves. Allow the glaze to set a bit, and then gently pull the foil pieces away and discard them before serving. This cake will keep at room temperature for several days. Store leftovers in an air-tight container.
Notes
- You may substitute plain yogurt for the sour cream.
- We use red wine vinegar, but you can also try white wine vinegar or even distilled white vinegar. The important part is the acidity it imparts, and less the particular flavor of the vinegar.
- I cannot stress enough, please make sure you let your chocolate glaze rest and cool a bit before pouring over your cooled cake.
- If you don't have walnut halves, you may sprinkle walnut pieces around the circumference of the cake instead. It will have a more rustic look, but still be absolutely delicious.
- Even though this is a 9-inch cake, it comfortably serves 12 people because it's a relatively dense cake, and you can serve more moderate slices to each guest.
Nutrition
*All nutritional information is based on third-party calculations and should be considered estimates. Actual nutritional content will vary with brands used, measuring methods, portion sizes and more.*


Mary Kabakian says
Definitely one of my all time favorites. I could have a piece every day for the rest of my life and never get tired of it.
Lucy Reinbold says
One of my favorite cake recipes of all time! So simple and light yet so beautiful and richly flavored. I could eat some right now!
Camille says
This was so easy to make, and so delicious! I used walnut pieces because I didn’t have halves, and it still looked great!!