This homemade Camembert cheese is a fun DIY cheesemaking project that tastes delicious!
You may remember that time I made cheese last summer. I kind of made a huge deal out of it, because let's be honest, it was a huge deal. It was my first aged cheese, my beautiful baby Stilton!
I had made some other basic cheeses in the past, such as mascarpone, ricotta, and fresh mozzarella, but the Stilton was my first endeavor with aging cheese.
At the time, I purchased some cheesemaking supplies, which included cultures and mold spores for both blue cheeses and Brie/Camembert. This past December, the time finally came to try out my second aged cheese. I decided to make Camembert, which is very similar to Brie, but smaller.
Fun fact: Salvador Dali's famous painting of the melting clocks (The Persistence of Memory) was inspired by wheels of Camembert melting in the sun.
As I mentioned in my Stilton post, I actually made my own forms for the Camembert using PVC pipe coupling fittings with holes drilled into them (these were actually cheaper last summer than they are at the time of this post, so you may be better off just buying actual cheese forms). You can easily purchase the forms (and all the necessary cultures, mold spores, etc) from The Cheesemaker.
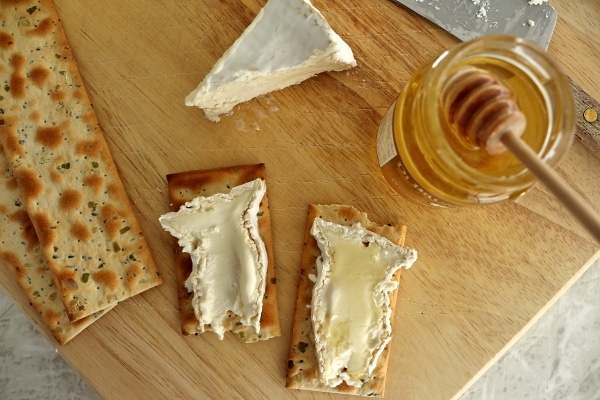 |
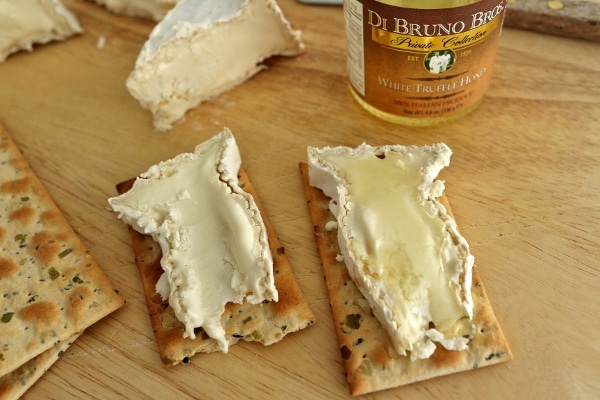
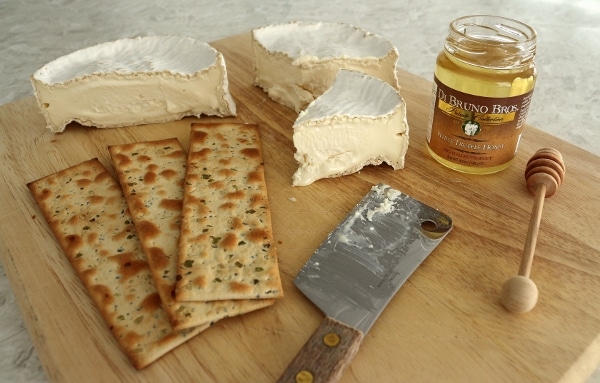
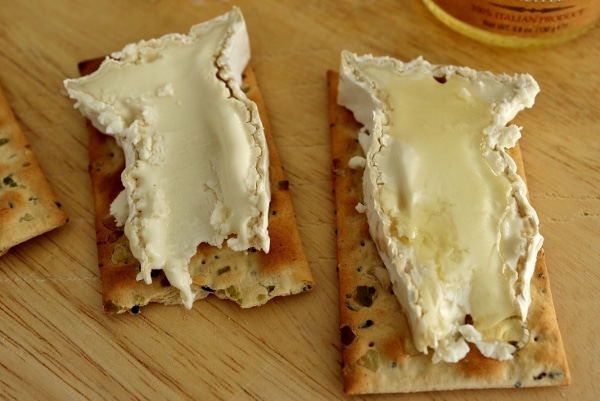
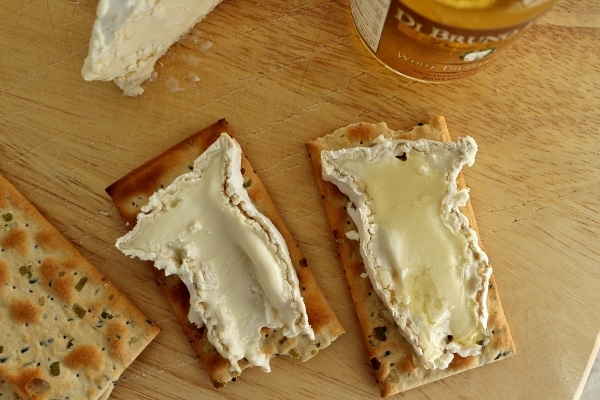
| Plain Camembert to the left, and topped with white truffle honey to the right |
I used a pre-packaged mixture of the cultures and mold spores, using two packets intended for Brie/Camembert for this recipe. I had already used all the rennet obtained from that purchase when I made my Stilton. Fortunately I had some frozen vegetable rennet tablets in my freezer from my fresh mozzarella-making.
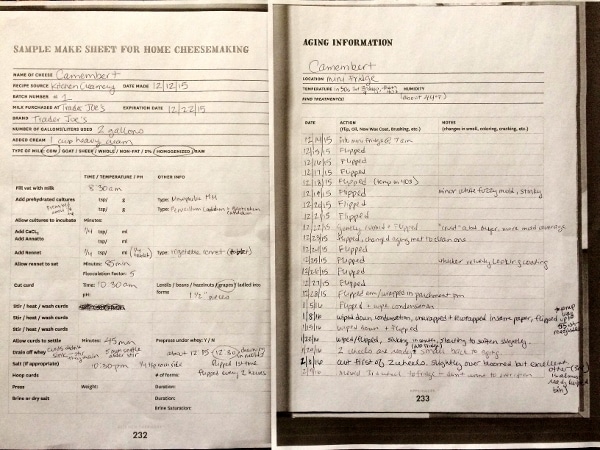
I had read that rennet tablets keep indefinitely in the freezer, but I hadn't tested this out. This was the first variable in my cheesemaking process. Would the vegetable rennet properly coagulate? Not only is it vegetable-based (still does the job, but not preferable to cheesemakers, who generally prefer calf rennet) but it was also several years old.
The second variable for my Camembert experiment came with the milk I used. The recipe in Kitchen Creamery specifies unhomogenized milk, which is more difficult (and expensive) to source.
Whole Foods had this for sale, but it was much more expensive than regular milk. I also found a local dairy farm that sells it, but I would have spent an hour driving just to buy some milk, but I decided to take a chance and use homogenized whole milk.
I was a bit nervous since I had kind of broken a couple of the rules/suggestions in the recipe, but I forged ahead with my cheese. On a cool Saturday morning in December, I got started with the tedious process of cheesemaking.
Although the recipe may seem daunting (and it's not for the faint of heart), it is a really well-written recipe that covers all the important steps in the process.
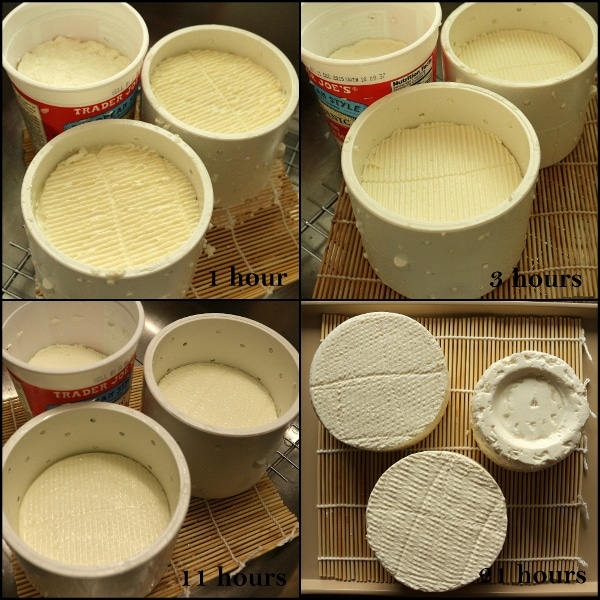 |
| The cheeses shrink in their molds as the curds continue to drain from 1 hour to 3 hours, 11 hours, and finally when removed from their molds at 21 hours |
I managed to fill both of my prepared Camembert cheese forms, and quickly had to come up with an alternative for a third form. Although it wasn't the best option, since it was slightly tapered and also didn't have a completely flat bottom (I realized this a little too late), I used an empty yogurt container which I repeatedly punctured with a barbecue fork to create holes. This third cheese was a bit less wide than the other two, but was taller. It aged a bit longer than the other two cheeses because of this.
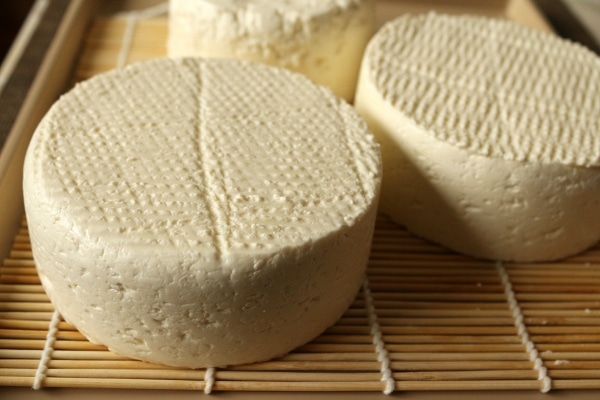 |
| Ready to start aging! |
I had aged my cheeses in a mini fridge in my enclosed patio. Although I had a refrigerator thermometer in there, the temperature often dropped below the preferable temperature (simply because it's winter and the patio got cold), so my cheeses took a bit longer to reach maturity than the book had stated.
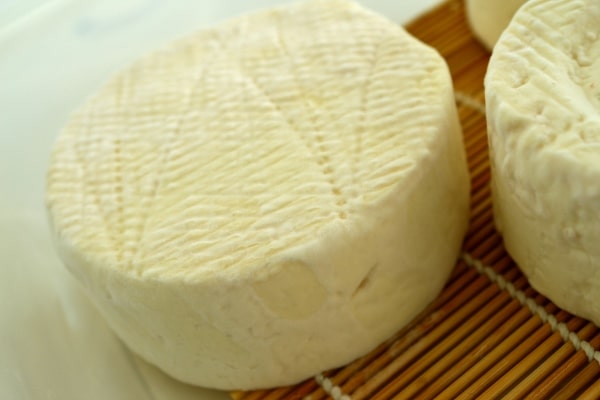 |
| After 1 week of aging |
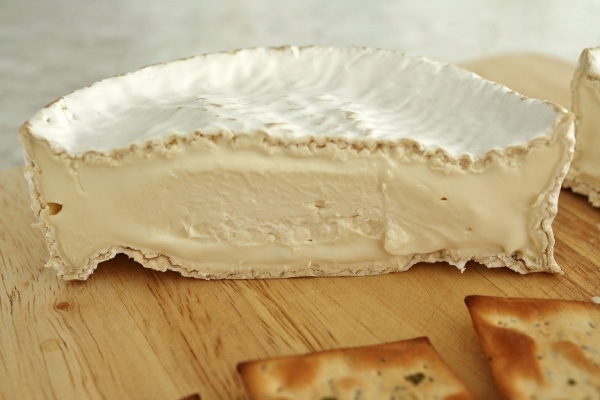
Camembert is a cheese that will continue to soften the longer it ages/ripens. You must be careful of this because if it ages too long, it will essentially liquify! My first two Camembert cheeses were ready (if not slightly over-ripe) right before I was heading on my recent Disney Cruise.
I moved the two cheeses (which were loosely wrapped in parchment paper) to unsealed plastic bags (so they could breathe) and placed them in my cheese drawer to stay cold and hopefully not continue to age until I was ready to cut them. Camembert cheese will continue to age until it is cut, and then once it's cut, it should be consumed rather quickly.
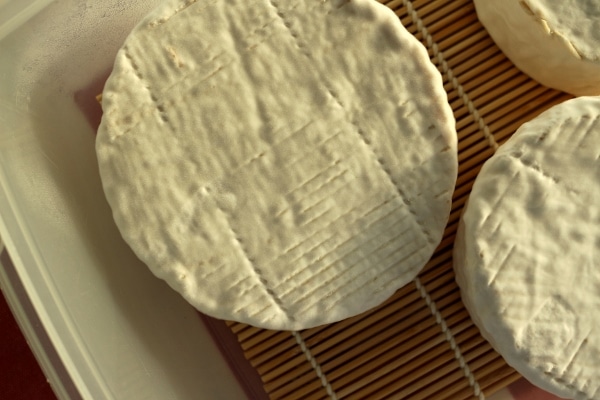 |
| After 2 weeks of aging |
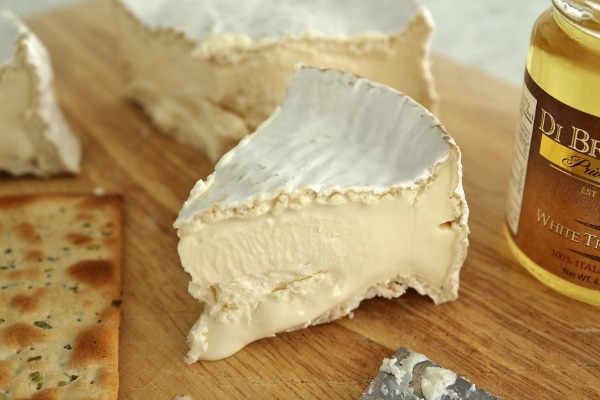
Promptly after returning from the cruise, I cut into the first of the two Camemberts (the third was still aging in my mini fridge until the following week). It was a little droopy, but still utterly fantastic! I actually like that it was slightly over-ripe because it was more easily spreadable.
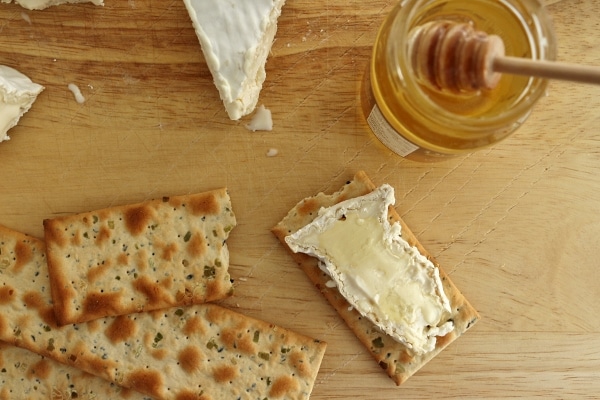
The flavor of the cheese was fantastic! Not too "stinky." I brought some cheese to work as well and got tons of rave reviews from everyone, including the CEO of the company, a self-proclaimed cheese-lover. Score!
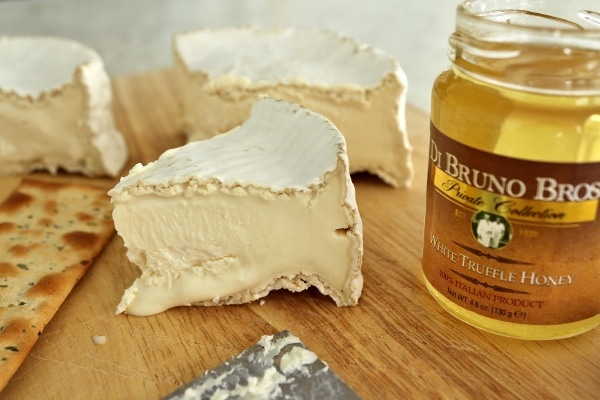
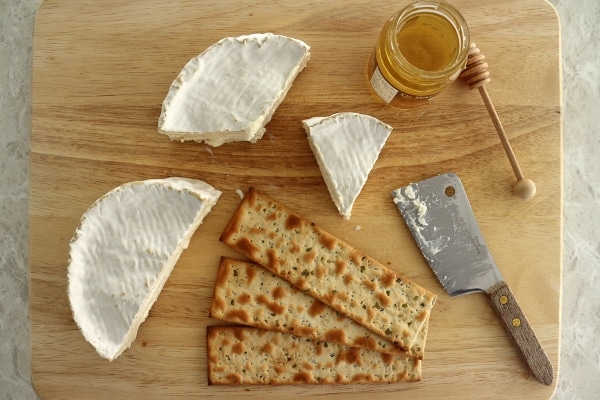
This Camembert is excellent on its own, but really shines when paired with white truffle honey. I'm sure any honey would be a wonderful counterpart to this cheese, but I luckily had received white truffle infused honey at Christmas time, and it really was outstanding between the sweetness and the fragrant truffle flavor. It took this Camembert to a whole other dimension. Seriously.
I am so excited to add another successful cheese to my arsenal. I will happily make both the Stilton and Camembert cheeses again in the future, but I'm also excited to try some new ones. There is a fattier, creamier blue featured in the book that I'd like to try, but also the Havarti is really calling my name. Stay tuned for more of my cheesemaking adventures 🙂
Other recipes you may like
- Homemade Stilton Cheese
- Obatzda (German Beer Cheese Dip)
- Nakládaný Hermelín (Czech Marinated Cheese)
- Crab and Brie Chowder
Tried this recipe? Please leave a star ⭐️⭐️⭐️⭐️⭐️ rating in the recipe card below and/or a review in the comments section further down the page. You can also follow me on social media on Facebook, Instagram, and Pinterest!
Homemade Camembert Cheese
Equipment
- 2 medium-sized cheese forms (may be Camembert or similar forms, approximately 4 inches round base by 4 inches height, open bottom, untapered)
- digital kitchen thermometer
- cheese paper (I use parchment–not the same, but I make it work)
Ingredients
- 2 gallons unhomogenized whole milk (not ultra-pasteurized) (I used homogenized, and it worked!)
- 1 cup heavy cream (not ultra-pasteurized)
- ⅛ teaspoon prehydrated mesophilic cultures* such as MM100 or Flora Danica
- Pinch of prehydrated Penicillium candidum mold powder*
- Pinch of prehydrated Geotrichum candidium mold powder*
- ¼ teaspoon calcium chloride diluted in ¼ cup water
- ¼ teaspoon rennet diluted in ¼ cup water (I used dry vegetable rennet, as opposed to the preferred calf rennet, and it worked!)
- 2 to 3 teaspoons salt
Instructions
- Clean all surfaces and equipment before beginning. Set up a draining station by placing the cheese forms on a draining rack (I use a sushi mat) in the sink.
- Pour the milk into a heavy-bottomed stockpot and warm over medium heat to 86°F, stirring gently. Remove from the heat.
- Add the prehydrated cultures and mold powders to the milk, then stir in, using an up-and-down motion.
- Add the calcium chloride solution and stir. Add the rennet solution. Stir in for 20 seconds, then stop the motion of the milk but stirring the opposite direction for a moment. As you add the rennet, start a timer and watch for the flocculation point**. When reached, stop the timer. Multiply the number of minutes elapsed by 5. This is how long you need to wait before you cut the curd. Goal time is 60 to 90 minutes.
- At the timed moment, cut the curd into 1 ½-inch pieces. Then, without stirring, let the curd sit for 45 minutes. During this time, the curd will sink below the surface of the whey (honestly, my curds didn’t sink, but I let them rest like this anyway).
- Remove the whey from the top of the pot until you see the surface of the curd again, then begin to stir (working from the top of the pot and moving downward) for 3 minutes. This action is more one of lifting and moving the curds than actually stirring. Allow the curds to rest in the pot for another 5 minutes.
- Finally, scoop the curds out of the pot and fill each form. Fill the forms all the way to the top before moving on to the next form. Depending on the height of your form, you may need to fill it, then wait 10 to 20 minutes for the curd level to drop sufficiently, then fill again. If you are absolutely certain you can’t fill your curds into the prepared forms, add another.
- Let the curds drain for 8 to 12 hours, flipping regularly, covered at room temperature.
- Sprinkle ¼ to ½ teaspoon salt on the top of each cheese while it is still in the form. Let the salt soak in for half an hour, then flip the cheese and repeat the salting on the opposite side. Let the salt soak in for 10 hours more at room temperature. During this time, make sure the whey can flow freely away, so that the cheese does not sit in a puddle.
- Remove the cheeses from their forms and set on a clean aging mat (again, I use a sushi mat for this), cover with cheesecloth, and allow the cheese to air-dry at room temperature for 1 day more. Finally, blot the cheese extra-dry with a clean paper towel. Place the cheese on the aging mat in the aging bin and place in a 45°F location (I loosely cover with a lid although the original recipe didn’t specify). If unavailable, store in the refrigerator.
- For the first 2 weeks, with clean hands or wearing gloves, flip the cheeses every day, and remove any accumulated moisture with a clean cloth or paper towel. You should start to see Geotrichum candidium mold growing on the rind after about 1 week. It looks like shimmery velvet. Next, you should see a heavier white mold grown in–the Penicillium candidum.
- When the cheeses are fully covered in mold, wrap in cheese paper to prevent the mold coat from growing too thick, or skip the paper and simply continue to flip and pat down the cheese rind on a weekly basis.
- After 4 weeks, check the cheese for ripeness by looking for a softness at the center. The center should feel more like a soft peach than a firm eraser. When ripe, enjoy. Store, uncut, in the fridge for up to 2 weeks more, and no longer.
Notes
Nutrition
*All nutritional information is based on third-party calculations and should be considered estimates. Actual nutritional content will vary with brands used, measuring methods, portion sizes and more.*


Comments
No Comments