Learn how to make homemade Stilton cheese in your own kitchen!
I'm definitely a kitchen do-it-yourselfer. I love learning how different things are made, and taking the time to make them myself from scratch whenever I have the opportunity.
In addition to staples like fresh pasta and home-baked bread, I've dabbled a little in cheesemaking. I've made some very basic cultured dairy products, such as yogurt, ricotta cheese, mascarpone cheese, and crème fraiche, as well as a more complex mozzarella.
I've been intrigued by cheesemaking, but never really went beyond my comfort zone. Well, enter Kitchen Creamery by Louella Hill. It should more aptly be called The Cheesemaking Bible because that's exactly the way it reads.
I'll be honest, when I first received my review copy of the book and started just skimming some of the recipes, I panicked. I worried that I had bit off more than I could chew, and that I'd need to spend a lot of time and money to make any of the non-basic recipes.
Fortunately, I took a deep breath, flipped back to the beginning of the book and started reading. This is definitely a book that you need to actually read from beginning to end to really have an understanding of how to make cheese in the most fundamental sense.
If you don't read all of the introductory information, as well as the appendices, you will miss a lot of vital information that could save you when making cheese in your home kitchen.
Louella has done an exemplary job with this book. After reading all the fine print, I felt more than confident to attempt some of the intermediate cheese recipes (since I had already made several of the basics on my own previously).
My main concern was still in regards to sourcing cultures and finding or purchasing forms. Although many of the recipes call for specific sizes or shapes of forms, there are some great tips on using other materials as forms for your cheeses, and there are some recipes that don't use forms at all!
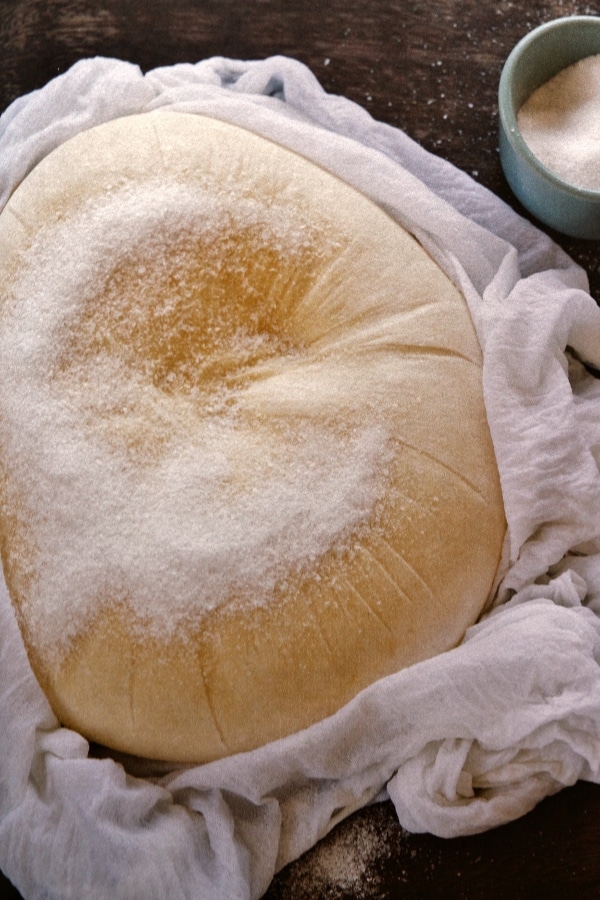 |
| This Baby Jack cheese is shaped simply in a cheesecloth-lined colander and then pressed! Louella states that the same technique can be used with other pressed cheeses to create a more rustic look and avoid using an actual form. |
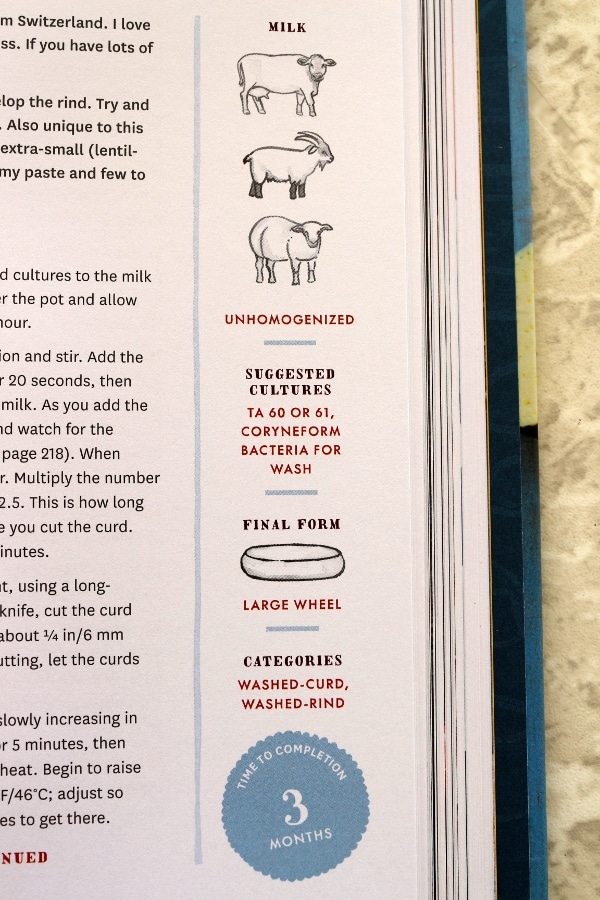
Each recipe also indicates all the key information you will need before determining whether or not you can make or would like to make that particular cheese. A bar along the edge indicates what type of milk to use, suggested cultures, final form, categories, and time to completion. The recipes are also color-coded by difficulty level.
Louella points out that you should not plan on making all of the cheeses in the book, but rather focusing on one or a few at a time and trying to master and manipulate them by making them over and over again.
I can see why this is an especially good piece of advice because many cheeses require different cultures and different tools in some cases, so although there may be some repetition, you'd need a lot to build a serious cheesemaking pantry until you're ready to do so.
You can easily begin cheesemaking without having to commit to purchasing too many products. After reading through the entire book, I decided to focus my early cheesemaking attempts on the Mold-Ripened Cheeses chapter.
I did this for a few reasons. One, I love stinky cheese. Two, There are at least a couple recipes in this section that can easily be made with homemade forms instead of purchasing anything extra. Three, I was able to find a very reasonably priced kit containing smaller amounts of the cultures and molds required to make both bloomy-rind cheeses (think Camembert and Brie) and blue cheeses.
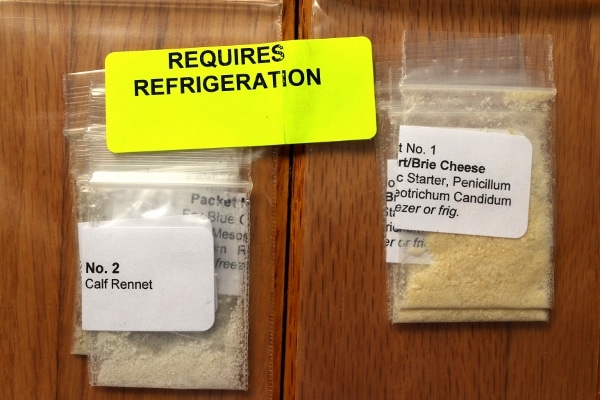
These packets, reasonably priced and sold by The Cheesemaker contain more than enough for me to make several wheels of mold-ripened cheeses. It includes the culture, powdered rennet, and mold which can be used for camembert and/or blue cheeses.
The culture and molds were pre-measured and pre-mixed into baggies for Camembert and separate baggies for blue. I also purchased calcium chloride from the same vendor.
I was a bit disappointed since I didn't realize the cultures and mold spores would be mixed together and I couldn't measure them to Louella's recipes. The measurements asked for are so small (a quarter teaspoon and sometimes even just a pinch) that I hoped it would be okay to let go of a little control.
I measured out the pre-mixed cultures and molds and determined that I needed to use both packets for a single recipe of Stilton to have a heaping ¼ teaspoon in total. Also, I used all four packets of rennet for a single Stilton recipe, so I'd obtain more before making more cheese in the future with the remaining Camembert packets.

This vendor was included in the resources section of Kitchen Creamery and I highly recommend them myself for their great products and excellent customer service!
I emailed them with a question and received a response perhaps 10 minutes later, and then when I actually placed my order, I received confirmation that it was shipped 20 minutes after placing the order! That's fast!
Just keep in mind that the packets that I purchased were already pre-mixed. If I find myself making more and more cheese, I will buy the cultures and molds individually next time in a larger quantity, but for beginners like myself, this is a great option.

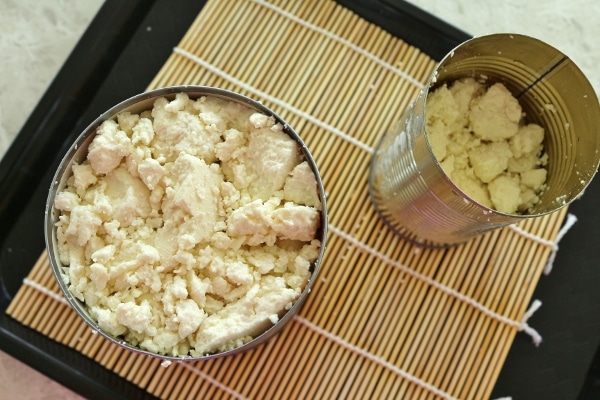
The Stilton recipe in the book actually uses an extra-tall open-bottomed form, such as a 32-ounce can with both the top and bottom taken off. I could only find 28-ounce or 48-ounce cans depending on the product (canned tomatoes for the former, canned tomato or pineapple juice for the latter).
I contacted Louella and she said the 28-ounce can is just fine. That's easy enough! The Camembert uses a bottomless mold as well studded with holes around the sides. In a fun graphic within the introduction of the book, Louella suggests PVC pipe that is cut and drilled as a repurposed form.
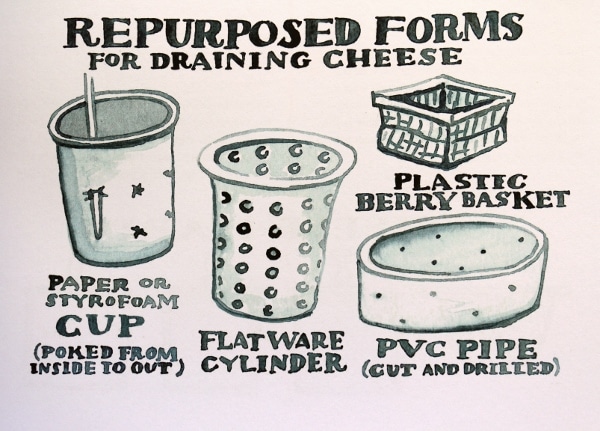
I actually purchased two PVC pipe repair coupling fittings (whatever the heck those are) which were actually 4 ½ inches in diameter and 4 inches tall, and then drilled holes in them similar to those on actual Camembert forms or molds.
By doing it myself, I saved about $12 (although prices could change at any time). It may not seem like a lot, but it can add up. If you plan on making Camembert or Brie but would rather purchase your own forms, you can find some here in different sizes.
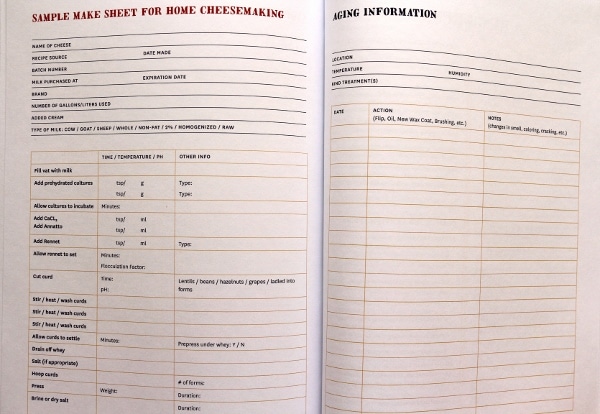
I can't stress enough what a wonderful job Louella has done with the amount of detail included in this book. It includes charts galore and even contains sample sheets you can copy to make notes for your cheesemaking adventures.
Keeping good notes both while making your cheese and throughout the potential weeks or even months aging them is a great way to remember what you've done, and then replicate it or even change it if necessary for future batches.
When you make cheese, the milk separates into curds (which you use to make the actual cheeses) and whey, a protein-rich liquid. Within three hours of making another rennet-based cheese, you can actually use this whey to create Whey Ricotta.
Louella doesn't recommend using the whey from mold-ripened cheeses for the Whey Ricotta, but I plan to try some other styles of cheese in the future, and love the idea of making two cheeses for the price of one!
To start, I planned on making both the Camembert and Stilton cheeses (and perhaps even others from that chapter) since I have the cultures and molds for both, as well as my handy dandy homemade forms (the drilled PVC pipe and the topless and bottomless can).
In order to maintain the temperatures as best as possible for aging, I actually rigged my old college dorm refrigerator to use for this purpose. It's usually only used for parties when we need a little extra fridge space, but it's perfect for cheesemaking!
For one thing, there is no chance to contaminate other foods in the fridge with molds from my cheese, but I can also maintain a constant temperature (especially since it's no longer winter and there aren't any particularly cool spots in my home where I can properly age cheese).
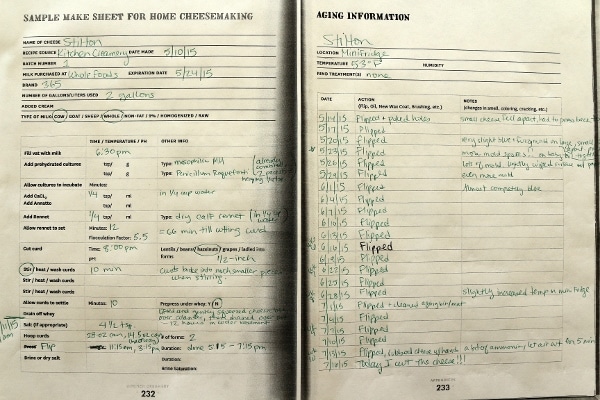
With that said, I began my cheesemaking endeavors on May 10th at 6:30 pm. I kept meticulous notes of the cheesemaking and aging process on copies of the worksheets found in the book.
I was pretty nervous, even with the ample information provided in Kitchen Creamery, but through occasional emails to Louella along with photos of my progressing cheese, my anxiety quickly faded.
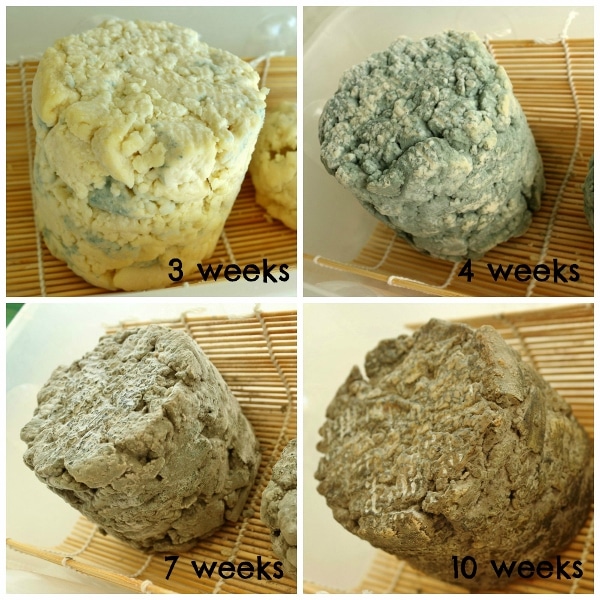
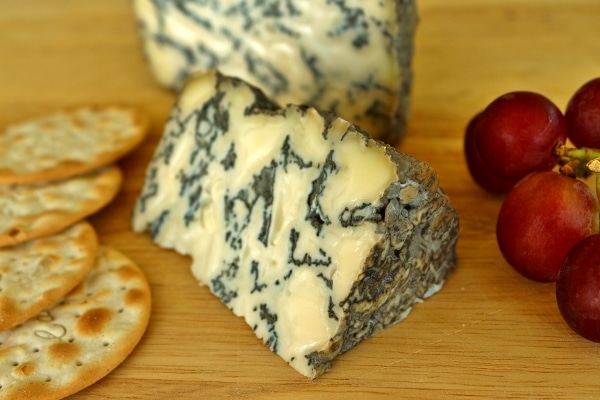
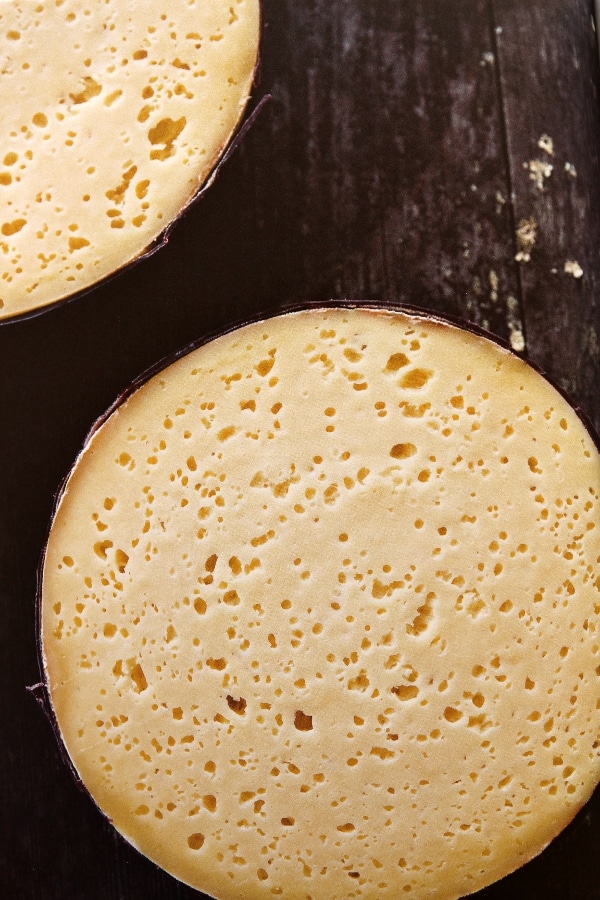
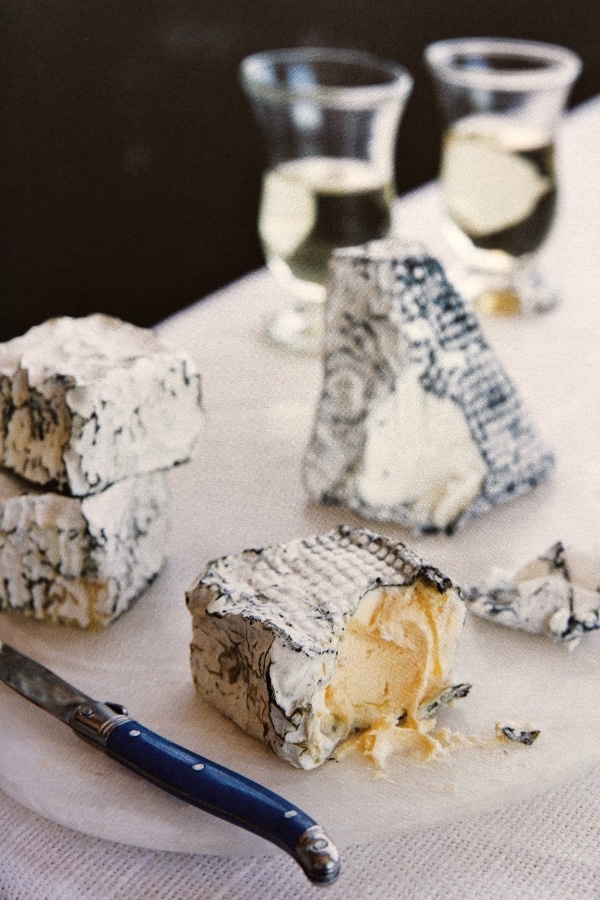
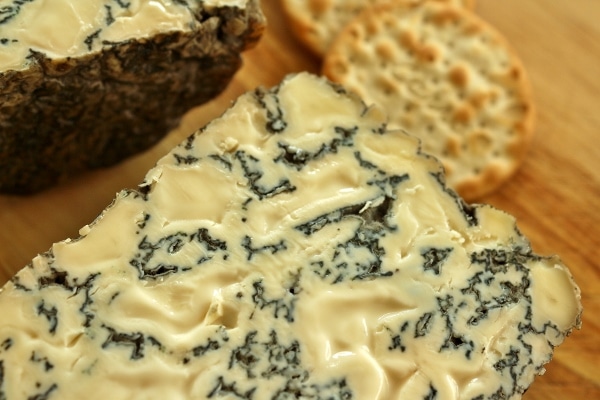
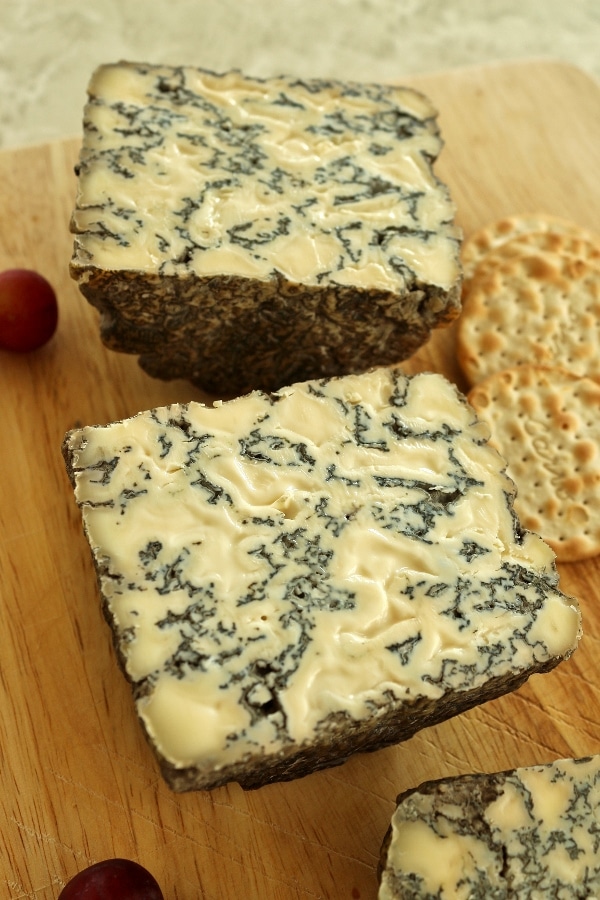
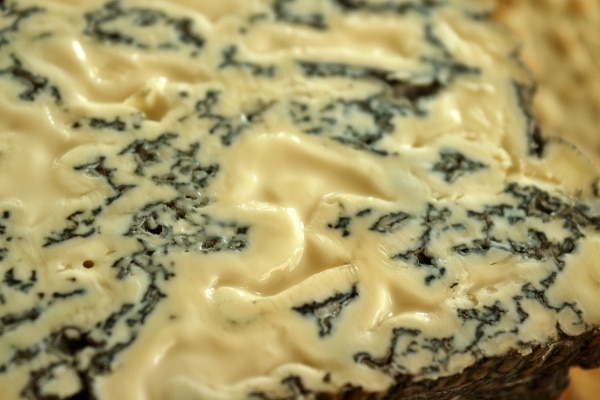
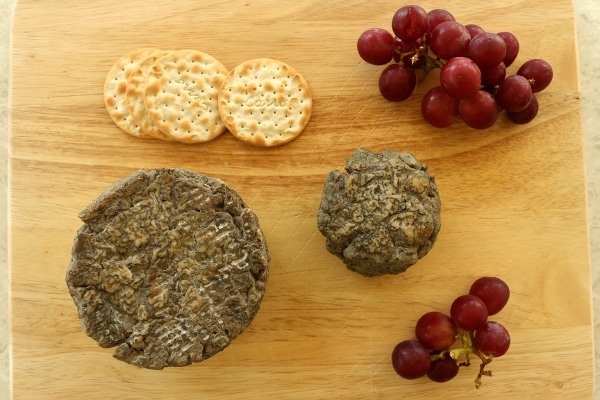
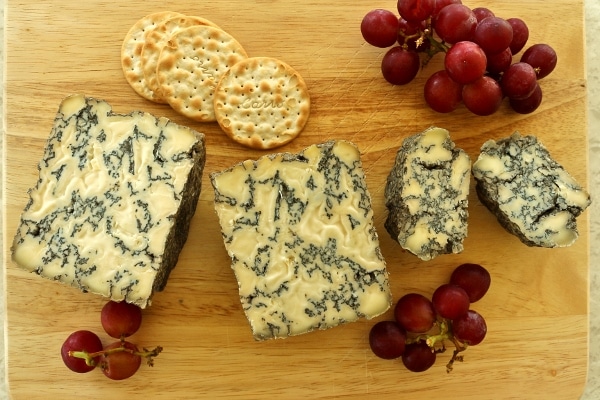
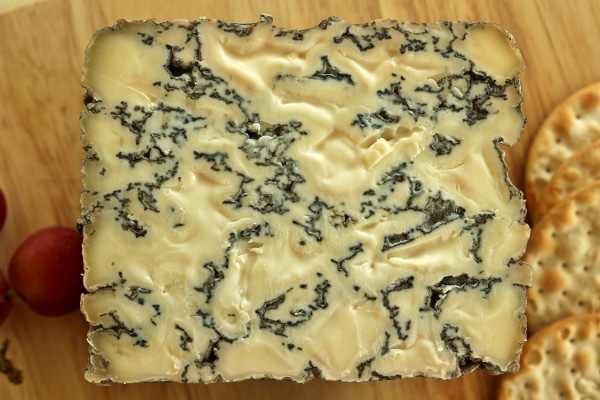
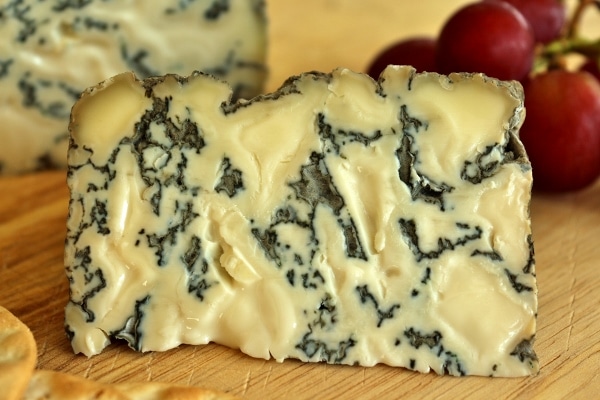
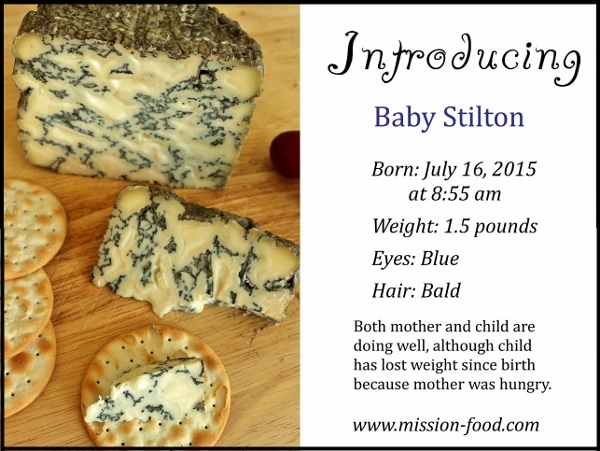
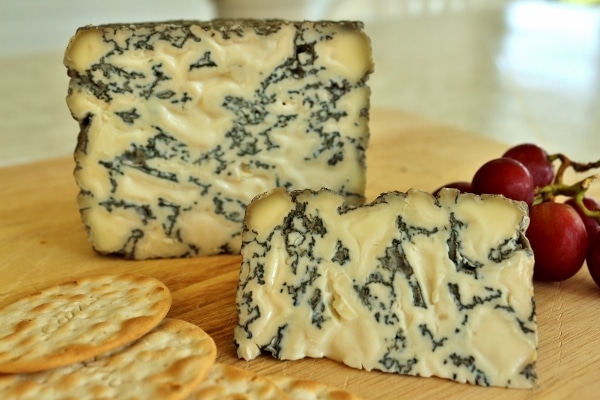
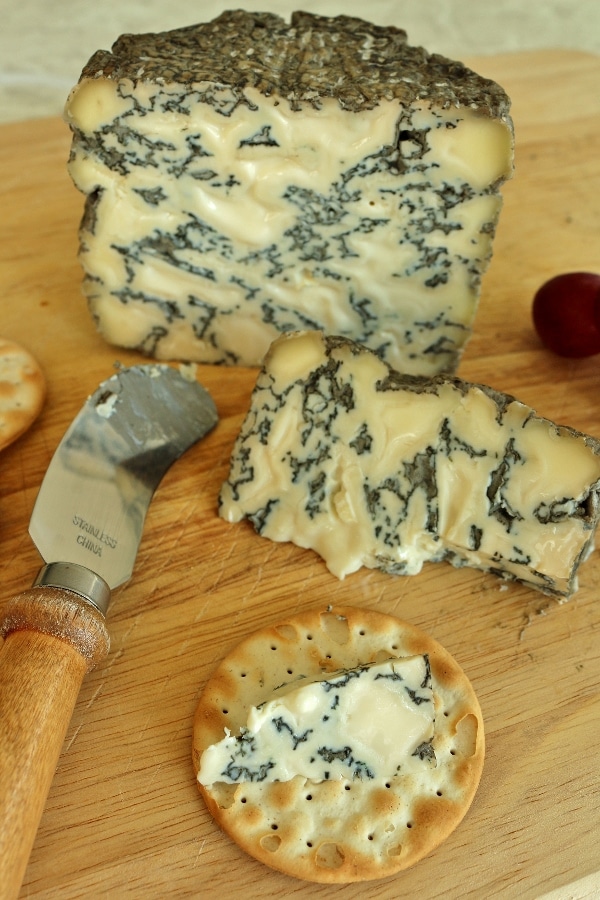
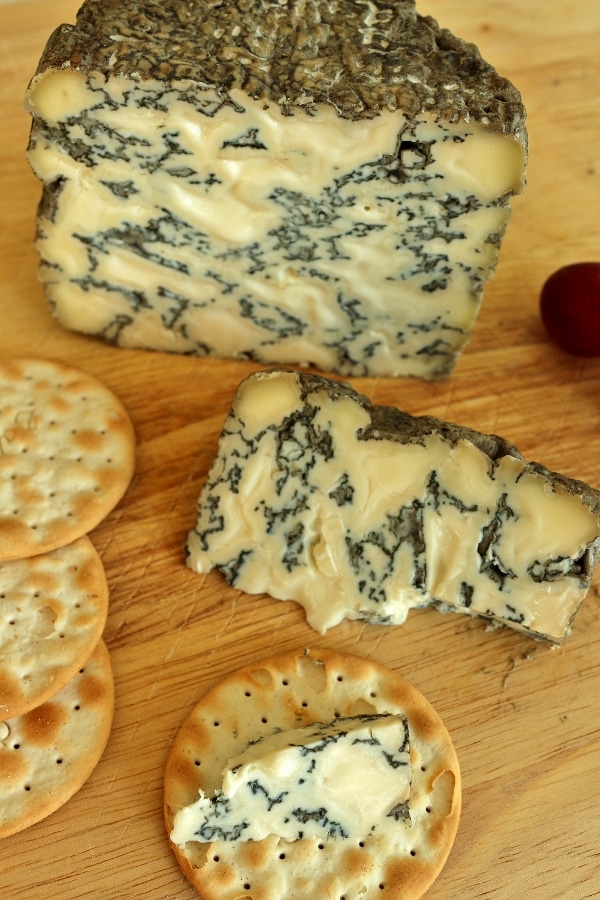
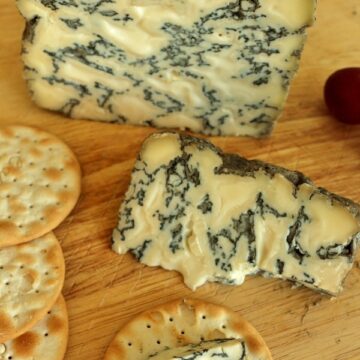
On July 16th around 8:55 am, I cut into my Stilton to discover a beautiful blue-veined cheese that I couldn't wait to dig into!
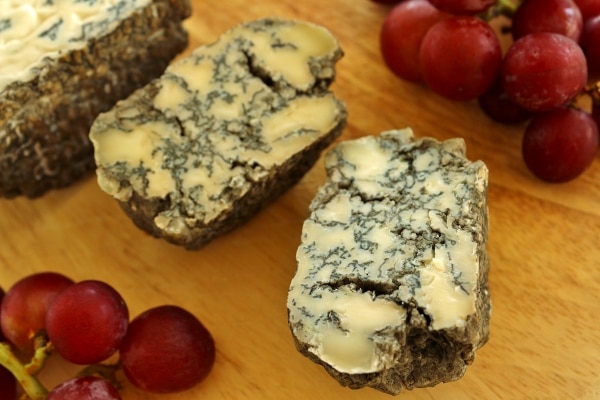
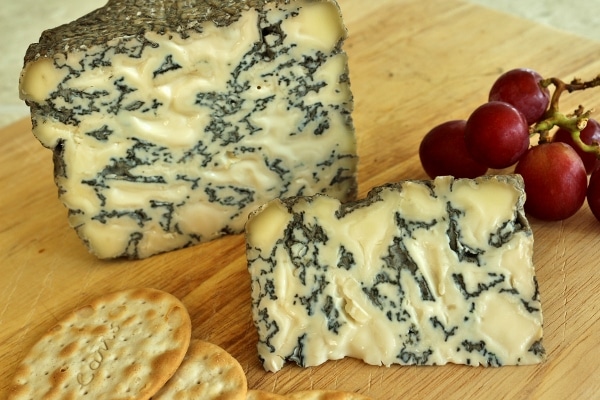
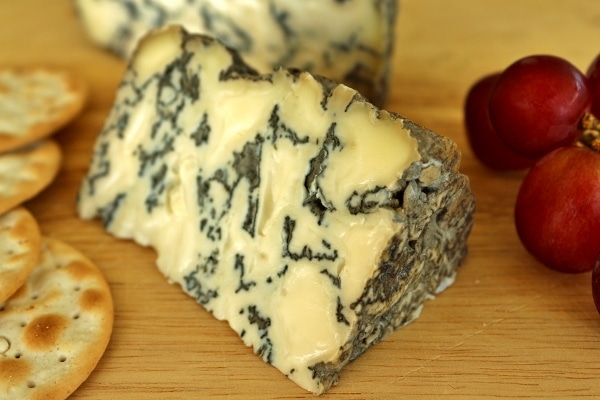
The smaller blue is drier (as expected) since it technically required less aging time than the big one. The texture reminded me almost of a cheddar. Not super crumbly, but not creamy either. Somewhat pungent and firm.
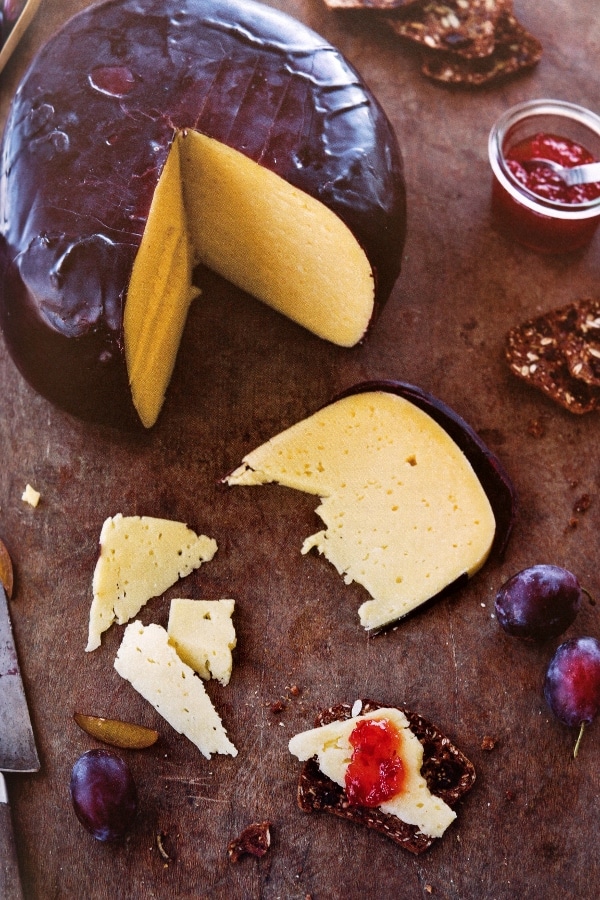
The big blue is glossy with streaks of bloomy cheese that reminds me a bit of Brie by its shine, but is otherwise not gooey at all. The texture is not quite as rich and spreadable as a Roquefort, but still a bit softer and not naturally crumbly (although you can easily still crumble it, it doesn't crumble upon contact like some dry blues do).
It probably could have aged longer to obtain a drier consistency, but personally, I like the texture and the less assertive blue flavor. It's still "stinky" but not super intense.
My Stilton aged for about 10 weeks, which is longer than the book suggests (it said 6 to 8), but in my case it simply was necessary. I was aging in a mini-fridge with an adjusted temp, but even with the temp in the required range, it perhaps was still cooler overall than ideal, thus the longer aging.
I'm super thrilled with the results of my cheesemaking! In fact, I was so excited I decided to share a "birth" announcement for my cheese on social media!
I plan on waiting until the fall before starting my next cheese, simply because the weather should be cool enough that I may be able to age my followup cheese on an enclosed patio or in the basement if the temperature is right.
I may also make more than one cheese at once, overlapping the aging time a bit, but since this was my first try, I didn't want to overwhelm myself.
Upcoming cheeses I plan to make include more Stilton, Camembert, and I'm thinking of making a free-form Havarti (similar to the Baby Jack in the book) as well!
I definitely recommend Kitchen Creamery if you have any interest in making homemade cheese. There are tons of recipes for cheeses that do not require aging or fancy equipment, so don't be put off if you just can't fathom the time commitment for making an aged cheese.
At the very least, this book will give readers an appreciation for the amount of time and effort involved in cheesemaking. No wonder so many fancy cheeses cost so much in the store!
How to make homemade Stilton cheese
Clean all surfaces and equipment before beginning. Set up a draining station by placing a clean colander lined with the cheesecloth in the sink.
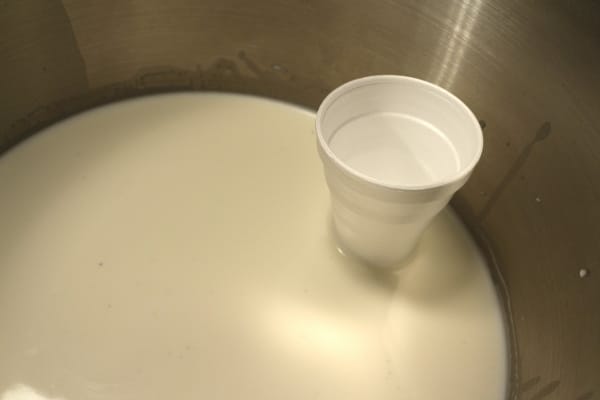
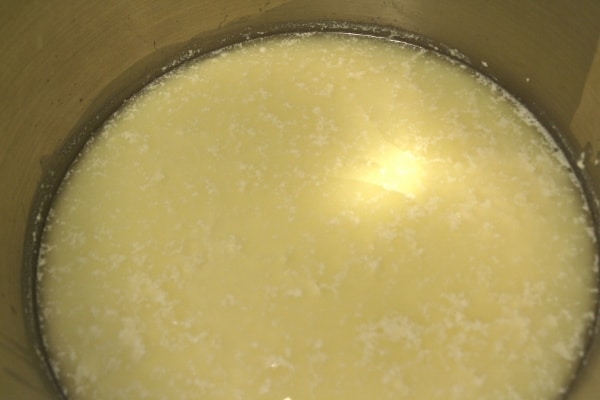
Pour the milk into a heavy-bottomed stockpot and warm over medium heat to 86 degrees F, stirring gently. Remove from the heat. Add the cultures and mold to the milk. Allow them to hydrate for 2 minutes, then stir in, using an up-and-down motion.
Add the calcium chloride solution and stir briefly. Add the rennet solution. Stir in for 20 seconds, then stop the motion of the milk but stirring the opposite direction for a moment.
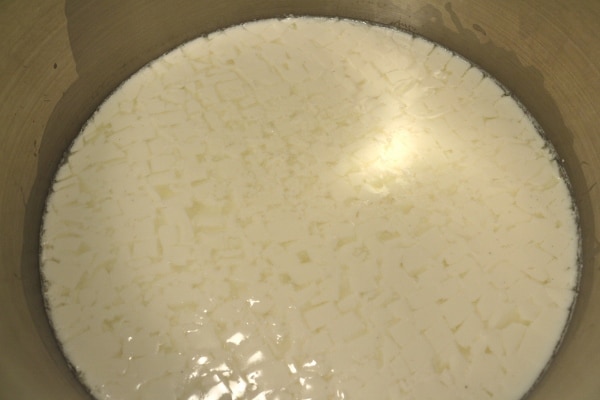
As you add the rennet, start a timer and watch for the flocculation point**. When reached, stop the timer. Multiply the number of minutes elapsed by 5.5. This is how long you need to wait before you cut the curd. Goal time is 90 minutes.
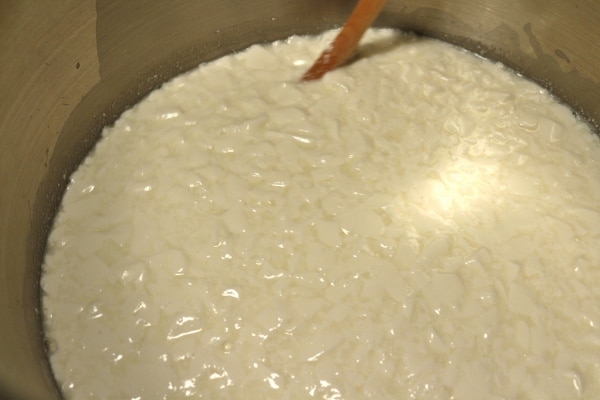
At the timed moment, cut the curd into ½-inch pieces. Stir gently for 10 minutes, then let the curds settle to the bottom of the pot for another 10 minutes.
Pour off the whey that has collected at the top of the pot, then gently pour the curds into the prepared colander. Cover the colander with additional cheesecloth or knot the corners of the cloth to form a pouch. Drain for 12 hours at room temperature.
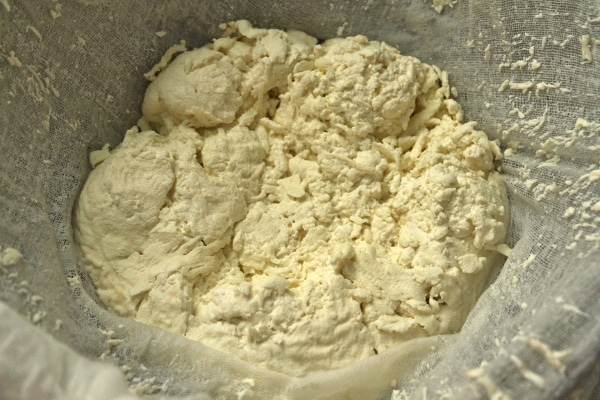
Afterward, open up the cheesecloth and move the drained curds to a bowl. With clean hands, break the curd into walnut-size chunks. Add half the salt to the curd chunks, toss to incorporate, then wait 2 minutes. Add the remaining salt and repeat the mixing process. The curds will taste very salty.

After salting, fill your prepared cheese form with the curds, packing them in, using your fingertips to very gently press down on the cheese. Do not press too hard (or you will compact all the spaces where the blue mold is going to grow) but use enough pressure that the cheese starts to knit together slightly. An underpressed cheese will fall apart when flipped. Place the curd-filled form on a draining rack (such as a sushi mat).
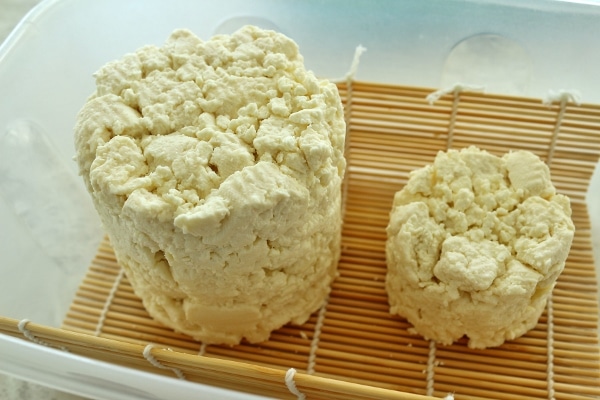
Keep the cheese in its form, at room temperature, for 8 to 10 hours more, flipping after 2 hours and again after 6 hours. Flipping is especially easy if you are using an open-bottomed form.
Finally, remove the cheese from its form by gently pushing it out and onto an aging mat (such as a sushi mat). With a knife or spatula, gently smear the sides of the cheese--as though you were frosting a cake--to help fill in the gaps and to form a more closed rind.
Move slowly; I know it's difficult to do because the cheese is crumbly. Move the cheese into a clean aging bin. Cover with the lid. Place the bin in a 65 degree F location for 2 to 3 days. This warmer period is important for acid development that activates the blue mold spores. Remove built-up moisture from the bin as needed.
After 2 to 3 days, take the knitting needle and pierce the cheese a half dozen times horizontally. You can make more pierces vertically if you wish.
Now move the bin and cheese to a cooler (50 to 55 degrees F) location. Keep the lid on the box but not locked down. Turn the cheese every 3 days. Begin to wipe the rind with your fingertips or a small piece of cheesecloth if excessive molds start to grow. Eventually, the rind will start to feel sticky and turn brown or pinkish in color.
For extra veining, pierce the cheese again between days 10 and 14. Ripen the cheese for 6 to 8 weeks, flipping and maintaining the rind and moisture levels. Ripen the cheese for 3 to 5 weeks longer if aging in a refrigerator. Enjoy, or wrap the cheese in aluminum foil and keep in the fridge, uncut, for up to 1 month.
Other recipes you may like
- Homemade Camembert Cheese
- Buffalo Chicken Stuffed Shells
- Buffalo Deviled Eggs
- The Hollywood Brown Derby Cobb Salad
Tried this recipe? Please leave a star ⭐️⭐️⭐️⭐️⭐️ rating in the recipe card below and/or a review in the comments section further down the page. You can also follow me on social media on Facebook, Instagram, and Pinterest!
Homemade Stilton Cheese
Equipment
- medium (60#) cheesecloth
- digital kitchen thermometer
- medium cheese form, ideally extra-tall and open-bottomed (a 32-ounce can with both the top and bottom taken off to form a hoop works perfectly)
- #6 knitting needle or equivalent for piercing
Ingredients
- 2 gallons whole milk (not ultra-pasteurized)
- ¼ teaspoon prehydrated mesophilic cultures* (such as MM100)
- ⅛ teaspoon prehydrated Penicillium roqueforti mold spores*
- ¼ teaspoon calcium chloride diluted in ¼ cup water
- ¼ teaspoon rennet diluted in ¼ cup water
- 4 to 5 teaspoons salt
Instructions
- Clean all surfaces and equipment before beginning. Set up a draining station by placing a clean colander lined with the cheesecloth in the sink.
- Pour the milk into a heavy-bottomed stockpot and warm over medium heat to 86 degrees F, stirring gently. Remove from the heat.
- Add the cultures and mold to the milk. Allow them to hydrate for 2 minutes, then stir in, using an up-and-down motion.
- Add the calcium chloride solution and stir briefly. Add the rennet solution. Stir in for 20 seconds, then stop the motion of the milk but stirring the opposite direction for a moment. As you add the rennet, start a timer and watch for the flocculation point**. When reached, stop the timer. Multiply the number of minutes elapsed by 5.5. This is how long you need to wait before you cut the curd. Goal time is 90 minutes.
- At the timed moment, cut the curd into ½-inch pieces. Stir gently for 10 minutes, then let the curds settle to the bottom of the pot for another 10 minutes.
- Pour off the whey that has collected at the top of the pot, then gently pour the curds into the prepared colander. Cover the colander with additional cheesecloth or knot the corners of the cloth to form a pouch. Drain for 12 hours at room temperature.
- Afterward, open up the cheesecloth and move the drained curds to a bowl. With clean hands, break the curd into walnut-size chunks. Add half the salt to the curd chunks, toss to incorporate, then wait 2 minutes. Add the remaining salt and repeat the mixing process. The curds will taste very salty.
- After salting, fill your prepared cheese form with the curds, packing them in, using your fingertips to very gently press down on the cheese. Do not press too hard (or you will compact all the spaces where the blue mold is going to grow) but use enough pressure that the cheese starts to knit together slightly. An underpressed cheese will fall apart when flipped. Place the curd-filled form on a draining rack (such as a sushi mat).
- Keep the cheese in its form, at room temperature, for 8 to 10 hours more, flipping after 2 hours and again after 6 hours. Flipping is especially easy if you are using an open-bottomed form.
- Finally, remove the cheese from its form by gently pushing it out and onto an aging mat (such as a sushi mat). With a knife or spatula, gently smear the sides of the cheese-as though you were frosting a cake-to help fill in the gaps and to form a more closed rind. Move slowly; I know it's difficult to do because the cheese is crumbly. Move the cheese into a clean aging bin. Cover with the lid. Place the bin in a 65 degree F location for 2 to 3 days. This warmer period is important for acid development that activates the blue mold spores. Remove built-up moisture from the bin as needed.
- After 2 to 3 days, take the knitting needle and pierce the cheese a half dozen times horizontally. You can make more pierces vertically if you wish.
- Now move the bin and cheese to a cooler (50 to 55 degrees F) location. Keep the lid on the box but not locked down. Turn the cheese every 3 days. Begin to wipe the rind with your fingertips or a small piece of cheesecloth if excessive molds start to grow. Eventually, the rind will start to feel sticky and turn brown or pinkish in color.
- For extra veining, pierce the cheese again between days 10 and 14.
- Ripen the cheese for 6 to 8 weeks, flipping and maintaining the rind and moisture levels. Ripen the cheese for 3 to 5 weeks longer if aging in a refrigerator.
- Enjoy, or wrap the cheese in aluminum foil and keep in the fridge, uncut, for up to 1 month.
Notes
Nutrition
*All nutritional information is based on third-party calculations and should be considered estimates. Actual nutritional content will vary with brands used, measuring methods, portion sizes and more.*
*Disclaimer* I received no compensation to write this review other than a free copy of the book. My opinions are always my own.


Comments
No Comments