
Try a taste of Rome in your own kitchen! Although you'll find variations of pizza throughout Italy, Pinsa is a unique style which originates in Rome. These oval-shaped personal-size pies feature a unique blend of flours in the crust, yielding the perfect balance of crisp and chew while also making this distinctive pizza easier to digest.

Pinsa (PEEN-sah) is an oblong-shaped pizza originating in Rome and featuring a unique style of crust. The word pinsa comes from the Latin word "pinsere," which means to stretch or crush, which is fitting for the stretched oval shape of this pie.
It actually has roots in Ancient Rome, where it was made with a mixture of grains and cooked on a stone hearth. Since then, the recipe has evolved to include wheat flour in addition to a couple others.
When I visited Rome, I was beyond impressed by the incredible pinse. I much prefer the flavor and texture of Pinsa Romana over Pizza Napoletana. We had both on this trip and the pinse of Rome were the winners by a large margin.

Key characteristics of Pinsa vs. Pizza
Although Pinsa Romana is technically a style of pizza, there are some notable differences between pinse and other types of pizza.
- Shape: A pinsa is oval or oblong while a pizza is typically round.
- Dough Ingredients: Pinsa dough features a blend of flours (wheat, rice, and soy or spelt) while pizza features only wheat flour.
- Hydration: Pinsa dough has a higher water content than pizza dough, which results in light, big bubbles.
- Dough Texture: Pinsa dough has a uniquely light and crunchy exterior with a soft and airy interior, while pizza dough is more dense.
- Time: Pinsa dough requires a long, slow cold fermentation process to get the right results, while pizza dough does not.
- Health: Pinsa is actually lower in gluten and easier to digest than pizza because of the mixture of flours and cold fermentation process, which breaks down starches.
- Baking Process: Pinsa dough is often baked before topping, then topped and finished in the oven as needed, resulting in a less soggy crust.

Comparing two Roman pizzas: Pinsa Romana vs. Pizza al Taglio
These are actually two different Roman styles of pizza! Here is a bit of a comparison between these two since you'll find both in the Italian capital.
- Shape: A pinsa is oval or oblong while pizza al taglio is rectangular.
- Dough Ingredients: Pinsa dough features a blend of flours (wheat, rice, and soy or spelt) while pizza al taglio features only wheat flour.
- Hydration: Pinsa dough has a higher water content than pizza al taglio dough.
- Selling Method: Pinsa is usually served as a personal, plated pizza as a sit down meal, while pizza al taglio is a grab-and-go option which is cut with scissors into squares or strips and sold by weight (al taglio meaning "by the cut").

Topping suggestions
You can get as creative as you want topping your Pinsa Romana! Add tomato sauce or don't. Add cheese or don't. The options are endless, but here are a few.
- Marinara: Tomato sauce, sliced fresh garlic, fresh oregano.
- Margherita: Tomato sauce, fresh mozzarella, fresh basil, and extra-virgin olive oil.
- Cherry Tomatoes & Stracciatella or Burrata: (I had this flavor combo in Rome!) tomato sauce, halved cherry tomatoes, stracciatella or torn burrata cheese, and fresh basil.
- Diavola: Tomato sauce, fresh mozzarella, spicy salami, and chili flakes.
- Capricciosa: Tomato sauce, fresh mozzarella, artichokes, ham, mushrooms, and olives.
- Quattro Formaggi: (bianca - white pizza without tomato sauce, or rossa - red pizza with tomato sauce) fresh mozzarella, gorgonzola, fontina, and Parmigiano-Reggiano.
- Mortazza: (toppings are not baked on the pizza) sliced mortadella, burrata or stracciatella cheese, and chopped pistachios or pistachio pesto drizzle.
Ingredient notes

- Flours: You actually need a trio of flour types to make this recipe. The first is bread flour which is pretty typical in bread-making; the second is rice flour (not glutinous!); and finally you'll need either soy flour (the most traditional) or spelt flour which is easier to find.
- Yeast: I use instant or rapid-rise yeast for this recipe. It is easier to dissolve and works faster (despite the slow fermentation process needed for this pinsa dough). If you want to use active dry yeast instead, increase the amount to 1 ¼ teaspoons.
- Water: This is a high-hydration dough. Use cold (from the refrigerator) filtered water.
- Toppings: As shared above, you can get very creative with your toppings or stick with traditional flavor combinations. For those with tomato sauce, I like to use canned crushed or ground peeled tomatoes combined with a little salt and extra-virgin olive oil. Easy peasy. I made three different types of pinse for this post: a classic margherita with tomato sauce, fresh mozzarella, fresh basil and extra-virgin olive oil; my beloved capricciosa (meaning "capricious") which features tomato sauce, fresh mozzarella, artichokes, ham (prosciutto cotto), mushrooms and olives; and finally mortazza which is topped with mortadella, stracciatella or burrata cheese and chopped pistachios, then served as is without further baking.

How to make it
Prepare the dough
Combine bread flour, rice flour, and spelt or soy flour with instant yeast in the bowl of a stand mixer fitted with the dough hook attachment.

With the machine running on low speed, add about 1 ¼ cups cold water in a few additions. Mix between each addition until there are no dry patches of flour left in the bowl.

Add salt and olive oil and continue to mix on medium speed.


Then add the remaining water a little at a time until combined. It will still look a bit wet and chunky.

Increase the mixer speed to medium-high. Continue to knead the dough until it's smooth and elastic.

Transfer the dough to a lightly oiled large mixing bowl. Cover tightly with plastic wrap and transfer to the fridge for 24 to 72 hours for cold fermentation.

Assemble the pinse
About 3 to 4 hours before baking, remove the dough from the refrigerator.

Lightly dust a work surface with rice flour and carefully turn the dough out of the bowl onto the surface. Divide it into 3 equal pieces weighing around 330 to 335 grams each.


Using your hands, form a dough ball out of each piece of the dough. I like to flip the dough over in my hands (since the bottom now has rice flour on it but the top is more sticky) and then pull the edges to the bottom to create a smooth ball.

If your work surface is large enough you can leave the balls on there, or transfer them to a parchment paper-lined and rice flour-dusted baking sheet. Lightly dust the tops with rice flour, then cover loosely with plastic wrap or a clean kitchen towel. Let it rise at room temperature until the dough has doubled, about 1 to 3 hours.

While the dough is proofing, you can prepare your pinsa toppings.
At least 1 hour before baking, place a pizza stone on the center rack of the oven. Preheat to the hottest temperature it will go 550°F (280°C) or at least 500°F (260°C).
Working with one ball of dough at a time, place on a lightly rice floured work surface. Gently stretch from the center toward the edges to create an oval or rectangle shape. You can use your fists underneath the dough to help stretch, then move toward the edges and let gravity help you. If the dough springs back, let it rest for a couple minutes, then try again. The ovals should measure about 12-to-14-inches in length and 9-to-11-inches in width. It can take some practice, but the thinner/larger you can get it the better.
Transfer the stretched dough to a rice flour-dusted pizza peel (if it's large enough), wooden cutting board, or the flat bottom (upside down) of a baking sheet. Drizzle the top of the dough with a little extra-virgin olive oil. Blot/spread gently with a pastry brush to lightly cover the entire surface.

Bake and serve
Carefully transfer the dough from the peel/board to the heated pizza stone. Bake for about 5 to 6 minutes. Keep in mind that the crust will brown even more after you add the toppings later on. I like mine well-done and extra crispy, but you may not; if that's the case, bake them a bit less at this stage.
If you see any particularly large bubbles appear mid-baking, you can poke them with the tip of a knife and quickly but carefully use the side of the knife blade to gently deflate them. Although bubbles are normally great (and one of the features of a good pinsa romana), if they're especially big it will be harder to arrange your toppings.
Remove from the oven and repeat with the remaining dough.

Next, add the toppings of your choice to each pinsa and, using the pizza peel, return as many as may fit on your pizza stone to the oven. Bake for about 4 more minutes, or as needed to heat the toppings and melt the cheese.


Remove from the oven using the peel and cut with scissors or a serrated knife into pieces to serve.
Please scroll to the bottom of the post for the full recipe (in a printable recipe card) including ingredient amounts and detailed instructions.

Expert tips
You can bake the dough to create pinsa bases in advance. When you're ready, add your toppings and finish baking in a super hot oven for a few minutes. Technically you can even eat pinsa romana without toppings like bread if you really wanted! It's very versatile.
This is the ultimate style of pizza for a make-your-own pizza party! Just pre-bake the crusts and let people top them however they like before finishing in the oven. In the past, I've even multiplied the recipe to make more pinsa bases for a crowd!
Use rice flour for flouring the work surface, the pinsa dough itself, and the pizza peel. It won't absorb into the dough but will also prevent it from sticking, making it much easier to slide onto the pizza stone. It works a bit similarly to using cornmeal in this fashion.
Store leftover pinsa romana in an airtight container or wrapped in aluminum foil in the refrigerator for up to 3 days. Reheat in a hot toaster oven or regular oven (about 400 to 425°F) on a foil-lined pan (for easy cleanup) until heated through.
For the best accuracy, always use a digital scale for weighing your ingredients! I've even provided the weights for each of the balls of dough to divide evenly (if you've weighed the ingredients, these should be pretty accurate).

Other recipes you may like
- Pizza Bianca (Roman Flatbread)
- Pizza Marinara (Cheeseless Pizza)
- Corn and Tomato Pizza
- Radicchio Pizza
- The Best Mortadella Sandwich in Rome
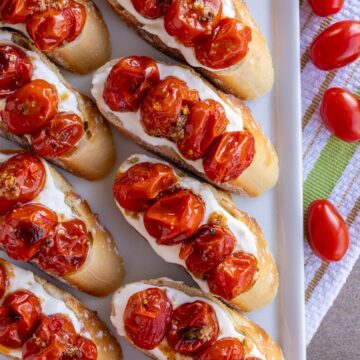
- Stracciatella Bruschetta with Roasted Cherry Tomatoes
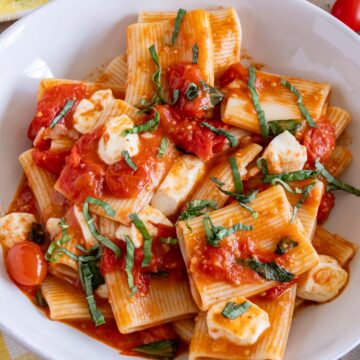
- Pasta alla Sorrentina (Pasta with Tomatoes, Basil, and Fresh Mozzarella)
Tried this recipe? Please leave a star ⭐️⭐️⭐️⭐️⭐️ rating in the recipe card below and/or a review in the comments section further down the page. You can also follow me on social media on Facebook, Instagram, and Pinterest!

Pinsa Romana (Roman-Style Pizza)
Ingredients
- 500 grams (4 cups) bread flour
- 50 grams (⅓ cup) rice flour plus more for dusting
- 30 grams (3 tablespoons) spelt or soy flour
- 3 grams (1 teaspoon) instant or rapid-rise yeast
- 400 grams (1 ⅔ cups) cold filtered water (from the fridge)
- 10 grams (1 tablespoon) kosher salt preferably Diamond Crystal brand (if using Morton, you may need half the amount in volume)
- 10 grams (1 tablespoon) extra-virgin olive oil plus more for brushing
Instructions
- Combine all three flours and the yeast in the bowl of a stand mixer fitted with the dough hook attachment. With the machine running on low speed, add about 1 ¼ cups (300 grams) of the cold water in a few additions, mixing between each addition, until there are no dry patches of flour left in the bowl, a few minutes.
- Add the salt and olive oil and continue to mix on medium speed, then add the remaining water a little at a time until combined, a few minutes. It will still look a bit wet and chunky.
- Increase the mixer speed to medium-high and continue to knead the dough. At first it will continue to stick to the sides, but eventually it will pull together into a ball. It might whip around a bit, stuck to the dough hook, but that's fine. Pause the machine once or twice, pull the dough off the dough hook and continue mixing. Mix for a total of 7 to 10 minutes, or until the dough is smooth, elastic, and still a bit tacky to the touch.
- Transfer the dough to a lightly oiled large mixing bowl. Cover tightly with plastic wrap and transfer to the fridge for 24 to 72 hours for cold fermentation.
- About 3 to 4 hours before baking, remove the dough from the refrigerator. Lightly dust a work surface with rice flour and carefully turn the dough out of the bowl onto the surface. Divide the dough into 3 equal pieces weighing around 330 to 335 grams each. (You can also divide the dough into 4 pieces if you want slightly smaller pinse; in that case, aim for roughly 250 gram balls).
- Using your hands, form a dough ball out of each piece of the dough. I like to flip the dough over in my hands (since the bottom now has rice flour on it but the top is more sticky) and then pull the edges to the bottom to create a smooth ball.
- If your work surface is large enough you can leave the balls on there (spacing them out so they have room to rise), or transfer them to a parchment paper-lined and rice flour-dusted baking sheet. Lightly dust the tops with rice flour, then cover loosely with plastic wrap or a clean kitchen towel. Let it rise at room temperature until the dough has doubled, about 1 to 3 hours (depending on the ambient temperature).
- While the dough is proofing, you can prepare your pinsa toppings.
- At least 1 hour before baking, place a pizza stone on the center rack of the oven and preheat to the hottest temperature it will go 550°F (280°C) or at least 500°F (260°C).
- Working with one ball of dough at a time, place on a lightly rice floured work surface and gently stretch from the center toward the edges to create an oval or rectangle shape. You can use your fists underneath the dough to help stretch, then move toward the edges and let gravity help you. If the dough springs back, let it rest for a couple minutes, then try again. The ovals should measure about 12-to-14-inches in length and 9-to-11-inches in width (it can take some practice, but the thinner/larger you can get it the better).
- Transfer the stretched dough to a rice flour-dusted pizza peel (if it's large enough), wooden cutting board, or the flat bottom (upside down) of a baking sheet, drizzle the top of the dough with a little extra-virgin olive oil and blot/spread gently with a pastry brush to lightly cover the entire surface.
- Carefully transfer the dough from the peel/board to the heated pizza stone. Bake for about 5 to 6 minutes. Keep in mind that the crust will brown even more after you add the toppings later on. I like mine well-done and extra crispy, but you may not; if that's the case, bake them a bit less at this stage. If you see any particularly large bubbles appear mid-baking, you can poke them with the tip of a knife and quickly but carefully use the side of the knife blade to gently deflate them. Although bubbles are great (and one of the features of a good pinsa), if they're especially big it will be harder to arrange your toppings.
- Remove from the oven and repeat with the remaining dough. Then add the toppings of your choice to each pinsa and, using the pizza peel, return as many as may fit on your pizza stone to the oven. Bake for about 4 more minutes, or as needed to heat the toppings and melt the cheese.
- Remove from the oven using the peel and cut with scissors or a serrated knife into pieces to serve.
Notes
- Topping suggestions:
- Marinara: Tomato sauce, sliced fresh garlic, fresh oregano.
- Margherita: Tomato sauce, fresh mozzarella, fresh basil, and extra-virgin olive oil.
- Cherry Tomatoes & Stracciatella: (I had this flavor combo in Rome!) tomato sauce, halved cherry tomatoes, stracciatella cheese, and fresh basil.
- Diavola: Tomato sauce, fresh mozzarella, spicy salami, and chili flakes.
- Capricciosa: Tomato sauce, fresh mozzarella, artichokes, ham, mushrooms, and olives.
- Quattro Formaggi: (bianca - white pizza without tomato sauce, or rossa - red pizza with tomato sauce) fresh mozzarella, gorgonzola, fontina, and Parmigiano-Reggiano.
- Mortazza: (toppings are not baked on the pizza) sliced mortadella, burrata or stracciatella cheese, and chopped pistachios or pistachio pesto drizzle.
- You can bake the dough to create pinsa bases in advance. When you're ready, add your toppings and finish baking in a super hot oven for a few minutes. Technically you can even eat pinsa without toppings like bread if you really wanted! It's very versatile.
- Store leftover pinsa in an airtight container or wrapped in aluminum foil in the refrigerator for up to 3 days. Reheat in a hot toaster oven or regular oven (about 400 to 425°F) on a foil-lined pan (for easy cleanup) until heated through.
Nutrition
*All nutritional information is based on third-party calculations and should be considered estimates. Actual nutritional content will vary with brands used, measuring methods, portion sizes and more.*

Comments
No Comments