
Panisse (French) or Panissa (Italian) is a popular street snack found in the South of France and Liguria, Italy. These "chickpea fries" are super easy to make and only require a couple ingredients other than water and salt.

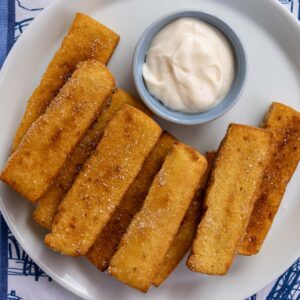
Panisses are essentially chickpea fries made from chickpea flour cooked together with water and a little olive oil into a thick porridge. The mixture is then transferred into a pan, cooled until solid, cut into batons, and fried until crisp!
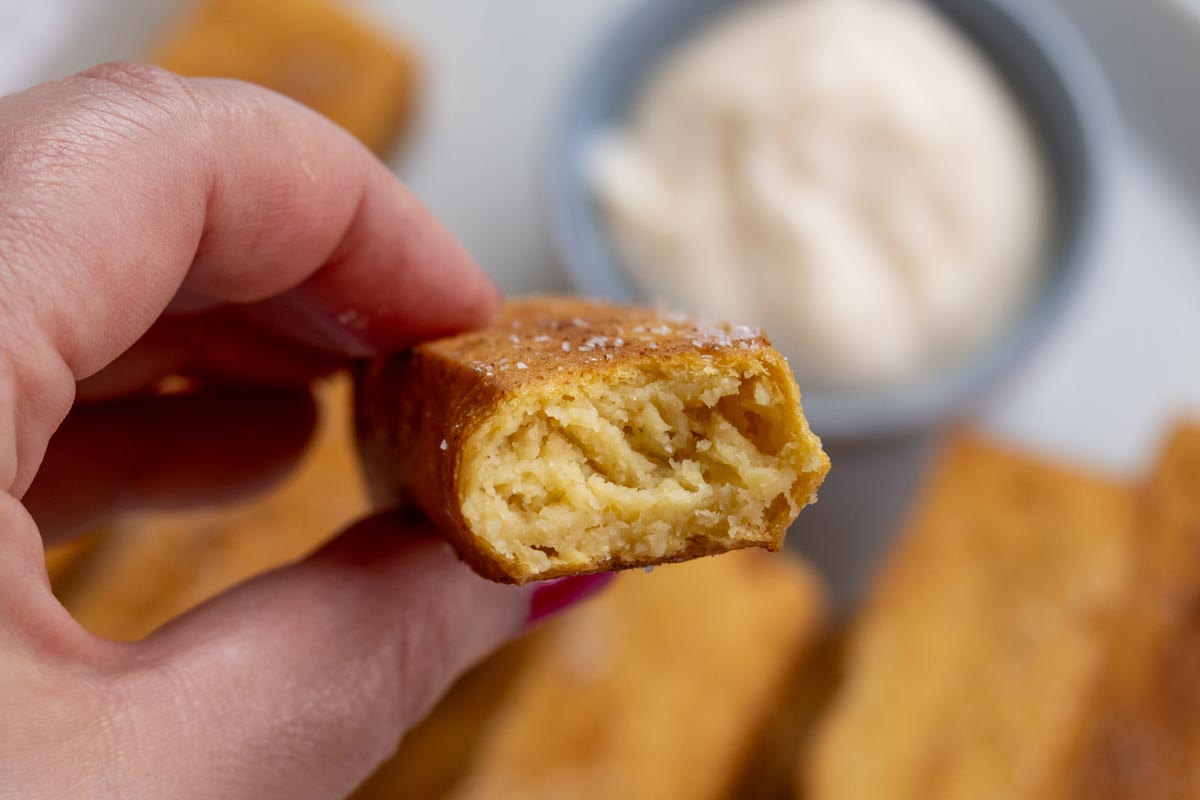
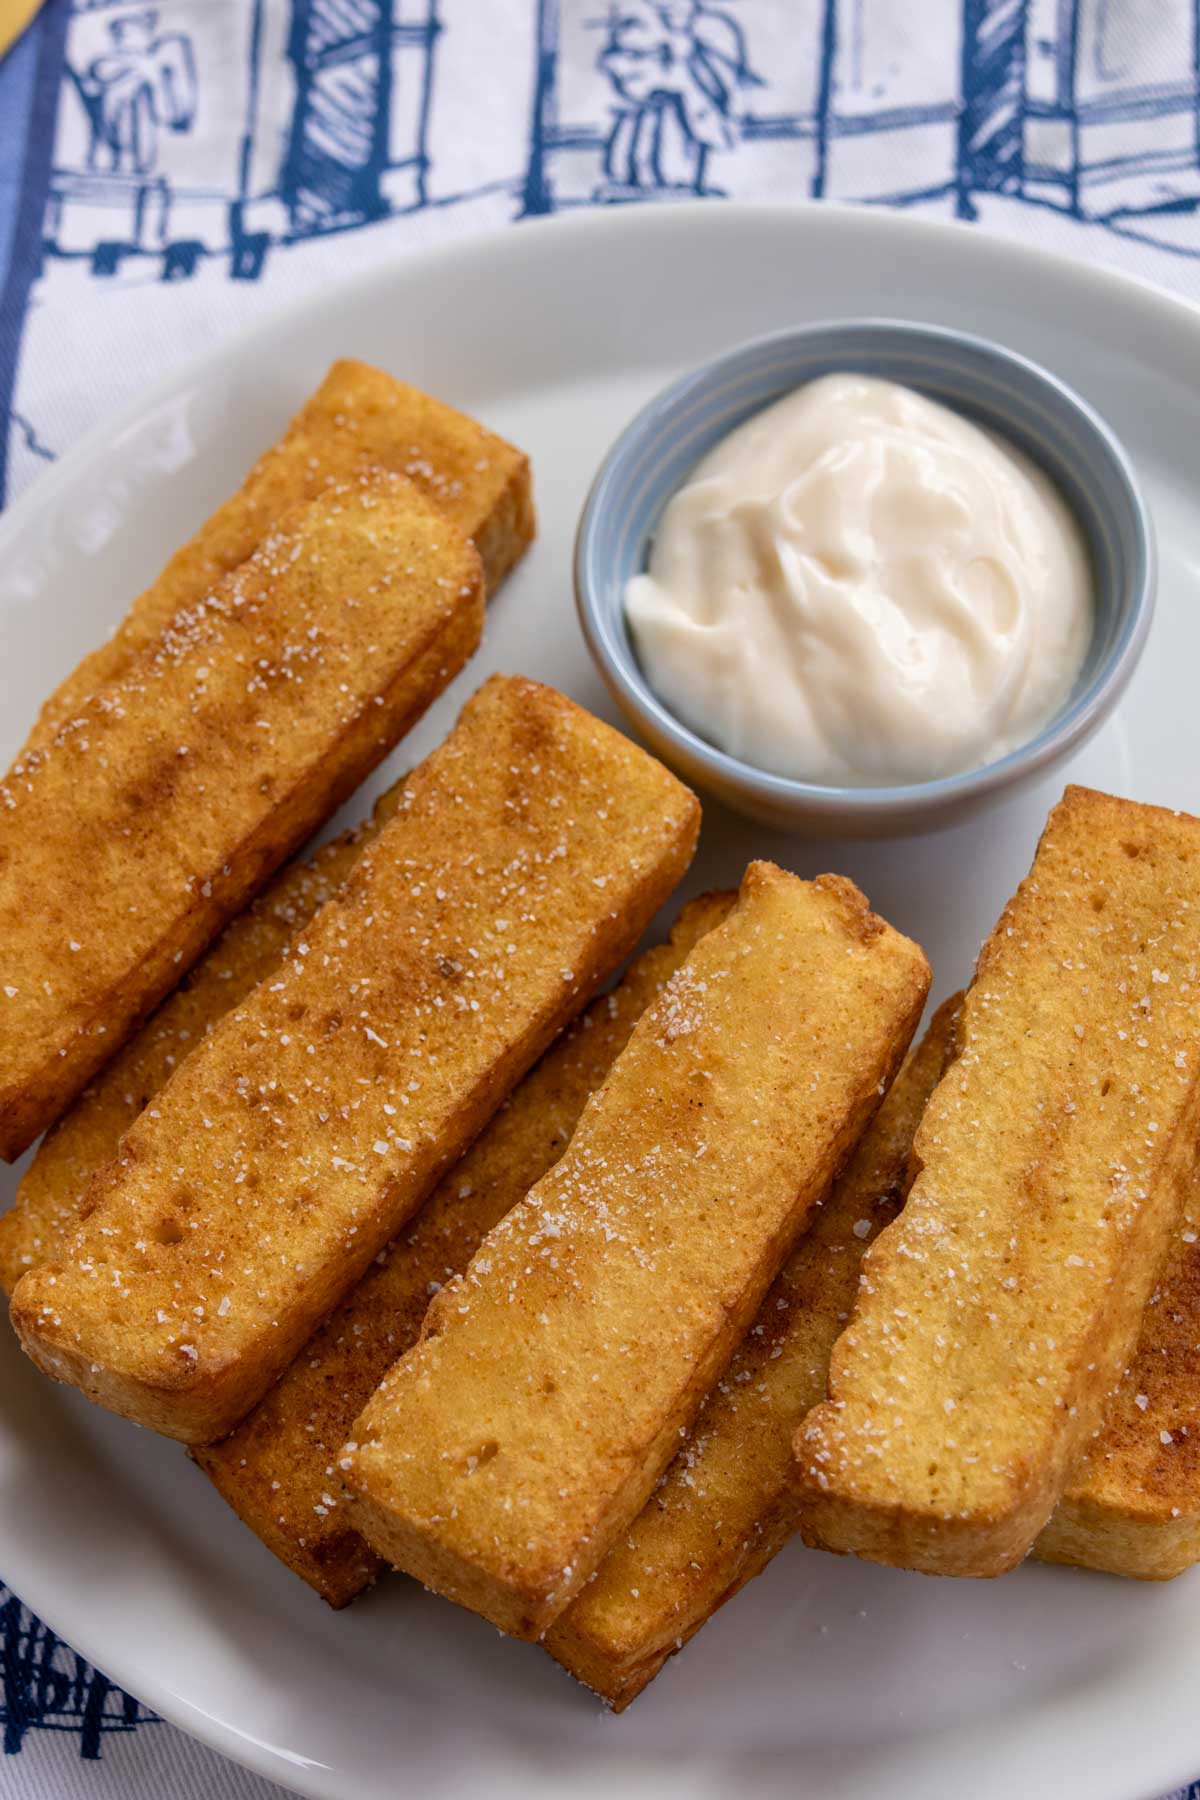
While the exteriors are crunchy, the inside of a panisse is thick and creamy. It's really such a delightful textural combination. While they are traditionally served plain, I definitely recommend throwing together some sauce for dipping. I share some suggestions below, but you can use almost anything you like with a mayonnaise or yogurt base (think creamy in general).
Panisse is also naturally gluten-free and protein-packed! It shares some characteristics (namely the use of chickpea flour) with its beloved cousin, socca, which is a thin and crispy chickpea flatbread also from the South of France.
Ingredient notes
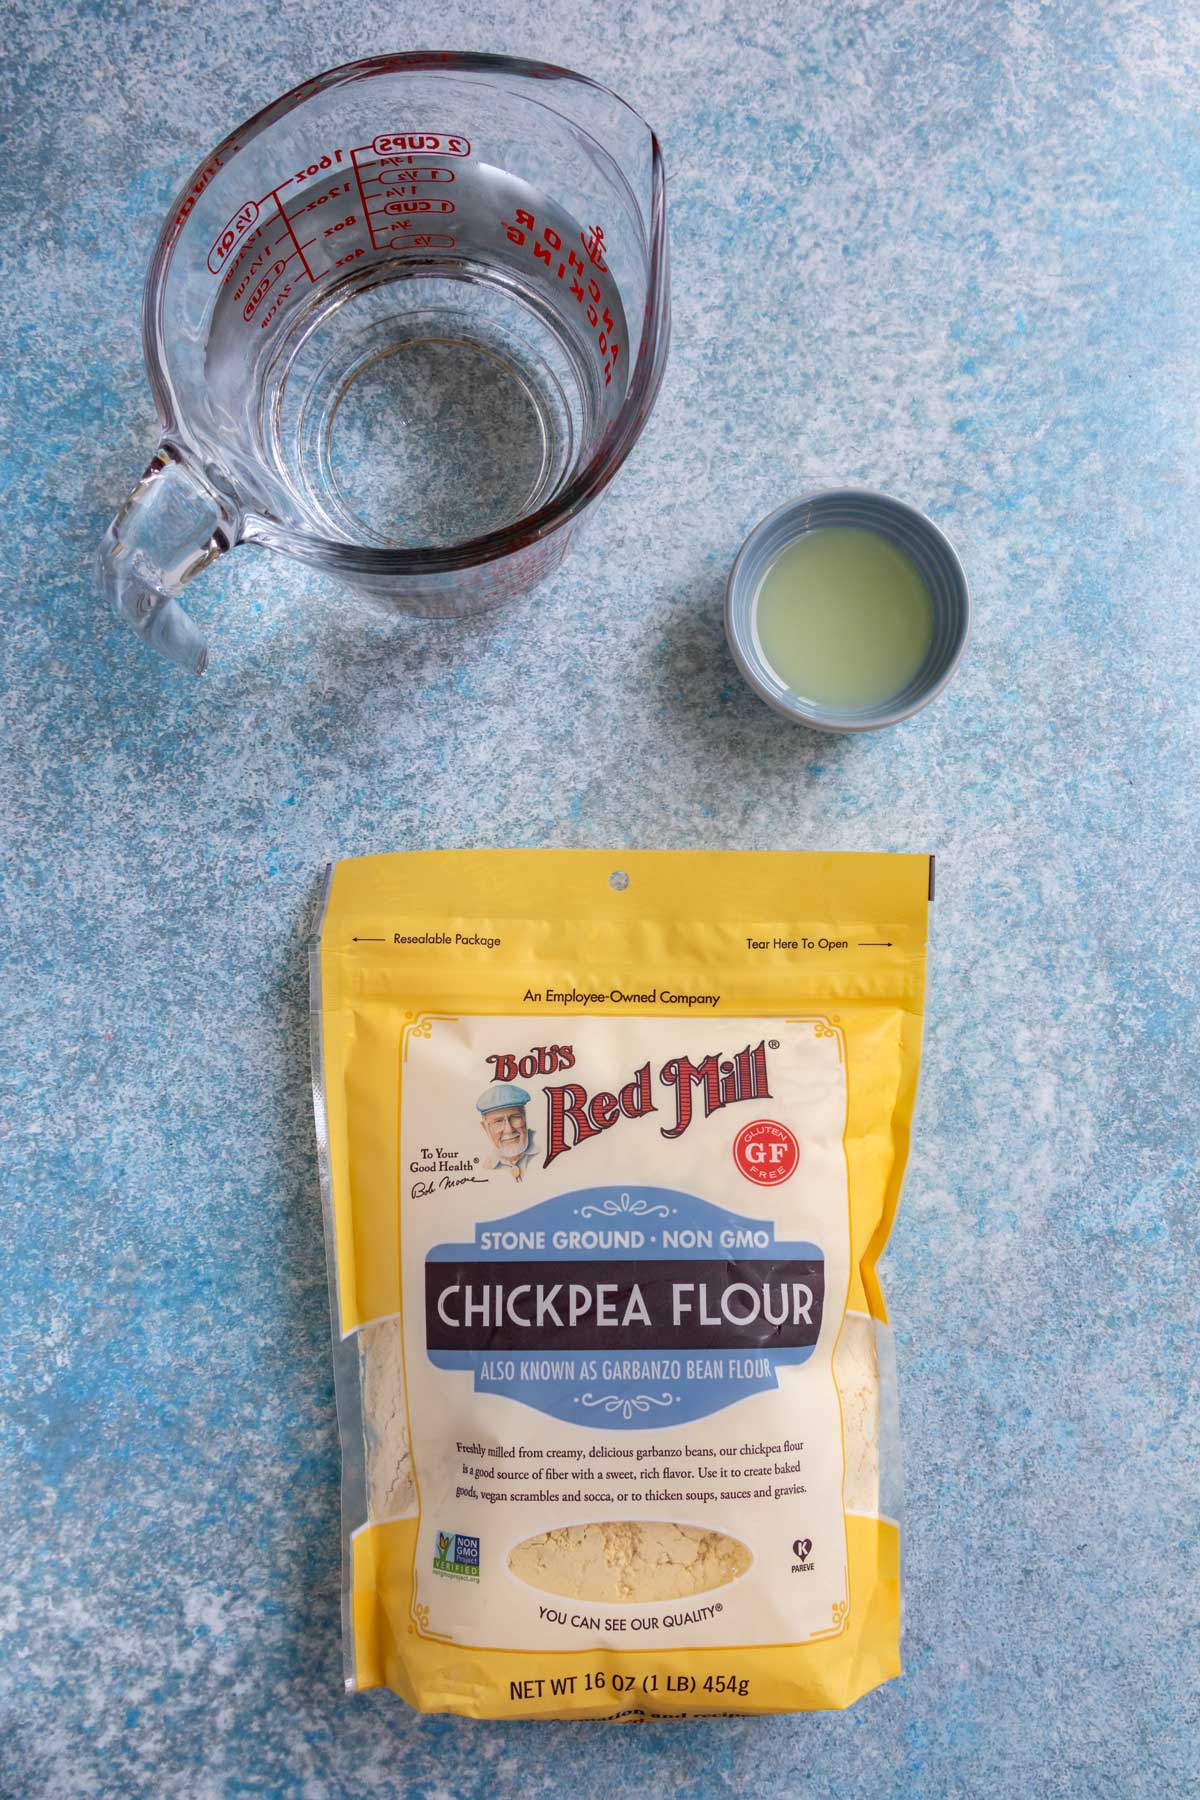
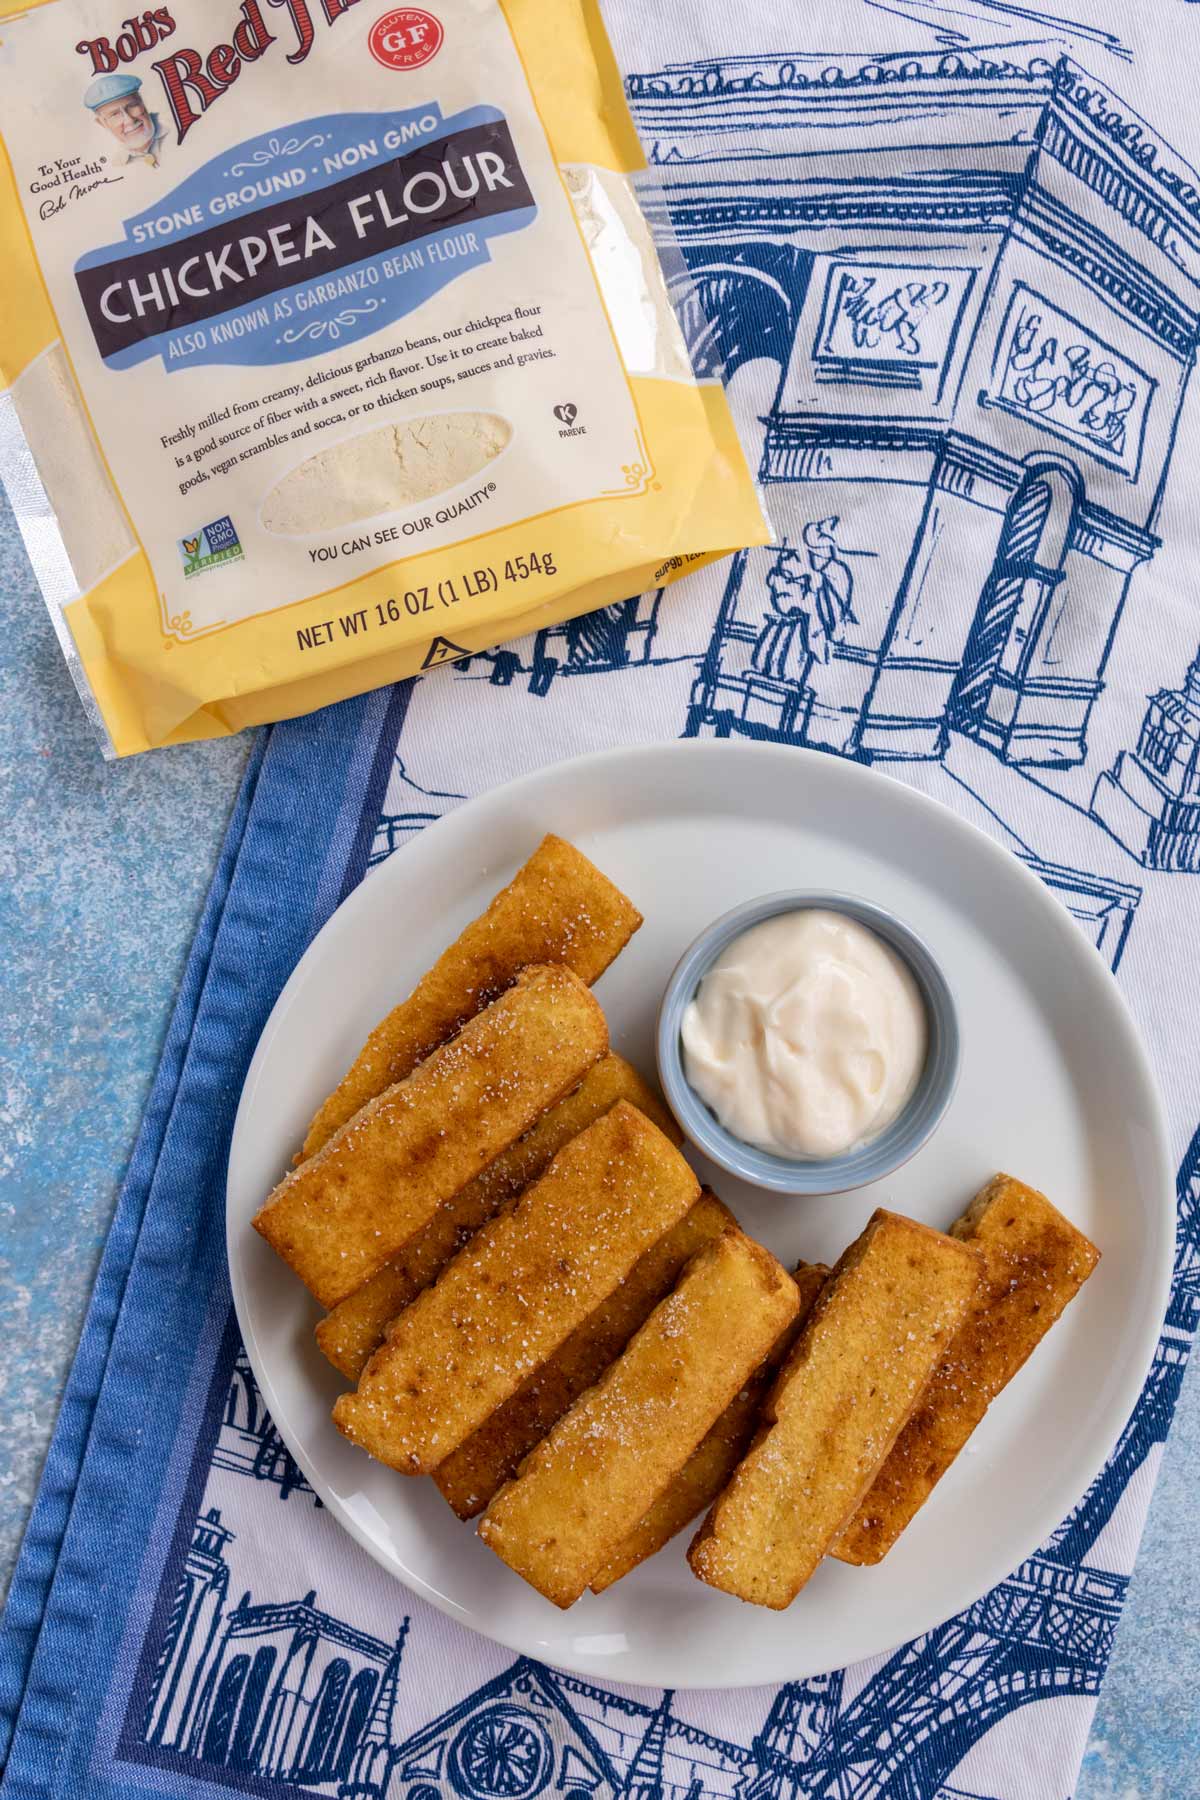
- Chickpea Flour: Chickpea flour is made from ground garbanzo beans. It's a common ingredient in Mediterranean cooking (namely in the South of France and parts of Italy) as well as on the Indian subcontinent. It's not that hard to find; Bob's Red Mill supplies it to many supermarkets. Store it in the fridge or freezer for the best shelf life.
- Water: Simple as it may be, this is a key ingredient to making panisses. Use filtered water.
- Olive Oil: Some recipes add a little olive oil, while others only combine the chickpea flour with water. A little olive oil won't hurt, especially if you end up deep-frying in an oil that isn't olive. It will impart a bit of olive oil flavor to the panisses.
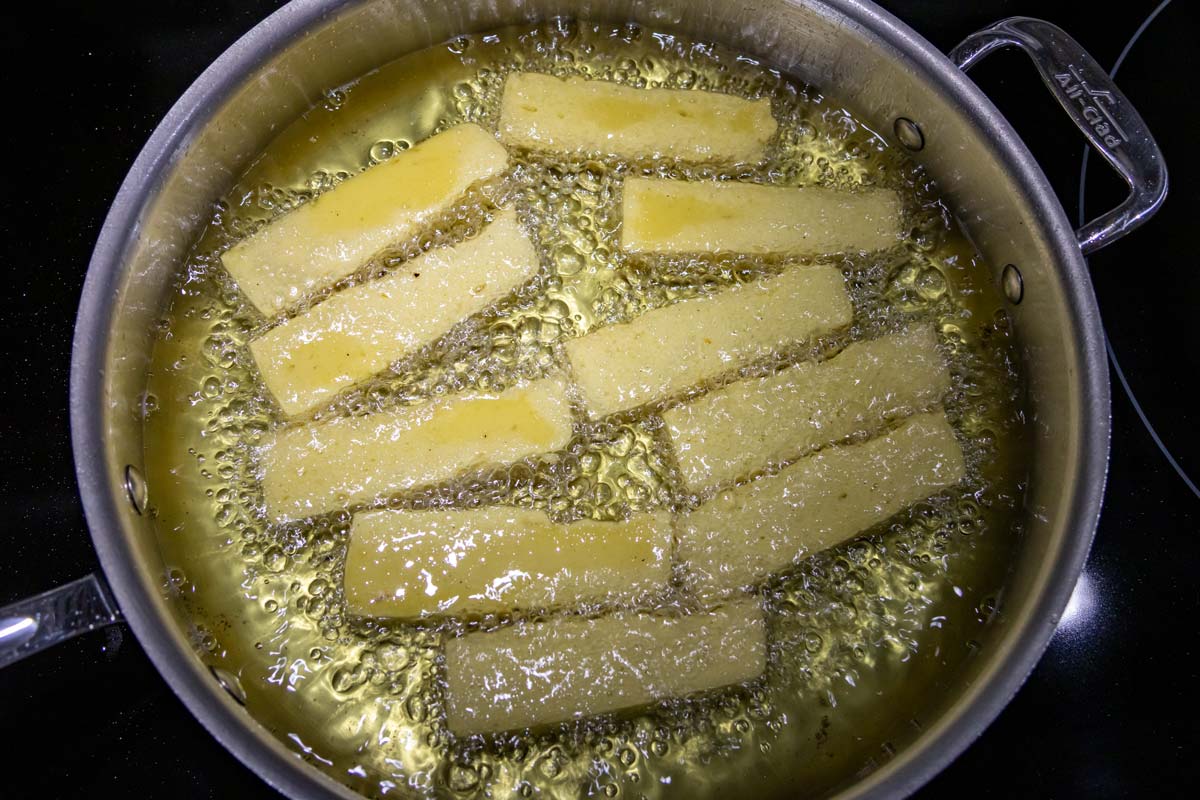
- Frying Oil: You have options. You can shallow-fry/pan-fry in olive oil (use regular, not extra-virgin) as this is traditional, but this can be kind of wasteful since you need a lot and may not reuse it. If I'm deep-frying, I prefer to use a more neutral oil (like vegetable, canola, or avocado). Then I cool and save it in jars to reuse for frying other items. Usually neutral fryer oil is fine to reuse three or four times before disposing of it. If you reuse fryer oil, always take note of the color and smell to make sure it isn't rancid or burnt. For this post, I shallow-fried my panisses in olive oil.
How to make it
Lightly oil the inside of an 8-or-9-inch square pan or baking dish or a couple of loaf pans. (You want roughly the same surface area). Alternatively, line them with plastic wrap or parchment paper for easy removal.
In a bowl, whisk or sift together the chickpea flour and the salt.
Bring water and olive oil to a simmer over high heat, then reduce the heat to medium. Slowly add the chickpea flour and salt mixture while whisking vigorously to avoid creating lumps. This requires a lot of elbow grease! If you get lumps, briefly take the pot off the heat and use an immersion blender to smooth it out.
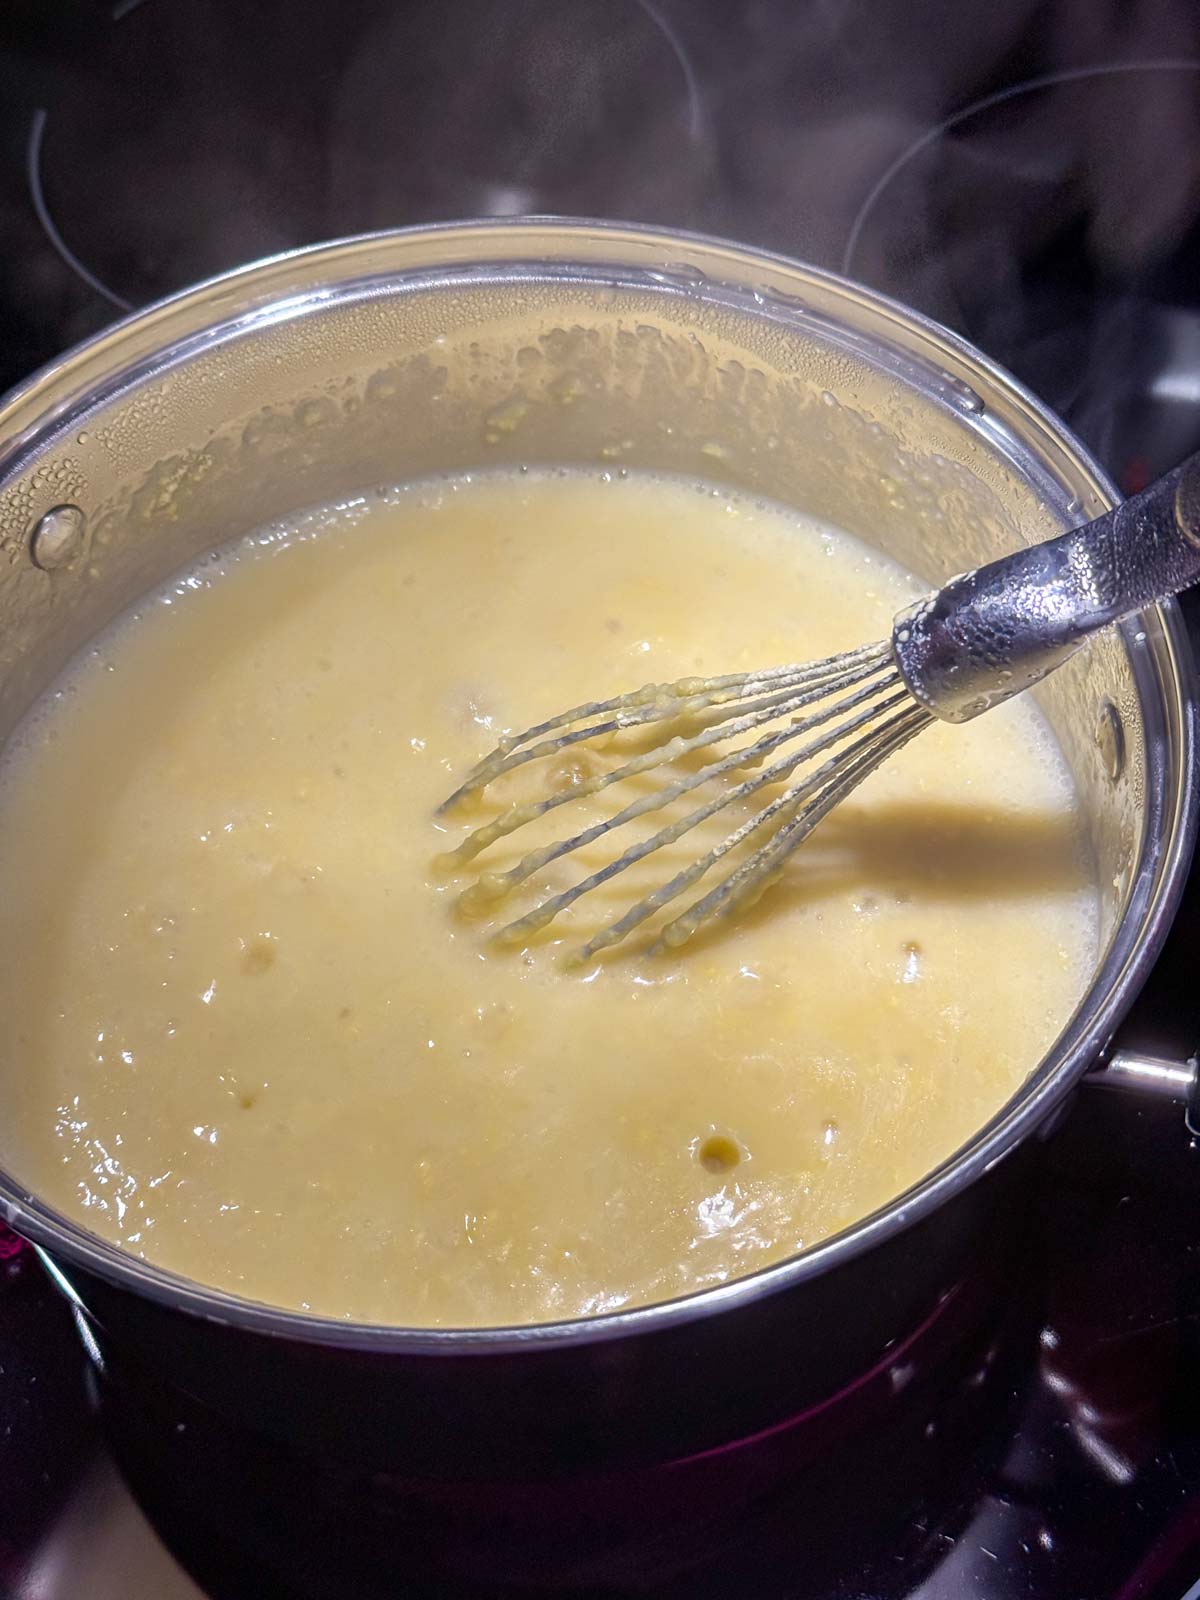
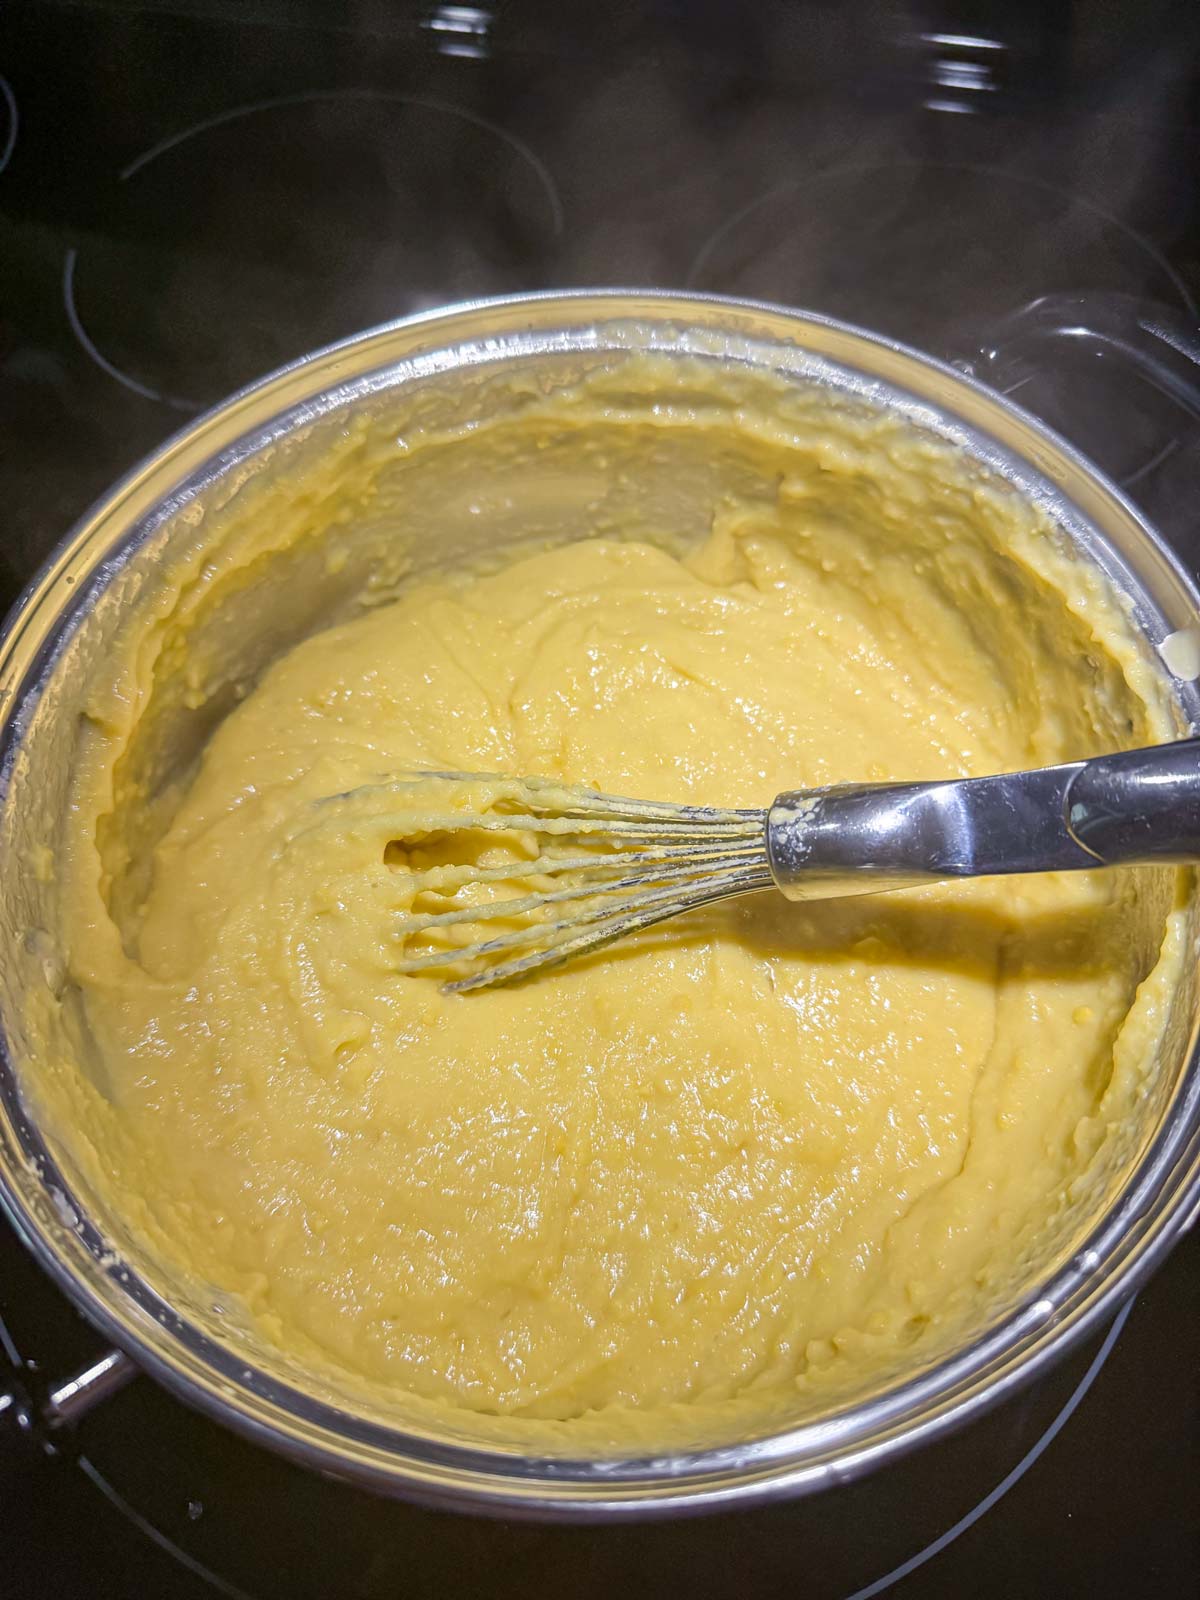
Once you add all the chickpea flour, continue to stir over medium heat until the mixture thickens, pulls away from the sides of the pan and doesn't stick to the bottom, about 10 to 15 minutes. It should be quite thick.
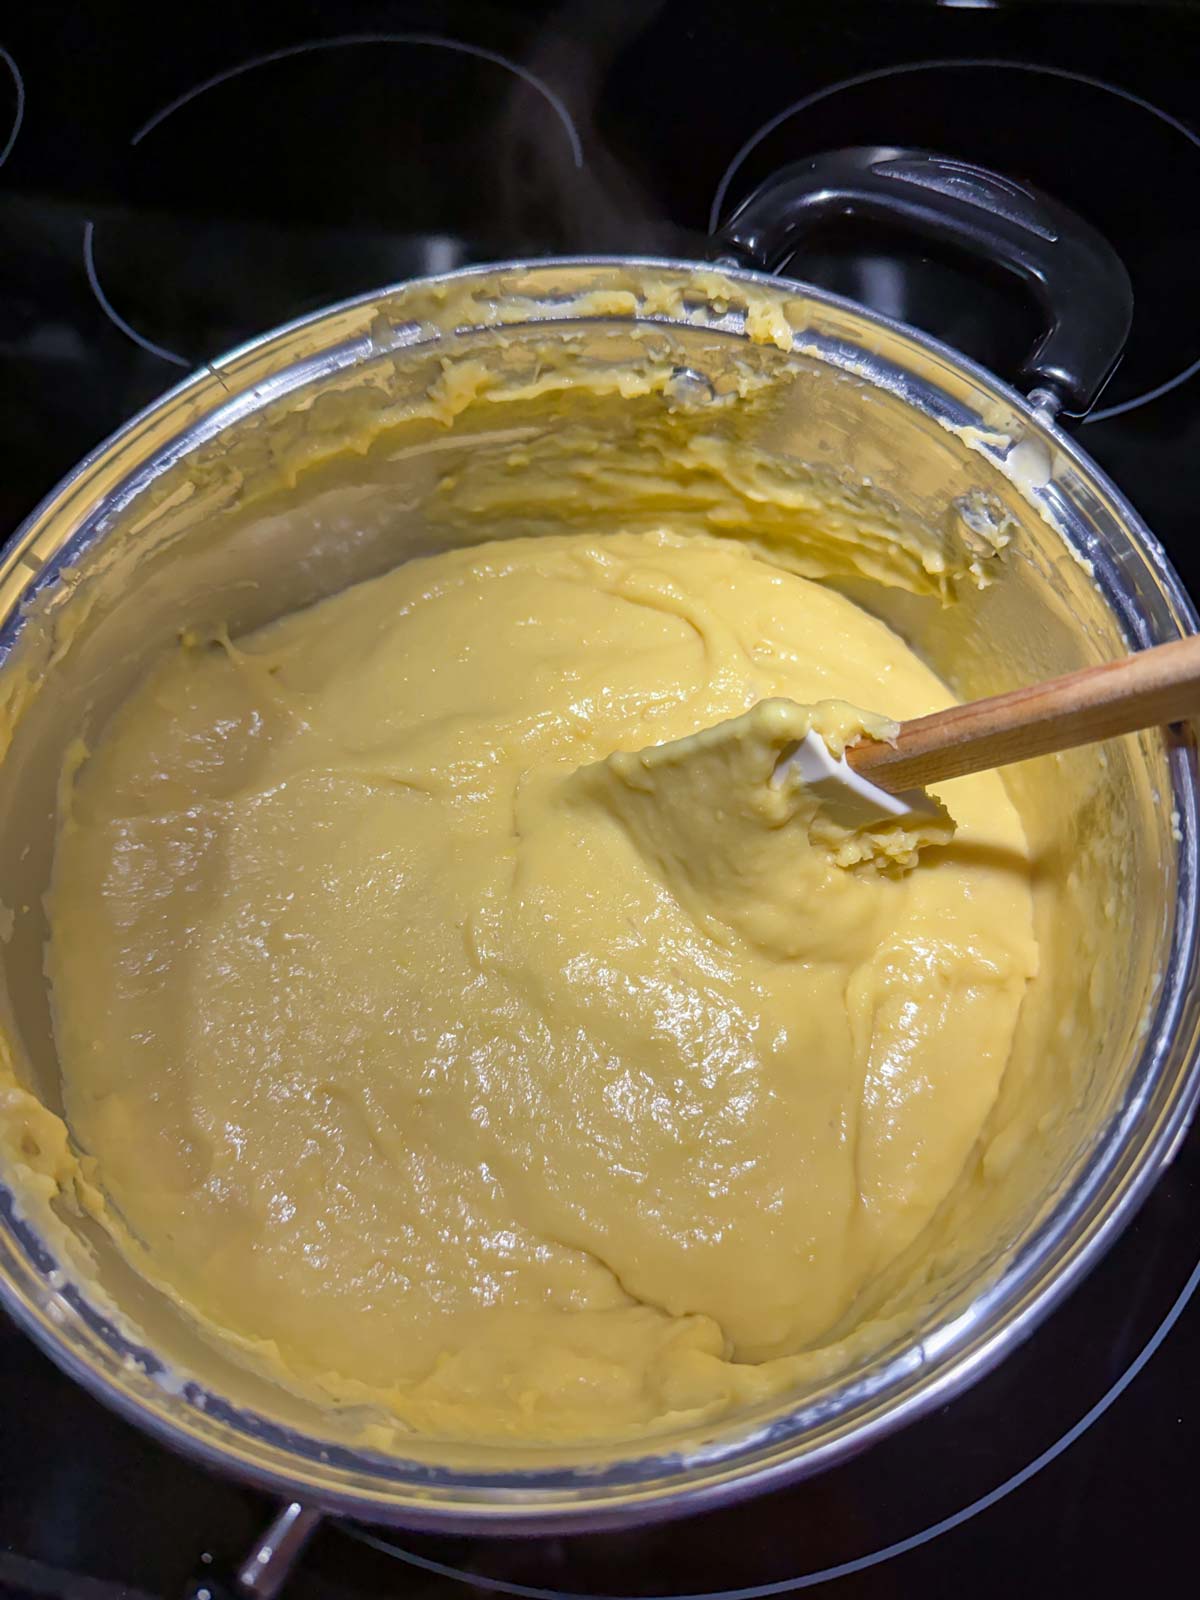

Remove from the heat. Then immediately scrape the mixture into the prepared pan, smoothing out the top as best as you can.
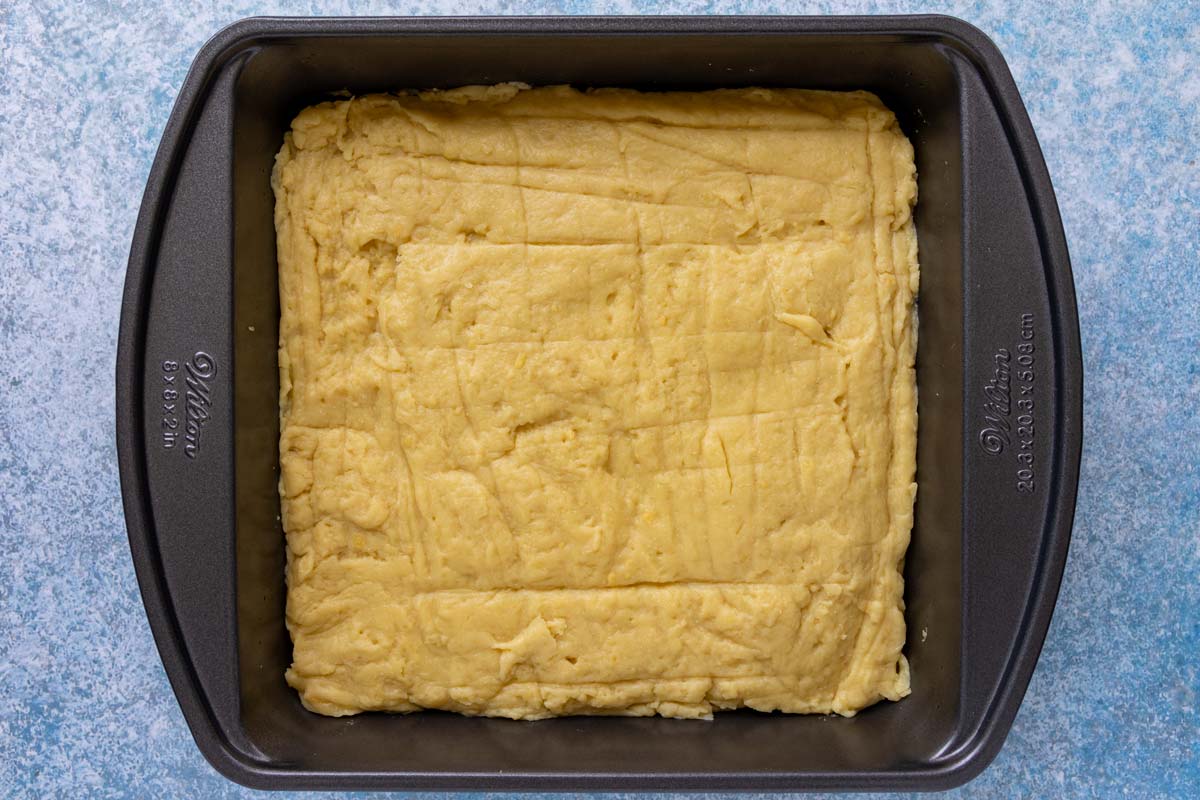
Cool completely at room temperature. If time allows, cover and refrigerate for another 1 to 2 hours or up to overnight.
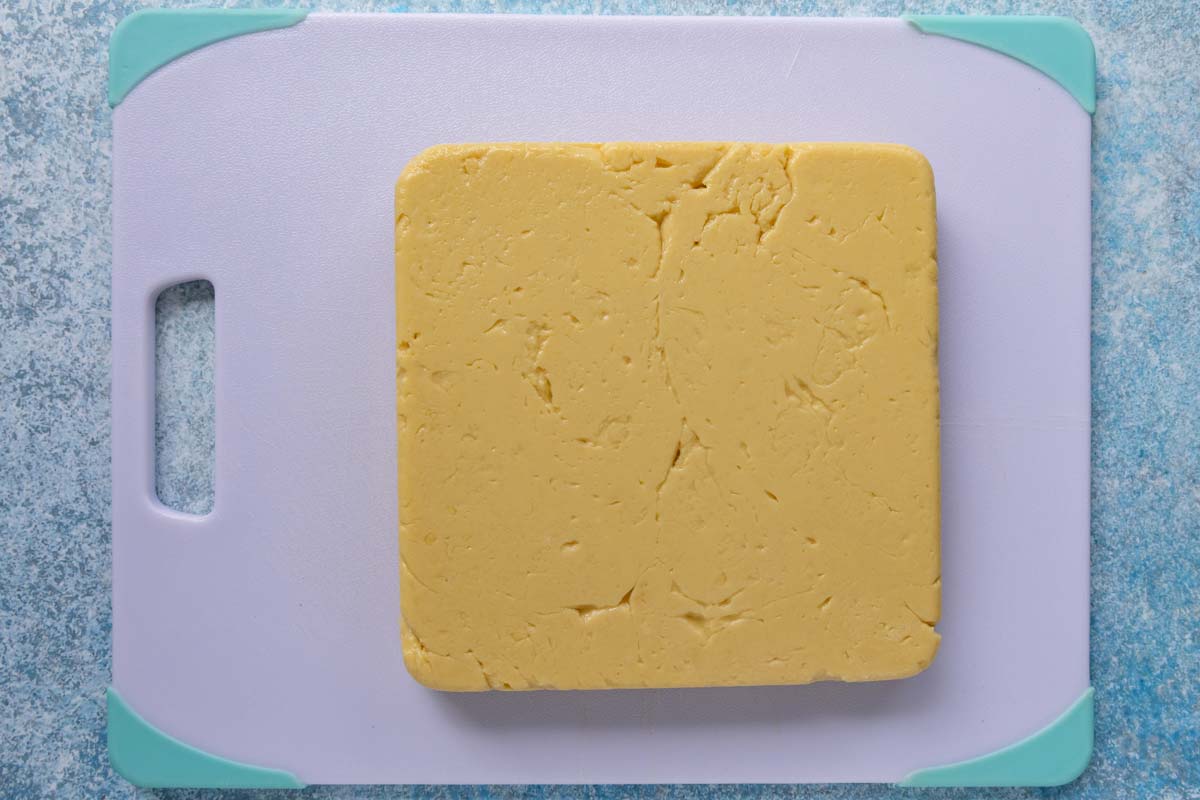
Flip the pan over onto a board to unmold the panisse mixture.
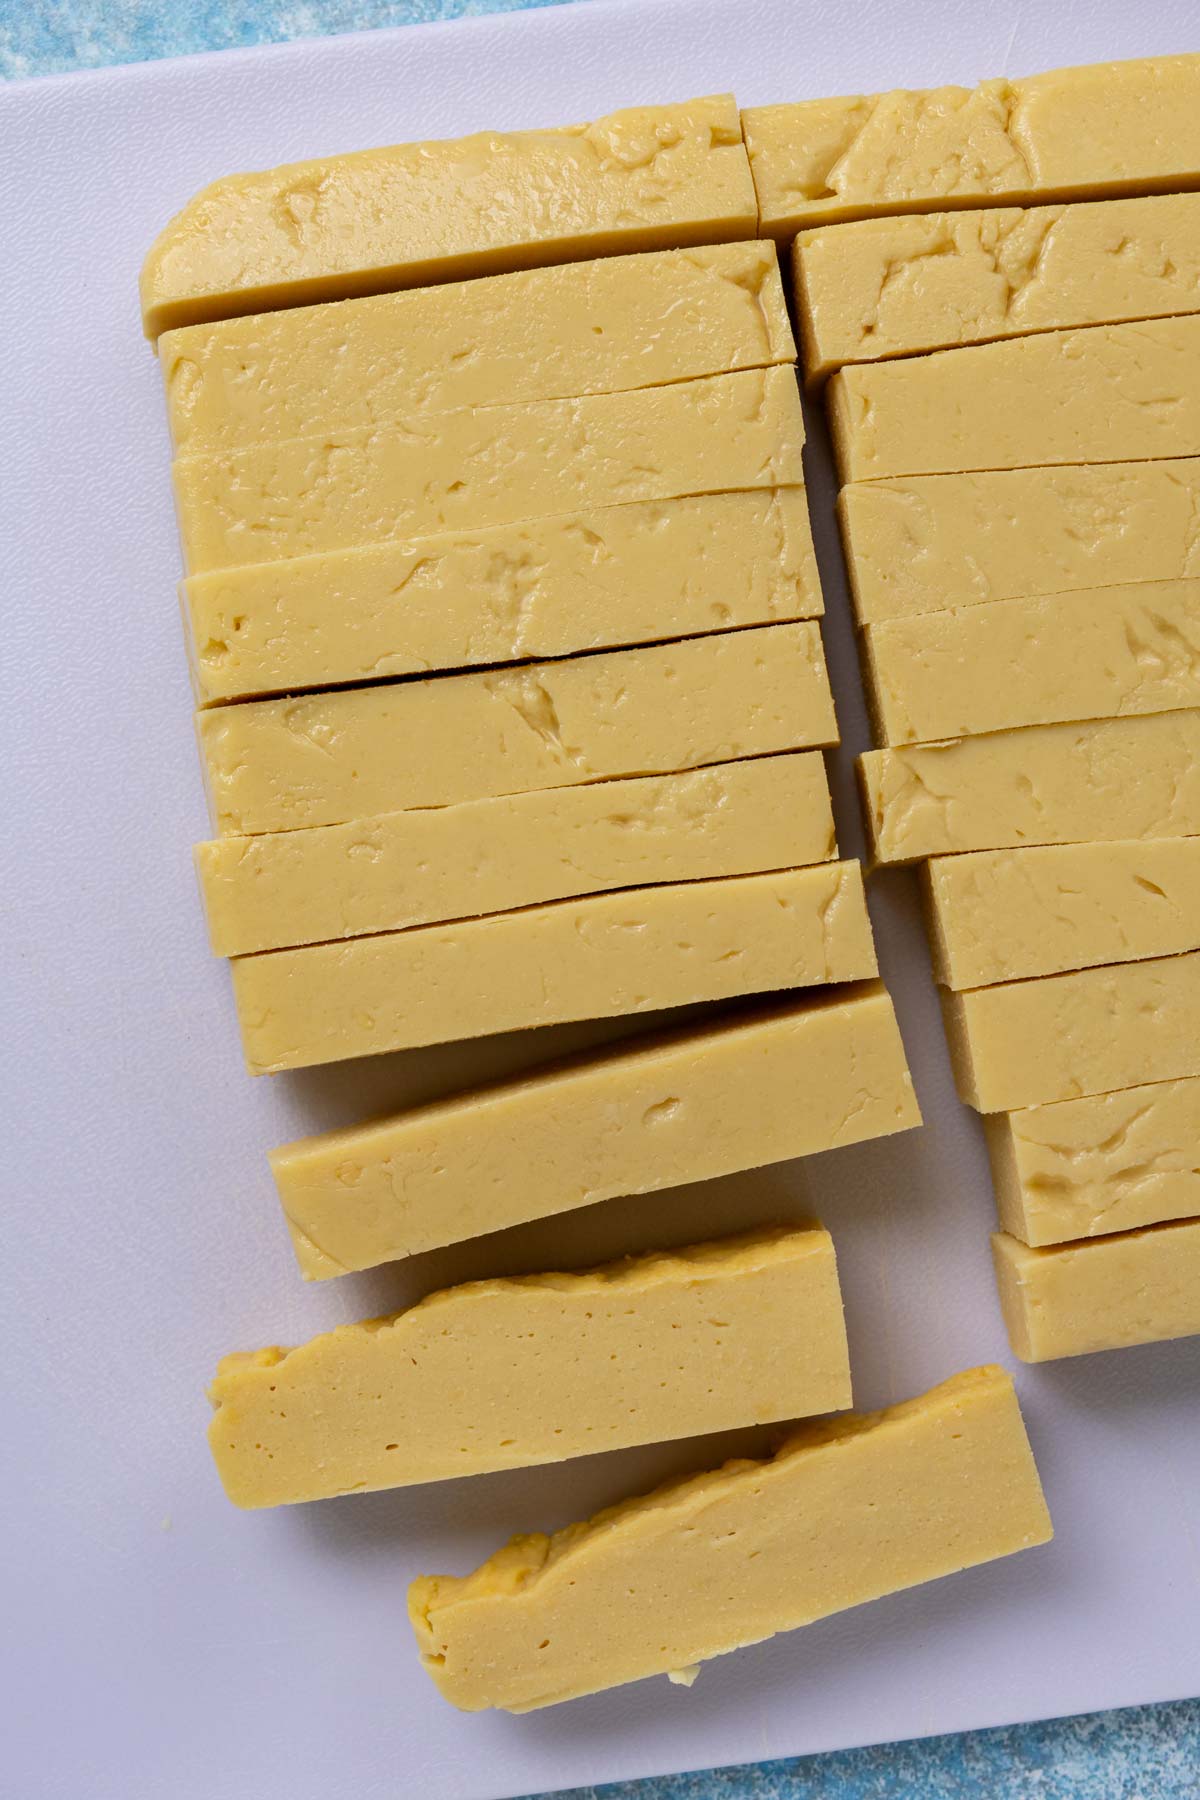
Cut into thick batons, about ¾-inch-wide and 3-to-4-inches long. The length will depend on the pan you used and the best way to divide it up.
At this point you have a few options for frying them. Make sure to fry in batches!
- Shallow fry (pictured below) in about ¼-to-½-inch depth of olive oil (it will rise too once you add panisses to the oil) in a heavy skillet for about 2 to 3 minutes per side or until dark golden brown. It's best to pan-fry them with the cut sides facing up and down as those are the smoothest. The first batch may take longer to cook than subsequent batches.
- Deep-fry in neutral oil (such as vegetable, canola, or avocado) heated to 350°F for about 5 minutes or until dark golden brown.
- Air-fry by brushing the panisses on both cut sides sides with olive oil (or gently roll them in a small dish of olive oil to coat) and air-fry at 400°F for about 10 to 15 minutes (flipping halfway through) or until dark golden brown (times may vary based on your air-fryer; note the results won't be as crispy as traditionally fried panisses).

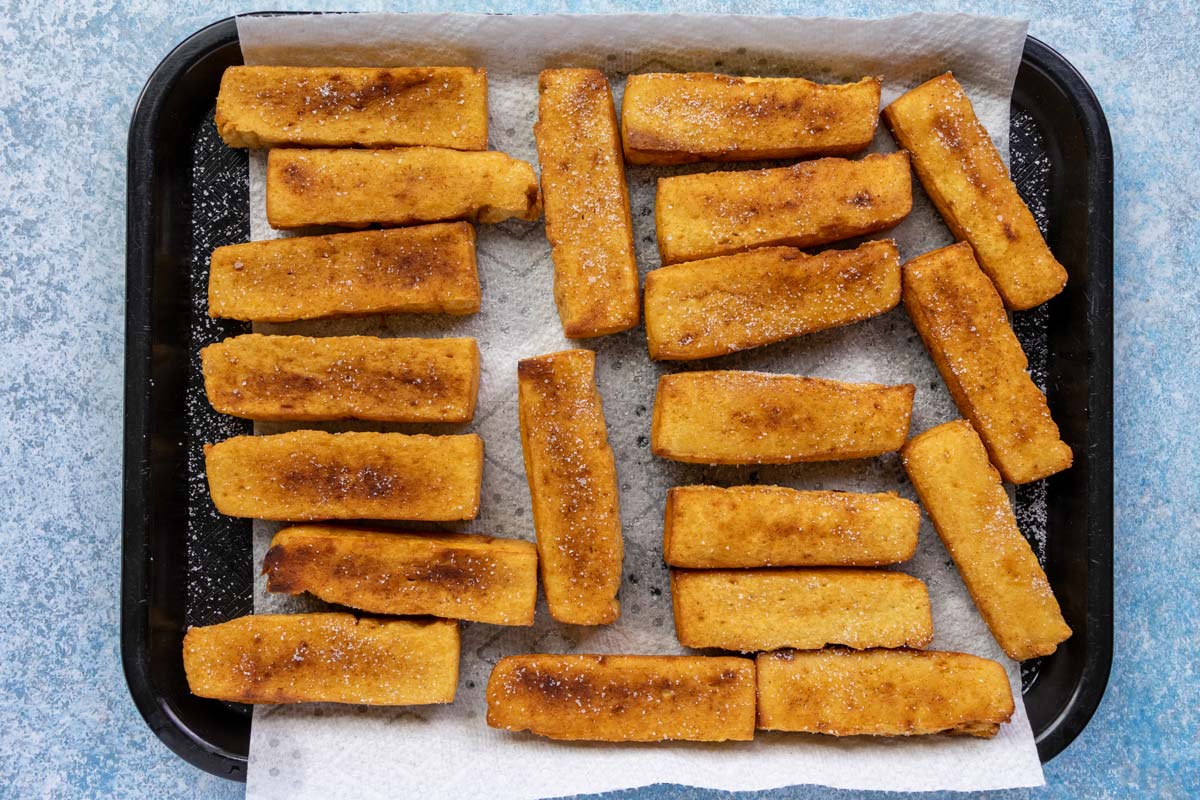
Remove panisses from oil and drain on a paper towel-lined plate or tray or remove from the air-fryer. Sprinkle salt over the top and repeat with the remaining batches.
Serve immediately. Panisses are traditionally served plain, but you can also try any of the following serving suggestions: sprinkled with sumac, dipped in aioli, curry mayo/aioli, harissa mayo/aioli, or sriracha mayo/aioli.
Please scroll to the bottom of the post for the full recipe (in a printable recipe card) including ingredient amounts and detailed instructions.
Expert tips
Serve panisses immediately, however you can keep them warm in a 200°F oven while you finish cooking the remaining batches, or until you're ready to enjoy them.
While panisses are best the day they are made, you can reheat leftovers. My preference is either reheating in an air-fryer or in a toaster oven set to a high temperature like 425°F to help crisp them back up.
You can freeze cooked panisses in a single layer and then transfer to a freezer bag or another freezer safe container for about a month. Reheat directly from frozen in an air-fryer or toaster oven as recommended above.
Although you could use a round pan or baking dish to cool and solidify your panisse batter (many people traditionally do!), you won't yield the same perfect batons once you cut them since you're contending with rounded edges. It is my personal preference to aim for the more uniform baton cuts by using a vessel with squared edges.
Other recipes you may like
- Aloo Chaat / Aloo Chana Chaat (Potato Chickpea Chaat)
- Confit Byaldi (Thomas Keller's Ratatouille)
- Kibbeling (Dutch Fried Fish Bites)
- Bitterballen (Dutch Fried Meatballs)
- Karipap Pusing (Malaysian Spiral Curry Puffs)
Tried this recipe? Please leave a star ⭐️⭐️⭐️⭐️⭐️ rating in the recipe card below and/or a review in the comments section further down the page. You can also follow me on social media on Facebook, Instagram, and Pinterest!
Panisse / Panissa (Chickpea Fries)
Ingredients
- 250 grams (2 ¼ cups) chickpea flour or garbanzo flour
- 1 teaspoon kosher salt
- 4 cups water
- 1 tablespoon olive oil plus more for oiling pan
- Oil for frying use olive oil for shallow frying in a pan or neutral oil (such as vegetable, canola, avocado) for deep-frying
Instructions
- Lightly oil the inside of an 8-or-9-inch square pan or baking dish or a couple of loaf pans (you want roughly the same surface area). Alternatively, you could line them with plastic wrap or parchment paper to ensure easy removal.
- In a bowl, whisk or sift together the chickpea flour and the salt to remove any lumps.
- In a large saucepan or medium pot, bring the water and olive oil to a simmer over high heat. Reduce the heat to medium. Slowly add the chickpea flour and salt mixture while whisking vigorously to avoid creating lumps. This requires a lot of elbow grease! If you end up with lumps, briefly take the pot off the heat and use an immersion blender to smooth out the mixture.
- Once all the chickpea flour is added, continue to whisk or stir with a wooden spoon or spatula over medium heat until the mixture thickens, pulls away from the sides of the pan and doesn't stick to the bottom, about 10 to 15 minutes. It should be quite thick like mashed potatoes.
- Remove from the heat and immediately scrape the mixture into the prepared pan, smoothing out the top as best as you can (try using an offset spatula or the flat edge of a bowl scraper to flatten and smooth).
- Cool completely at room temperature. If you have time, ideally cover and refrigerate for another 1 to 2 hours or up to overnight, but it's also fine to proceed at this stage if you don't.
- Flip the pan over onto a board to unmold the panisse mixture. Cut into thick batons, about ¾-inch-wide and 3-to-4-inches long (the length will depend on the pan you used and the best way to divide it up). If the knife sticks, wet it between slicing.
- At this point you have a few options for frying them. Make sure to fry in batches! 1) Shallow fry in about ¼-to-½-inch depth of olive oil (it will rise too once you add panisses to the oil) in a heavy skillet for about 2 to 3 minutes per side or until dark golden brown. It's best to pan-fry them with the cut sides facing up and down as those are the smoothest. The first batch may take longer to cook than subsequent batches.2) Deep-fry in neutral oil (such as vegetable, canola, or avocado) heated to 350°F for about 5 minutes or until dark golden brown.3) Air-fry by brushing the panisses on both cut sides sides with olive oil (or gently roll them in a small dish of olive oil to coat) and air-fry at 400°F for about 10 to 15 minutes (flipping halfway through) or until dark golden brown (times may vary based on your air-fryer; note the results won't be as crispy as traditionally fried panisses).
- Remove panisses from oil and drain on a paper towel-lined plate or tray or remove from the air-fryer. Sprinkle salt over the top and repeat with the remaining batches.
- Serve immediately. Panisses are traditionally served plain, but you can also try any of the following serving suggestions: sprinkled with sumac, dipped in aioli, curry mayo/aioli, harissa mayo/aioli, or sriracha mayo/aioli.
Notes
- Chickpea flour is made from ground garbanzo beans. It's a common ingredient in Mediterranean cooking (namely in the South of France and parts of Italy) as well as on the Indian subcontinent. It's not that hard to find; Bob's Red Mill supplies it to many supermarkets. Store it in the fridge or freezer for the best shelf life.
- Serve panisses immediately, however you can keep them warm in a 200°F oven while you finish cooking the remaining batches, or until you're ready to enjoy them.
- While panisses are best the day they are made, you can reheat leftovers. My preference is either reheating in an air-fryer or in a toaster oven set to a high temperature like 425°F to help crisp them back up.
- You can freeze cooked panisses in a single layer and then transfer to a freezer bag or another freezer safe container for about a month. Reheat directly from frozen in an air-fryer or toaster oven as recommended above.
Nutrition
*All nutritional information is based on third-party calculations and should be considered estimates. Actual nutritional content will vary with brands used, measuring methods, portion sizes and more.*


Comments
No Comments